Replacement
Replacing the toner cartridge and the drum unit!
■When the display shows the following message, replace the toner cartridge.
TONER LOW
or
TONER EMPTY
■We recommend you replace the drum unit every third time you replace the toner cartridge. To check the drum life and quality, please print the printer test list (p. 75).
Model No.
Caution:
●The drum unit contains a photosensitive drum. Exposing it to light may damage the drum.
Once you have opened the protection bag:
●Do not unplug the fax machine to prevent loss of fax documents in memory.
●Do not pour any toner into the toner cartridge.
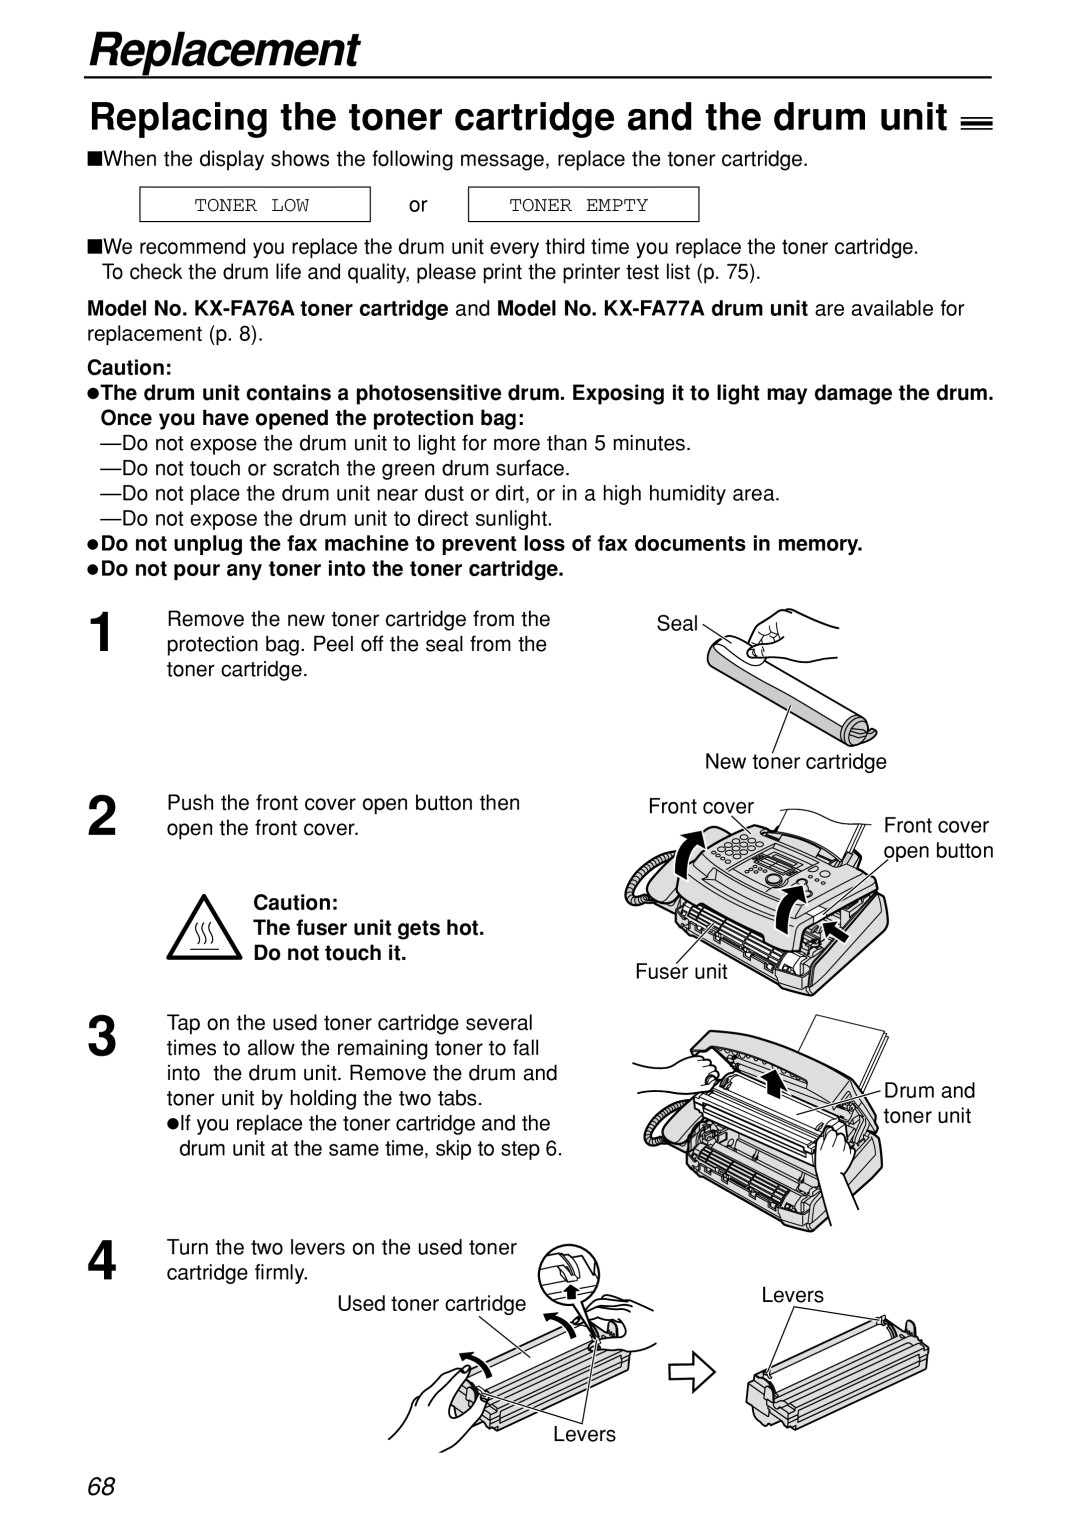
1 | Remove the new toner cartridge from the |
protection bag. Peel off the seal from the | |
| toner cartridge. |
2 | Push the front cover open button then |
open the front cover. | |
| Caution: |
| The fuser unit gets hot. |
| Do not touch it. |
3 | Tap on the used toner cartridge several |
times to allow the remaining toner to fall | |
| into the drum unit. Remove the drum and |
| toner unit by holding the two tabs. |
| If you replace the toner cartridge and the |
| ● |
| drum unit at the same time, skip to step 6. |
4 | Turn the two levers on the used toner |
cartridge firmly. |
Used toner cartridge
Seal ![]()
New toner cartridge
Front cover
Front cover open button
Fuser unit
Drum and toner unit
Levers
Levers
68