To configure optional settings on the remote agent
1. From the remote agent application main screen, click the Setup button | if the Settings screen is not open. The Settings screen |
appears and the Remote Agent tab is displayed. |
|
2.Change any of the following settings:
•Receive Event: Check this box if you intend to search for recorded video based on events that are stored in a log file. By default all events are selected. Each time the DX4000 registers one of these events, an entry is stored in a log file on the DX4000 hard disk.
•OSD Display: Check this box if you want to change the information that is displayed in each video pane. You can display the camera name, current date, and image resolution.
•Screen Switching Interval (Sec): Select the number of seconds that each channel should be displayed before switching to the next channel. This setting is used when the Screen Mode is set to Sequencing.
•Live Audio Monitoring Channel: Select the audio channel that you will use to listen to audio associated with a camera.
•Saving Directory: Select the directory where you want to store video and snapshot files. By default this is the installation directory for the remote agent application. To change the directory, click the Browse button located to the right of the field.
3.Click the Apply button to save the changes and continue to other settings under the DVR System tab. If you are finished updating settings, click the OK button to close the screen.
CONFIGURING THE DX4000 FROM THE REMOTE AGENT
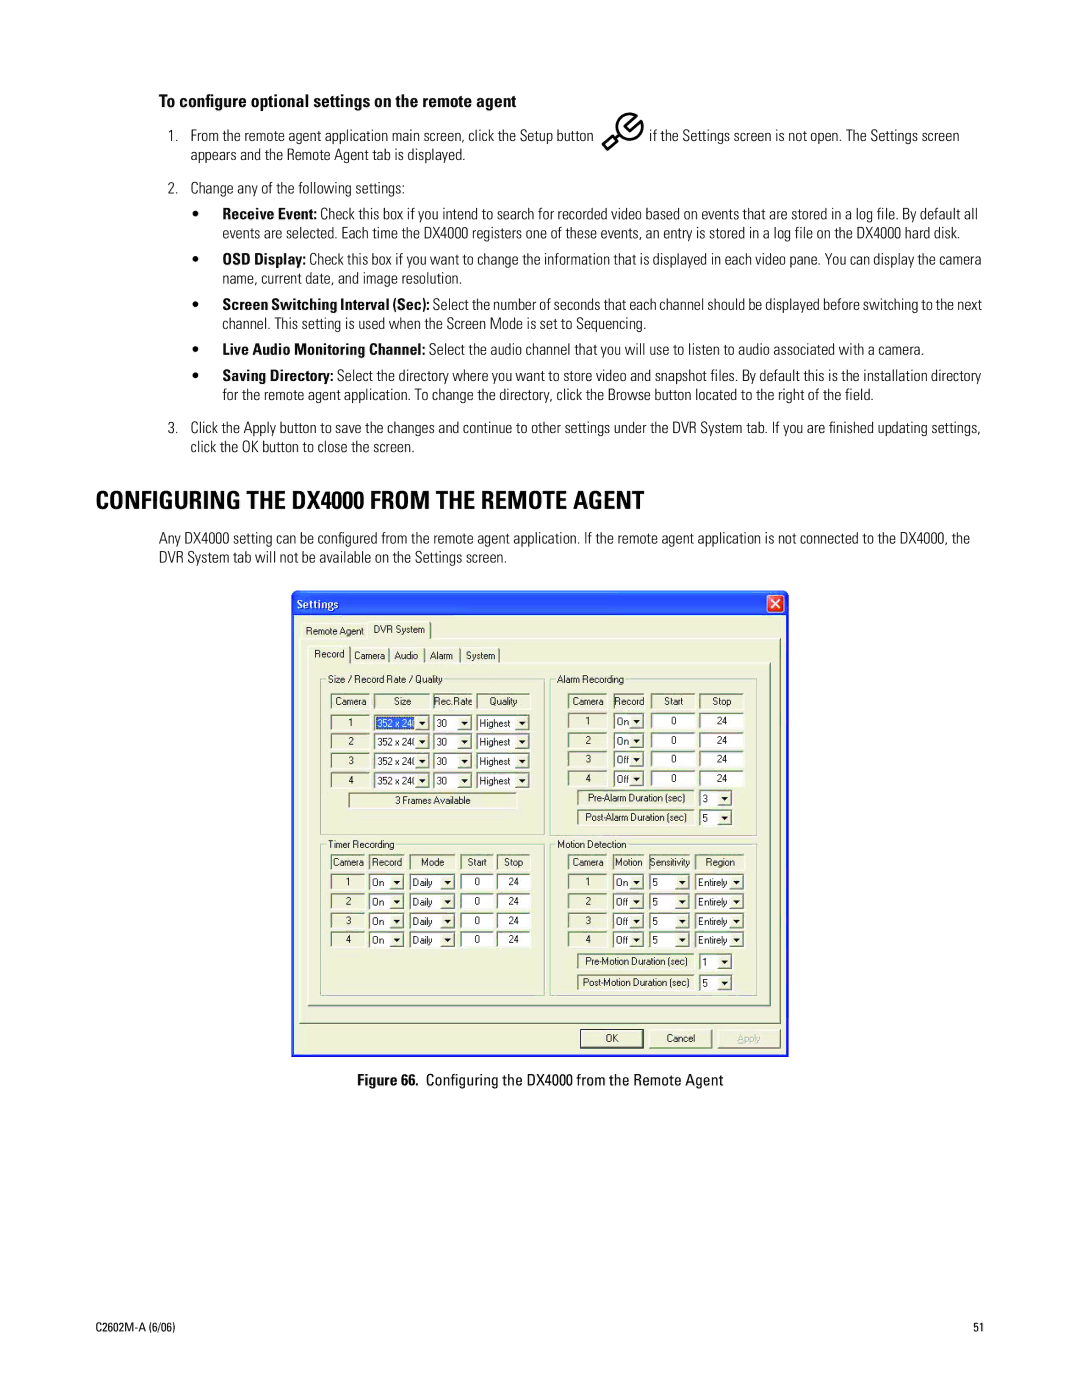
Any DX4000 setting can be configured from the remote agent application. If the remote agent application is not connected to the DX4000, the DVR System tab will not be available on the Settings screen.
Figure 66. Configuring the DX4000 from the Remote Agent
| 51 |