CONFIGURING THE REMOTE AGENT
Before you can view video recorded on the DX4000, you must set up a network connection for the DX4000. You may also configure optional settings for the remote agent. These settings are described below.
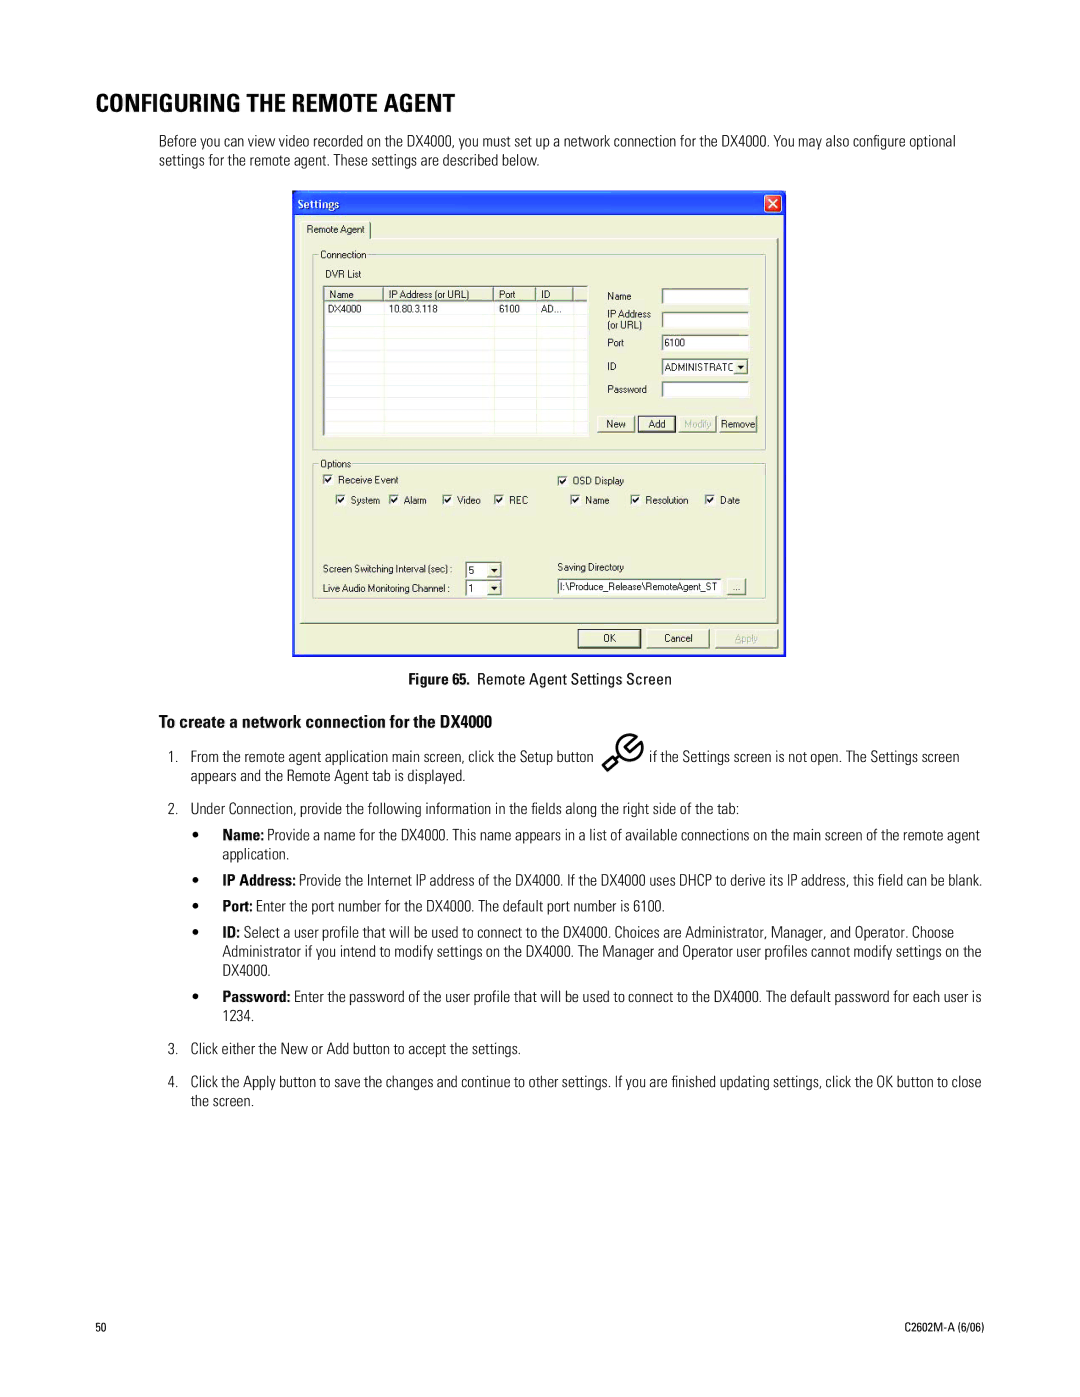
Figure 65. Remote Agent Settings Screen
To create a network connection for the DX4000
1. From the remote agent application main screen, click the Setup button | if the Settings screen is not open. The Settings screen |
appears and the Remote Agent tab is displayed. |
|
2.Under Connection, provide the following information in the fields along the right side of the tab:
•Name: Provide a name for the DX4000. This name appears in a list of available connections on the main screen of the remote agent application.
•IP Address: Provide the Internet IP address of the DX4000. If the DX4000 uses DHCP to derive its IP address, this field can be blank.
•Port: Enter the port number for the DX4000. The default port number is 6100.
•ID: Select a user profile that will be used to connect to the DX4000. Choices are Administrator, Manager, and Operator. Choose Administrator if you intend to modify settings on the DX4000. The Manager and Operator user profiles cannot modify settings on the DX4000.
•Password: Enter the password of the user profile that will be used to connect to the DX4000. The default password for each user is 1234.
3.Click either the New or Add button to accept the settings.
4.Click the Apply button to save the changes and continue to other settings. If you are finished updating settings, click the OK button to close the screen.
50 |
|