6.If you choose Daily, you should select a start and stop time for the recording schedule. Choose the hour at which the recording should start and stop based on a
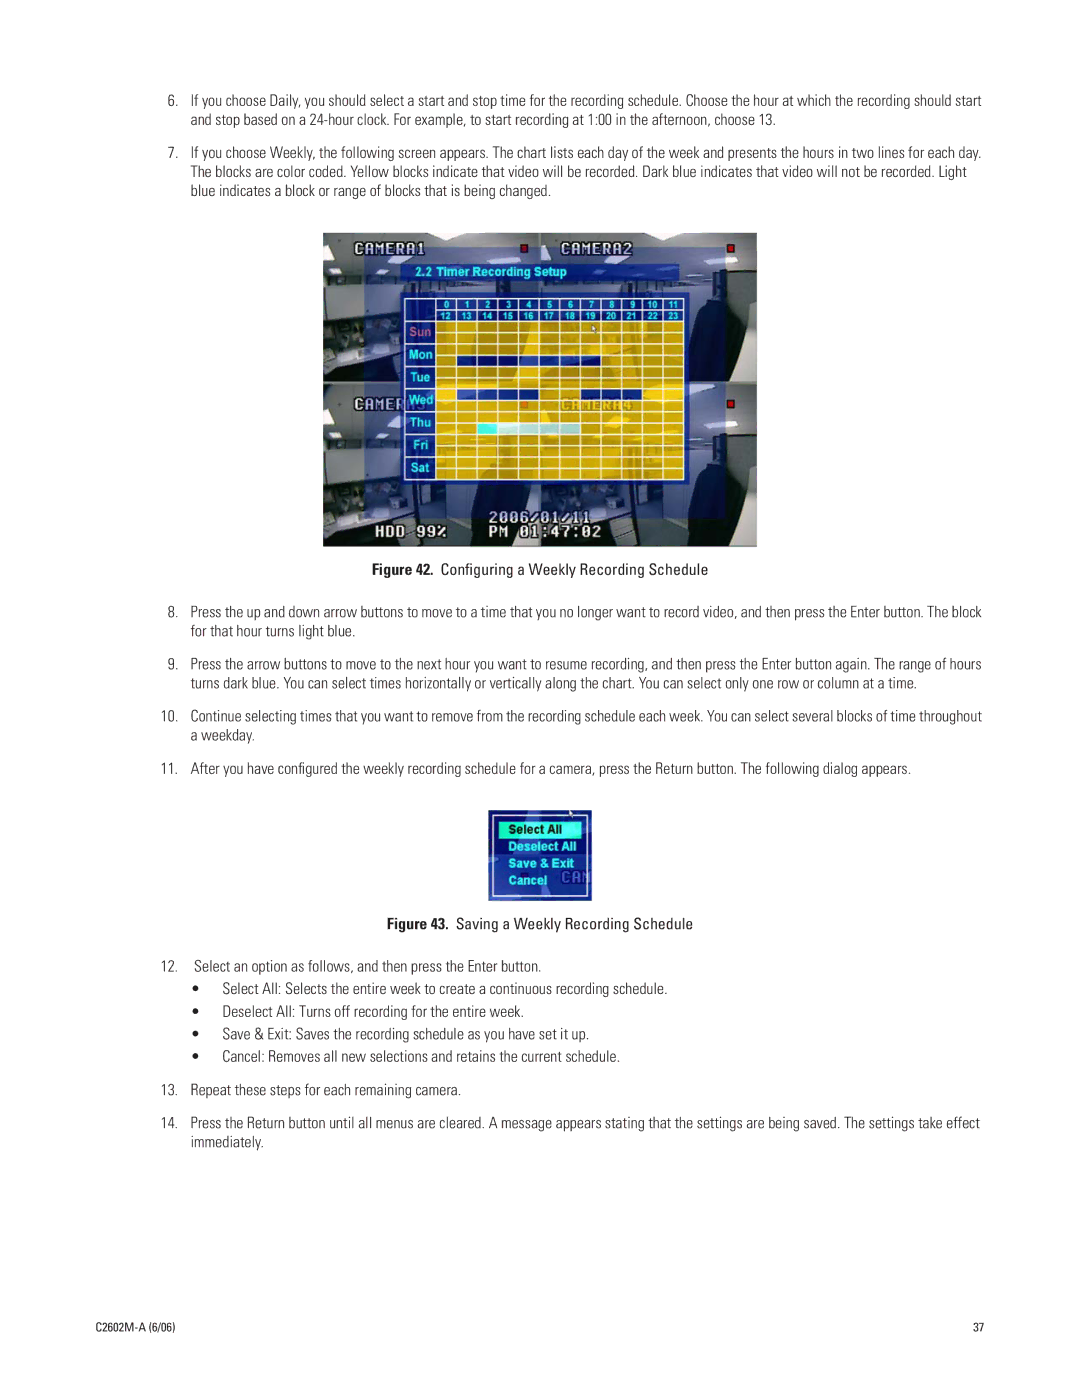
7.If you choose Weekly, the following screen appears. The chart lists each day of the week and presents the hours in two lines for each day. The blocks are color coded. Yellow blocks indicate that video will be recorded. Dark blue indicates that video will not be recorded. Light blue indicates a block or range of blocks that is being changed.
Figure 42. Configuring a Weekly Recording Schedule
8.Press the up and down arrow buttons to move to a time that you no longer want to record video, and then press the Enter button. The block for that hour turns light blue.
9.Press the arrow buttons to move to the next hour you want to resume recording, and then press the Enter button again. The range of hours turns dark blue. You can select times horizontally or vertically along the chart. You can select only one row or column at a time.
10.Continue selecting times that you want to remove from the recording schedule each week. You can select several blocks of time throughout a weekday.
11.After you have configured the weekly recording schedule for a camera, press the Return button. The following dialog appears.
Figure 43. Saving a Weekly Recording Schedule
12.Select an option as follows, and then press the Enter button.
•Select All: Selects the entire week to create a continuous recording schedule.
•Deselect All: Turns off recording for the entire week.
•Save & Exit: Saves the recording schedule as you have set it up.
•Cancel: Removes all new selections and retains the current schedule.
13.Repeat these steps for each remaining camera.
14.Press the Return button until all menus are cleared. A message appears stating that the settings are being saved. The settings take effect immediately.
| 37 |