CAMERA SETTINGS
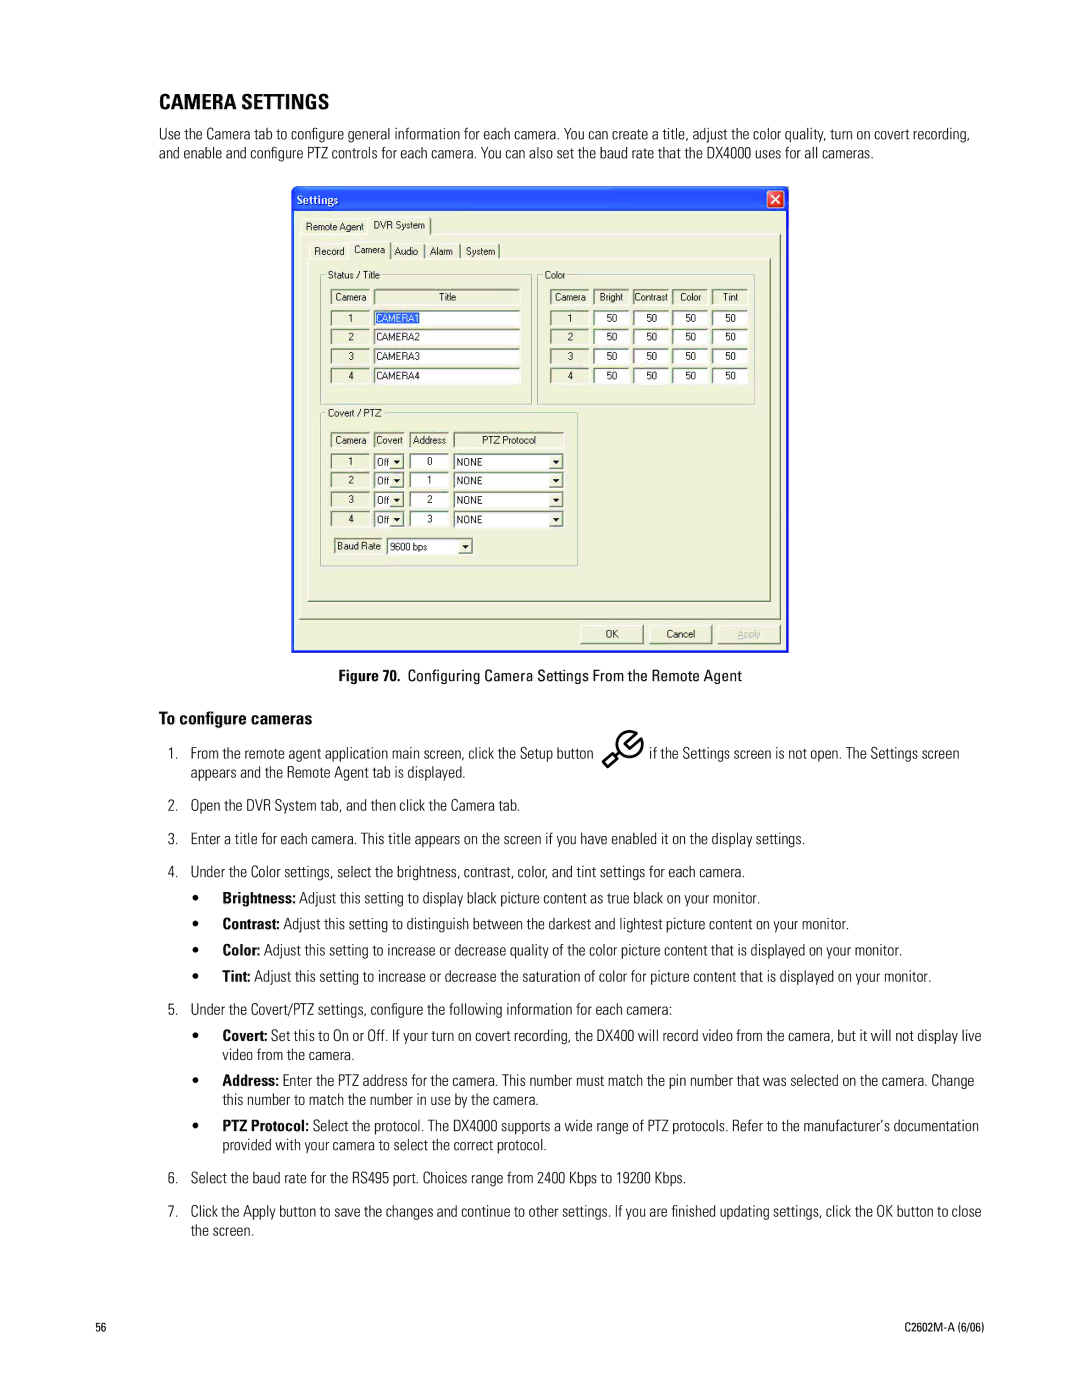
Use the Camera tab to configure general information for each camera. You can create a title, adjust the color quality, turn on covert recording, and enable and configure PTZ controls for each camera. You can also set the baud rate that the DX4000 uses for all cameras.
Figure 70. Configuring Camera Settings From the Remote Agent
To configure cameras
1. From the remote agent application main screen, click the Setup button | if the Settings screen is not open. The Settings screen |
appears and the Remote Agent tab is displayed. |
|
2.Open the DVR System tab, and then click the Camera tab.
3.Enter a title for each camera. This title appears on the screen if you have enabled it on the display settings.
4.Under the Color settings, select the brightness, contrast, color, and tint settings for each camera.
•Brightness: Adjust this setting to display black picture content as true black on your monitor.
•Contrast: Adjust this setting to distinguish between the darkest and lightest picture content on your monitor.
•Color: Adjust this setting to increase or decrease quality of the color picture content that is displayed on your monitor.
•Tint: Adjust this setting to increase or decrease the saturation of color for picture content that is displayed on your monitor.
5.Under the Covert/PTZ settings, configure the following information for each camera:
•Covert: Set this to On or Off. If your turn on covert recording, the DX400 will record video from the camera, but it will not display live video from the camera.
•Address: Enter the PTZ address for the camera. This number must match the pin number that was selected on the camera. Change this number to match the number in use by the camera.
•PTZ Protocol: Select the protocol. The DX4000 supports a wide range of PTZ protocols. Refer to the manufacturer’s documentation provided with your camera to select the correct protocol.
6.Select the baud rate for the RS495 port. Choices range from 2400 Kbps to 19200 Kbps.
7.Click the Apply button to save the changes and continue to other settings. If you are finished updating settings, click the OK button to close the screen.
56 |
|
