INSTALLATION AND SETUP
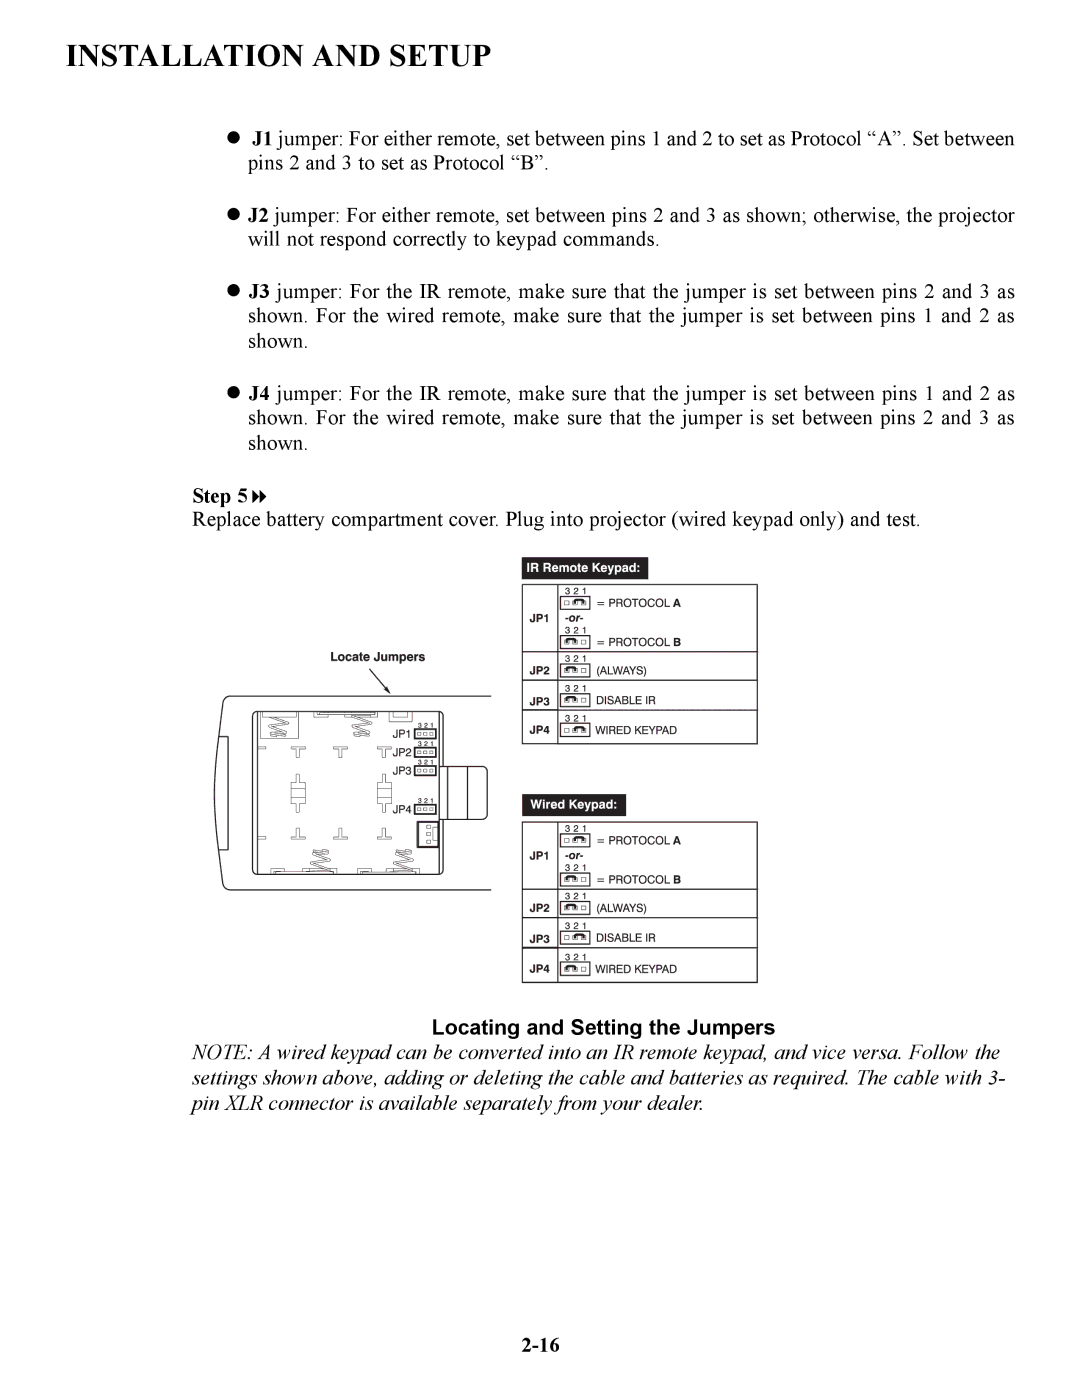
J1 jumper: For either remote, set between pins 1 and 2 to set as Protocol “A”. Set between pins 2 and 3 to set as Protocol “B”.
J2 jumper: For either remote, set between pins 2 and 3 as shown; otherwise, the projector will not respond correctly to keypad commands.
J3 jumper: For the IR remote, make sure that the jumper is set between pins 2 and 3 as shown. For the wired remote, make sure that the jumper is set between pins 1 and 2 as shown.
J4 jumper: For the IR remote, make sure that the jumper is set between pins 1 and 2 as shown. For the wired remote, make sure that the jumper is set between pins 2 and 3 as shown.
Step 5
Replace battery compartment cover. Plug into projector (wired keypad only) and test.
Locating and Setting the Jumpers
NOTE: A wired keypad can be converted into an IR remote keypad, and vice versa. Follow the settings shown above, adding or deleting the cable and batteries as required. The cable with 3- pin XLR connector is available separately from your dealer.