INSTALLATION AND SETUP
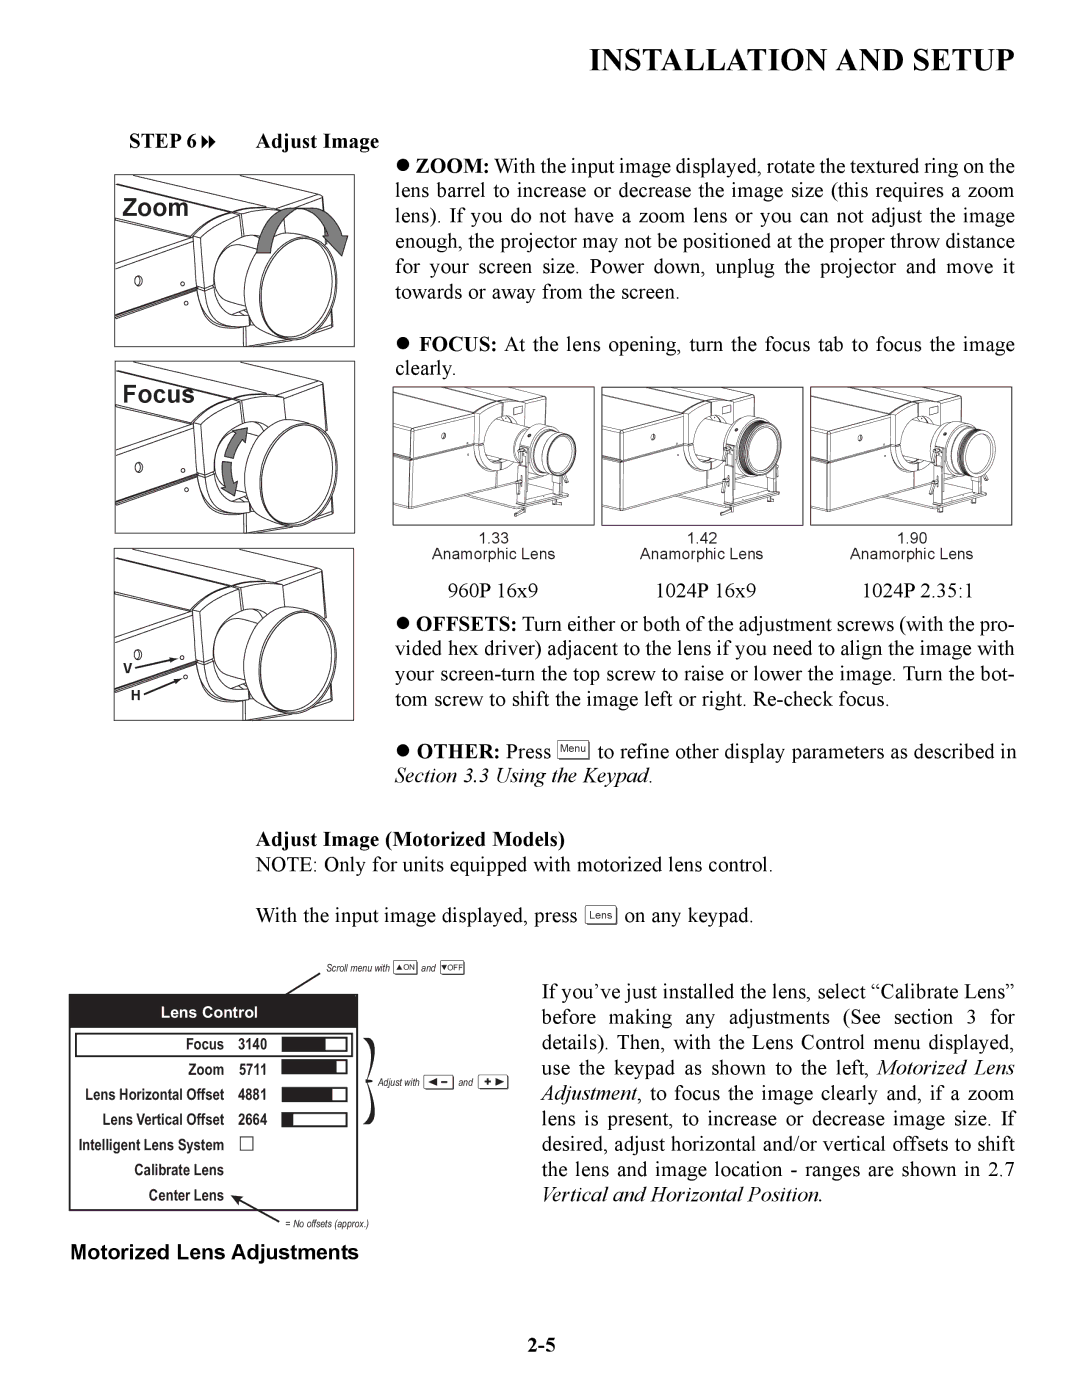
STEP 6 | Adjust Image |
Zoom
ZOOM: With the input image displayed, rotate the textured ring on the lens barrel to increase or decrease the image size (this requires a zoom lens). If you do not have a zoom lens or you can not adjust the image enough, the projector may not be positioned at the proper throw distance for your screen size. Power down, unplug the projector and move it towards or away from the screen.
FOCUS: At the lens opening, turn the focus tab to focus the image clearly.
1.33 |
Anamorphic Lens |
1.42 |
Anamorphic Lens |
1.90 |
Anamorphic Lens |
V |
H |
960P 16x9 | 1024P 16x9 | 1024P 2.35:1 |
OFFSETS: Turn either or both of the adjustment screws (with the pro- vided hex driver) adjacent to the lens if you need to align the image with your
OTHER: Press Menu ![]()
![]() to refine other display parameters as described in Section 3.3 Using the Keypad.
to refine other display parameters as described in Section 3.3 Using the Keypad.
Adjust Image (Motorized Models)
NOTE: Only for units equipped with motorized lens control.
With the input image displayed, press Lens on any keypad.
Scroll menu with ![]() ON and
ON and ![]() OFF
OFF
Lens Control
Focus | 3140 |
Zoom | 5711 |
Lens Horizontal Offset | 4881 |
Lens Vertical Offset | 2664 |
Intelligent Lens System |
|
Calibrate Lens
Center Lens ![]()
![]() Adjust with
Adjust with ![]() and
and ![]()
If you’ve just installed the lens, select “Calibrate Lens” before making any adjustments (See section 3 for details). Then, with the Lens Control menu displayed, use the keypad as shown to the left, Motorized Lens Adjustment, to focus the image clearly and, if a zoom lens is present, to increase or decrease image size. If desired, adjust horizontal and/or vertical offsets to shift the lens and image location - ranges are shown in 2.7 Vertical and Horizontal Position.
= No offsets (approx.)