OPERATION
3.1Overview
This section explains how to use the projector once it has been installed. Please read through these pages before using the projector for the first time. An understanding of projector features and how to access them will help you to take full advantage of the capabilities of the projector within min- utes.
NOTE: Installation involves locating the projector and adjusting it for use at that location. If you have not yet installed the projector, refer to Section 2, Installation and Setup.
3.2Projector Basics
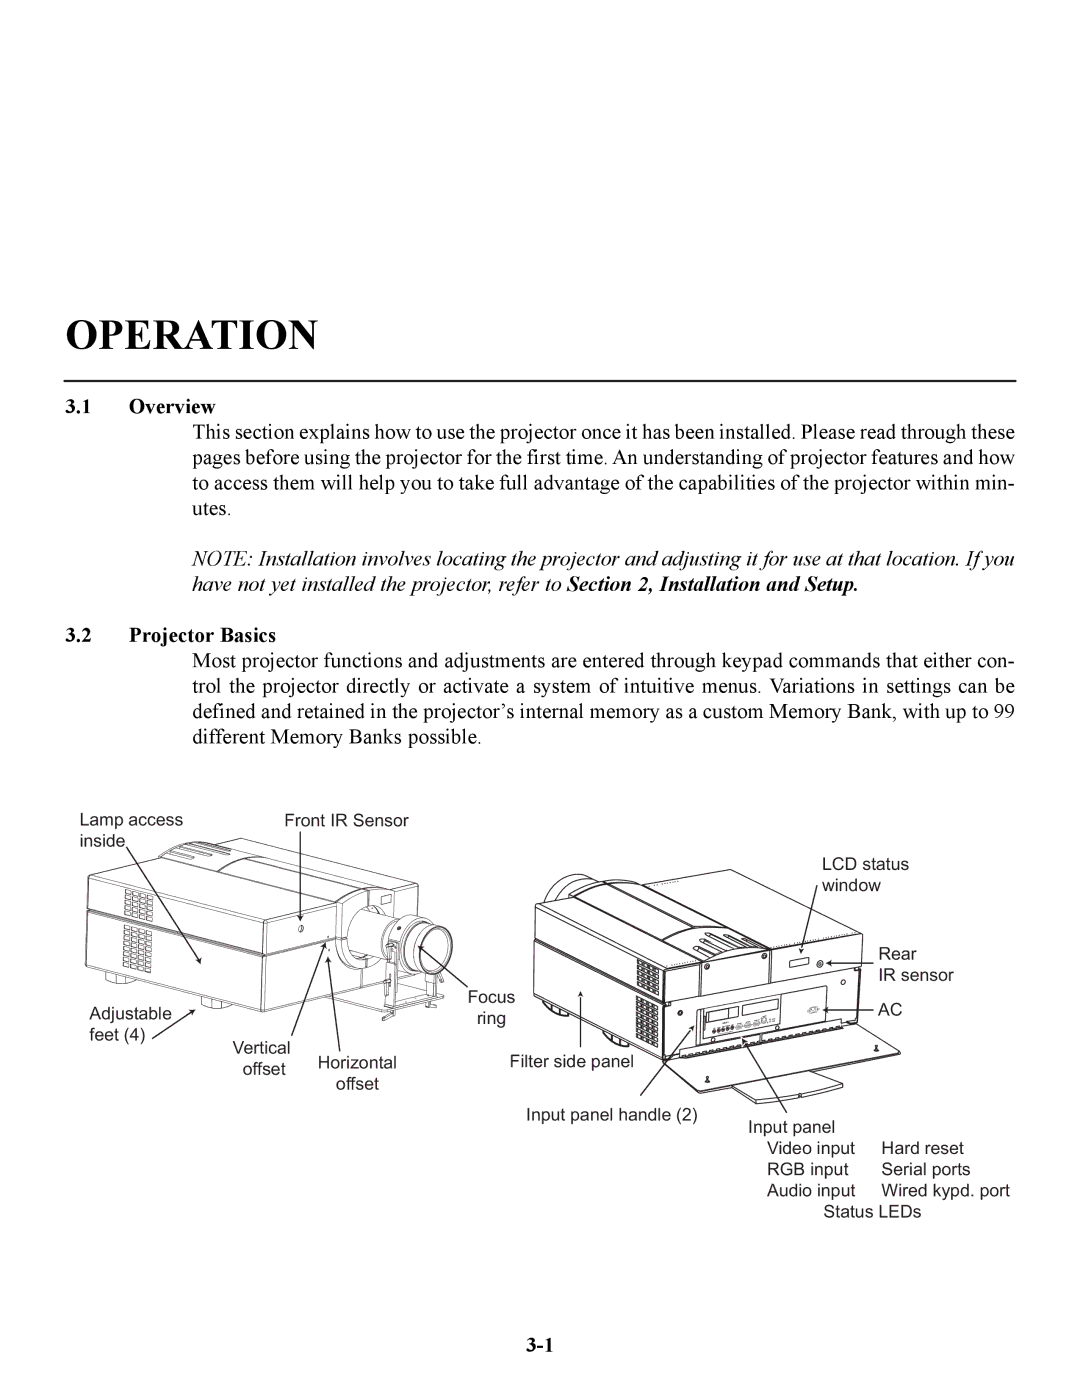
Most projector functions and adjustments are entered through keypad commands that either con- trol the projector directly or activate a system of intuitive menus. Variations in settings can be defined and retained in the projector’s internal memory as a custom Memory Bank, with up to 99 different Memory Banks possible.
Lamp access | Front IR Sensor |
inside |
|
| Focus |
Adjustable | ring |
| |
feet (4) |
|
Vertical
offset HorizontalFilter side panel offset
Input panel handle (2)
LCD status window
Rear
IR sensor
AC
Input panel |
|
Video input | Hard reset |
RGB input | Serial ports |
Audio input | Wired kypd. port |
Status LEDs
