•PRE ALARM RECORD: In event recording, set the advance recording time before an actual event.
J Pre alarm settings will be changed according to the frame rate.
•HDD REMAINING: Shows the remaining and total capacity of the current HDD.
•TIME REMAINING: Displays the expected recordable time in the “DATE(D)/HOUR(H)/MIN(M)” format based on the selected quality.
6.When done, select <OK>. Your setting will be applied.
If you select <DEFAULT>, the settings will be restored to the factory default.
7.To return to the previous menu, select <ESC>.
Schedule Setup
You can set the recording schedule. |
|
|
| |
See the previous section to repeat steps 1~3. (Page 28) |
|
|
| |
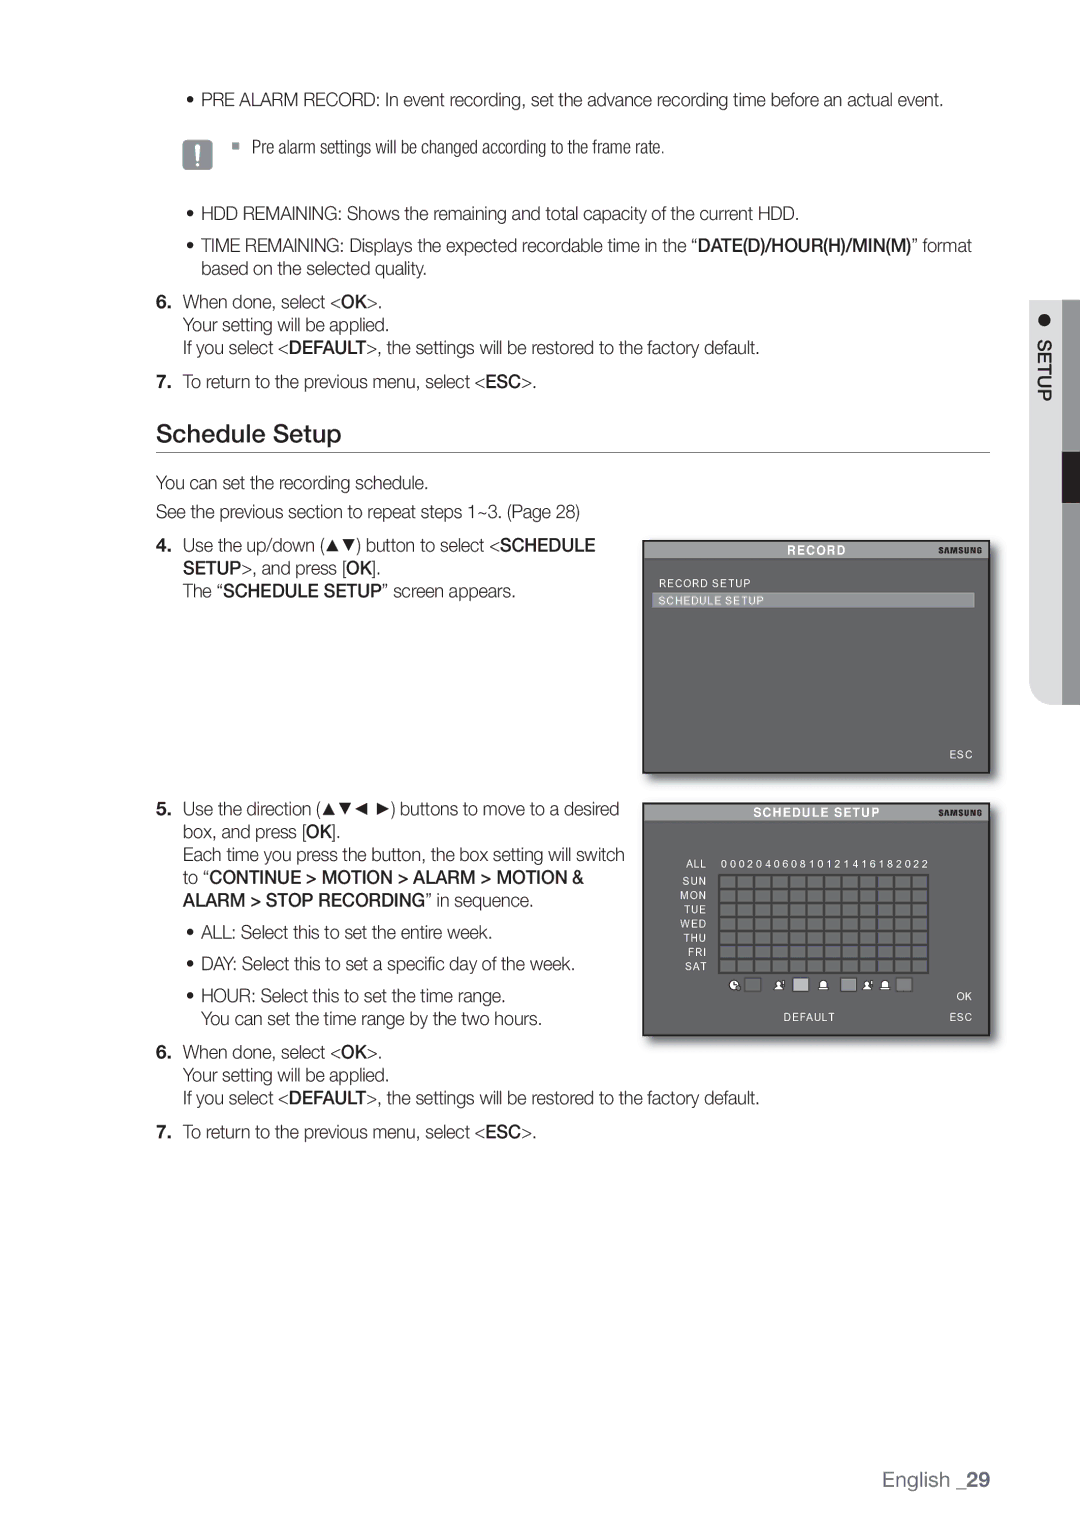
4. Use the up/down (▲▼) button to select <SCHEDULE |
|
|
| |
| RECORD | |||
SETUP>, and press [OK]. |
|
| RECORD SETUP | |
The “SCHEDULE SETUP” screen appears. |
| |||
|
|
| ||
| SCHEDULE SETUP |
| ||
|
|
|
| |
ESC
SETUP
5.Use the direction (▲▼◄ ►) buttons to move to a desired box, and press [OK].
Each time you press the button, the box setting will switch to “CONTINUE > MOTION > ALARM > MOTION & ALARM > STOP RECORDING” in sequence.
•ALL: Select this to set the entire week.
•DAY: Select this to set a specifi c day of the week.
|
|
|
| SCHEDULE SETUP | ||||||||||
ALL | 0 0 0 2 0 4 0 6 0 8 1 0 1 2 1 4 1 6 1 8 2 0 2 2 |
| ||||||||||||
SUN |
|
|
|
|
|
|
|
|
|
|
|
|
| |
|
|
|
|
|
|
|
|
|
|
|
|
| ||
MON |
|
|
|
|
|
|
|
|
|
|
|
|
|
|
TUE |
|
|
|
|
|
|
|
|
|
|
|
|
|
|
WED |
|
|
|
|
|
|
|
|
|
|
|
|
|
|
THU |
|
|
|
|
|
|
|
|
|
|
|
|
|
|
FRI |
|
|
|
|
|
|
|
|
|
|
|
|
|
|
SAT |
|
|
|
|
|
|
|
|
|
|
|
|
|
|
• HOUR: Select this to set the time range. |
|
|
|
|
|
|
|
|
|
|
| OK |
|
|
|
|
|
|
|
|
|
|
| ||
|
|
|
|
|
|
|
|
|
|
| ||
You can set the time range by the two hours. |
| DEFAULT |
|
|
|
|
| ESC | ||||
6.When done, select <OK>. Your setting will be applied.
If you select <DEFAULT>, the settings will be restored to the factory default.
7.To return to the previous menu, select <ESC>.
English _29
