Camera Setup
See the previous section to repeat steps 1~3. (Page 30)
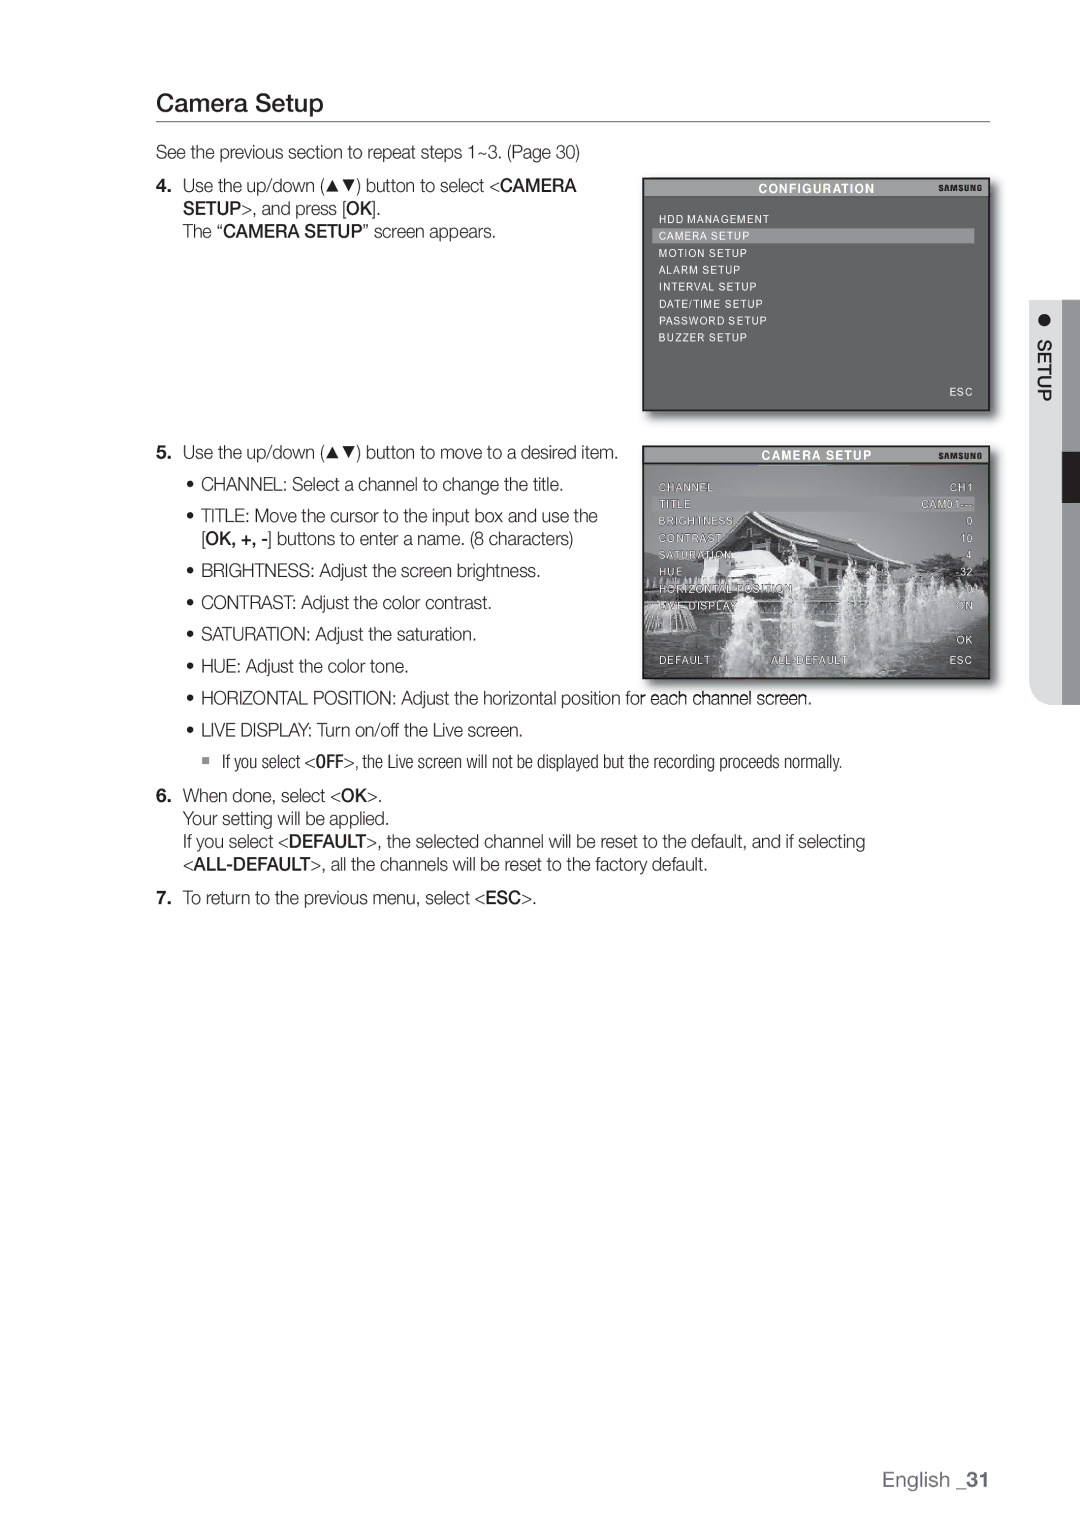
4.Use the up/down (▲▼) button to select <CAMERA SETUP>, and press [OK].
The “CAMERA SETUP” screen appears.
CONFIGURATION
HDD MANAGEMENT
CAMERA SETUP
MOTION SETUP
ALARM SETUP
INTERVAL SETUP
DATE/TIME SETUP
PASSWORD SETUP
BUZZER SETUP
SETUP
ESC
5.Use the up/down (▲▼) button to move to a desired item.
•CHANNEL: Select a channel to change the title.
•TITLE: Move the cursor to the input box and use the [OK, +,
•BRIGHTNESS: Adjust the screen brightness.
•CONTRAST: Adjust the color contrast.
•SATURATION: Adjust the saturation.
•HUE: Adjust the color tone.
|
| CAMERA SETUP |
|
|
| CHANNEL |
| CH1 |
|
| TITLE |
|
| |
| BRIGHTNESS |
| 0 |
|
| CONTRAST |
| 10 |
|
| SATURATION |
| 4 |
|
| HUE |
|
| |
| HORIZONTAL POSITION | 0 |
| |
| LIVE DISPLAY |
| ON |
|
|
|
| OK |
|
| DEFAULT | ESC |
| |
•HORIZONTAL POSITION: Adjust the horizontal position for each channel screen.
•LIVE DISPLAY: Turn on/off the Live screen.
If you select <OFF>, the Live screen will not be displayed but the recording proceeds normally.
6.When done, select <OK>. Your setting will be applied.
If you select <DEFAULT>, the selected channel will be reset to the default, and if selecting
7.To return to the previous menu, select <ESC>.
English _31
