setup
Motion Setup
You can specify an area to detect a motion.
If you select an area to detect a motion, the DVR will detect any motion occurring in that area.
See the previous section to repeat steps 1~3. (Page 30)
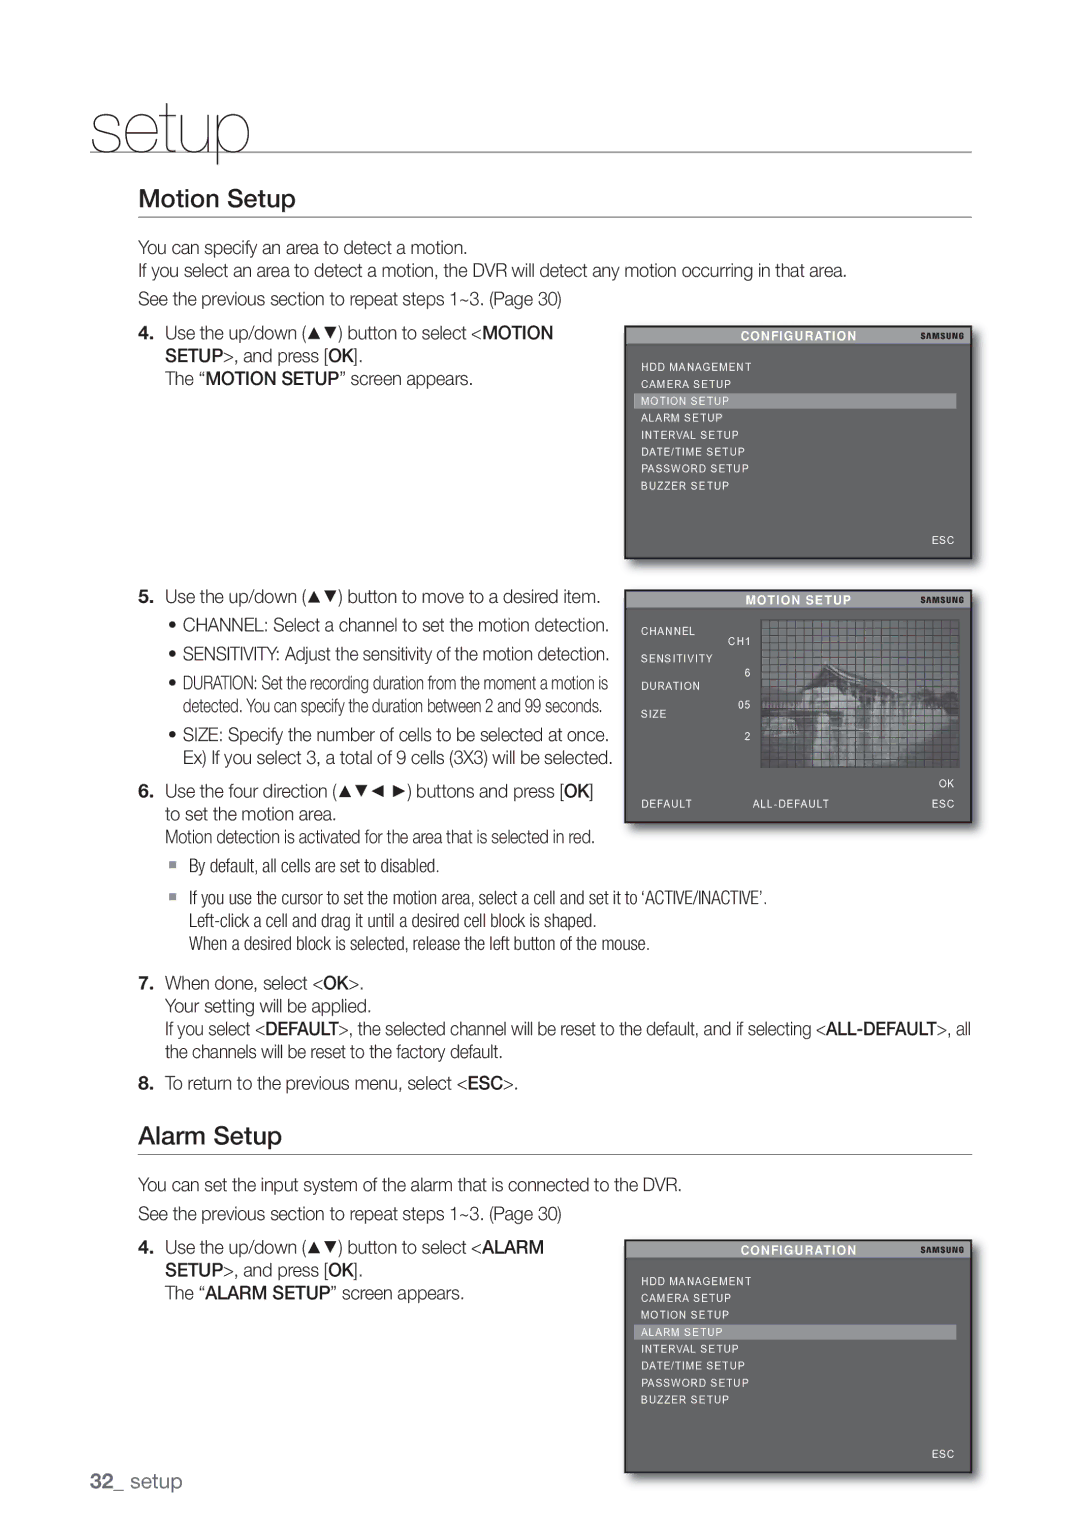
4.Use the up/down (▲▼) button to select <MOTION SETUP>, and press [OK].
The “MOTION SETUP” screen appears.
CONFIGURATION
HDD MANAGEMENT
CAMERA SETUP
MOTION SETUP
ALARM SETUP
INTERVAL SETUP
DATE/TIME SETUP
PASSWORD SETUP
BUZZER SETUP
ESC
5. Use the up/down (▲▼) button to move to a desired item. |
• CHANNEL: Select a channel to set the motion detection. |
• SENSITIVITY: Adjust the sensitivity of the motion detection. |
• DURATION: Set the recording duration from the moment a motion is |
MOTION SETUP
CHANNEL
CH1
SENSITIVITY
6
DURATION
detected. You can specify the duration between 2 and 99 seconds. |
• SIZE: Specify the number of cells to be selected at once. |
Ex) If you select 3, a total of 9 cells (3X3) will be selected. |
SIZE
05
2
6. Use the four direction (▲▼◄ ►) buttons and press [OK] |
|
| OK | |
DEFAULT | ESC | |||
to set the motion area. | ||||
|
|
| ||
Motion detection is activated for the area that is selected in red. |
|
|
|
By default, all cells are set to disabled.
If you use the cursor to set the motion area, select a cell and set it to ‘ACTIVE/INACTIVE’.
When a desired block is selected, release the left button of the mouse.
7.When done, select <OK>. Your setting will be applied.
If you select <DEFAULT>, the selected channel will be reset to the default, and if selecting
8.To return to the previous menu, select <ESC>.
Alarm Setup
You can set the input system of the alarm that is connected to the DVR.
See the previous section to repeat steps 1~3. (Page 30)
4.Use the up/down (▲▼) button to select <ALARM SETUP>, and press [OK].
The “ALARM SETUP” screen appears.
CONFIGURATION
HDD MANAGEMENT
CAMERA SETUP
MOTION SETUP
ALARM SETUP
INTERVAL SETUP
DATE/TIME SETUP
PASSWORD SETUP
BUZZER SETUP
ESC
32_ setup
