Chapter
Install the Data Drives
![]() Warning
Warning
Caution
Do not pull more than one blade out of the chassis at a time. Extending multiple blades may cause the nTier700 to tip forward.
Warnung: Ziehen Sie nicht mehr als einen Einschub zu gleicher Zeit aus dem Gehäuse. Das gleichzeitige Ziehen mehrerer Einschübe kann dazu führen, dass das nTier700 nach vorne kippt.
Each box of drives is preconfigured as a RAID 6 for a single blade. Mixing the drives from one box with the drives from another box may destroy the RAID volume.
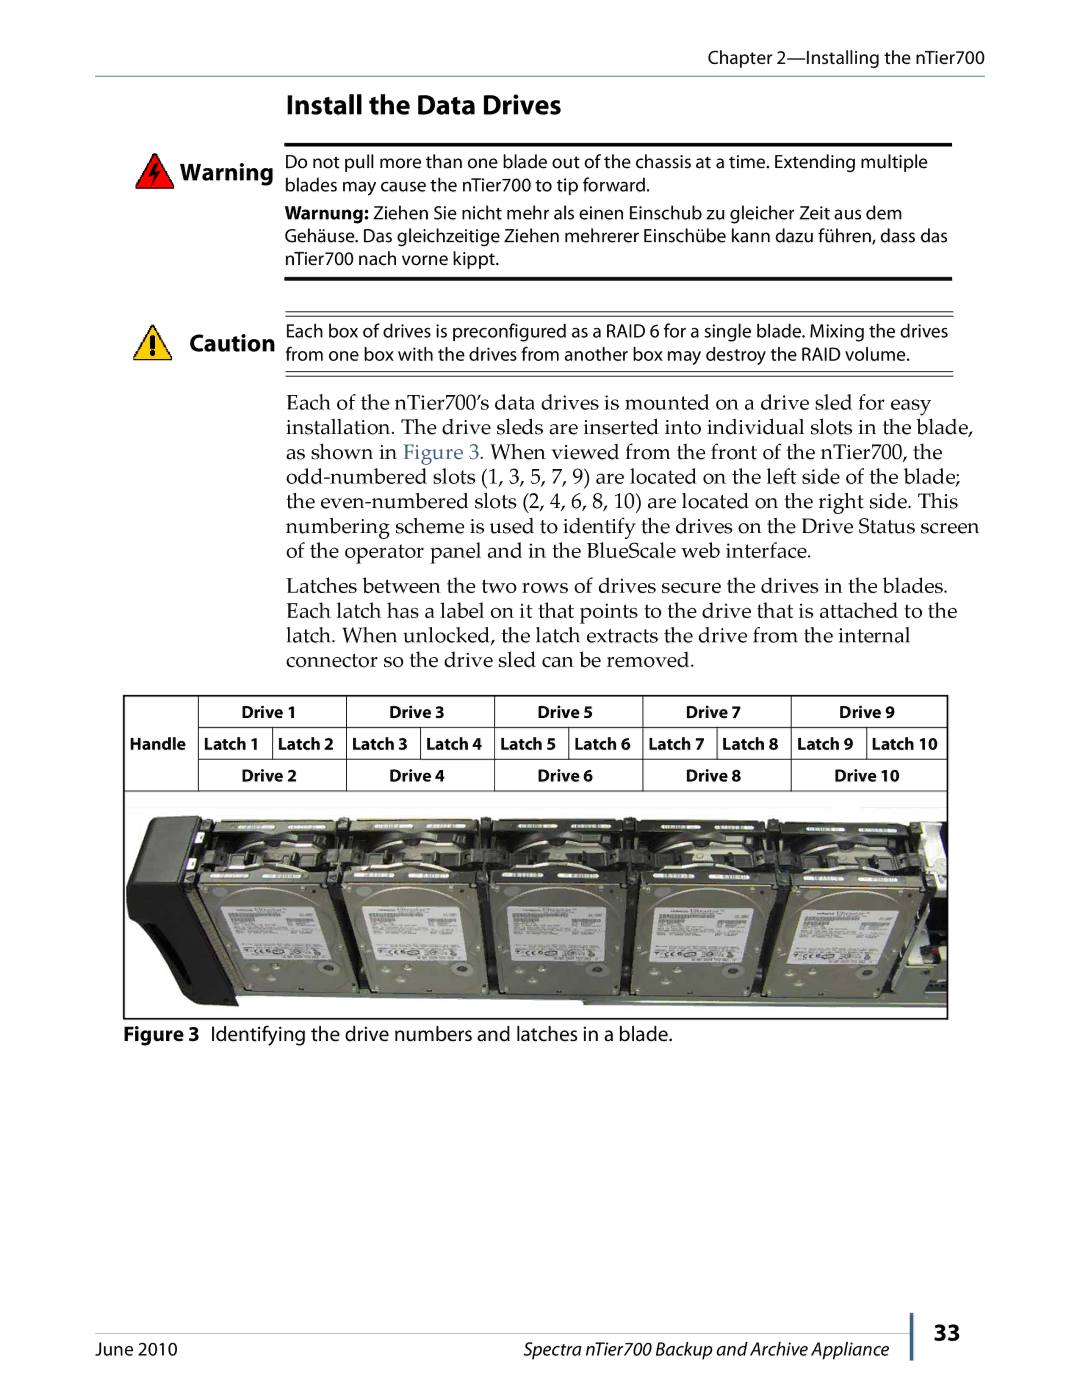
Each of the nTier700’s data drives is mounted on a drive sled for easy installation. The drive sleds are inserted into individual slots in the blade, as shown in Figure 3. When viewed from the front of the nTier700, the
Latches between the two rows of drives secure the drives in the blades. Each latch has a label on it that points to the drive that is attached to the latch. When unlocked, the latch extracts the drive from the internal connector so the drive sled can be removed.
| Drive 1 | Drive 3 | Drive 5 | Drive 7 | Drive 9 | |||||
|
|
|
|
|
|
|
|
|
| |
Handle | Latch 1 | Latch 2 | Latch 3 | Latch 4 | Latch 5 | Latch 6 | Latch 7 | Latch 8 | Latch 9 | Latch 10 |
|
|
|
|
|
|
|
|
|
|
|
| Drive 2 | Drive 4 | Drive 6 | Drive 8 | Drive 10 | |||||
|
|
|
|
|
|
|
|
|
|
|
|
|
|
|
|
|
|
|
|
|
|
Figure 3 Identifying the drive numbers and latches in a blade.
June 2010 | Spectra nTier700 Backup and Archive Appliance |
33