Chapter 2: Installation
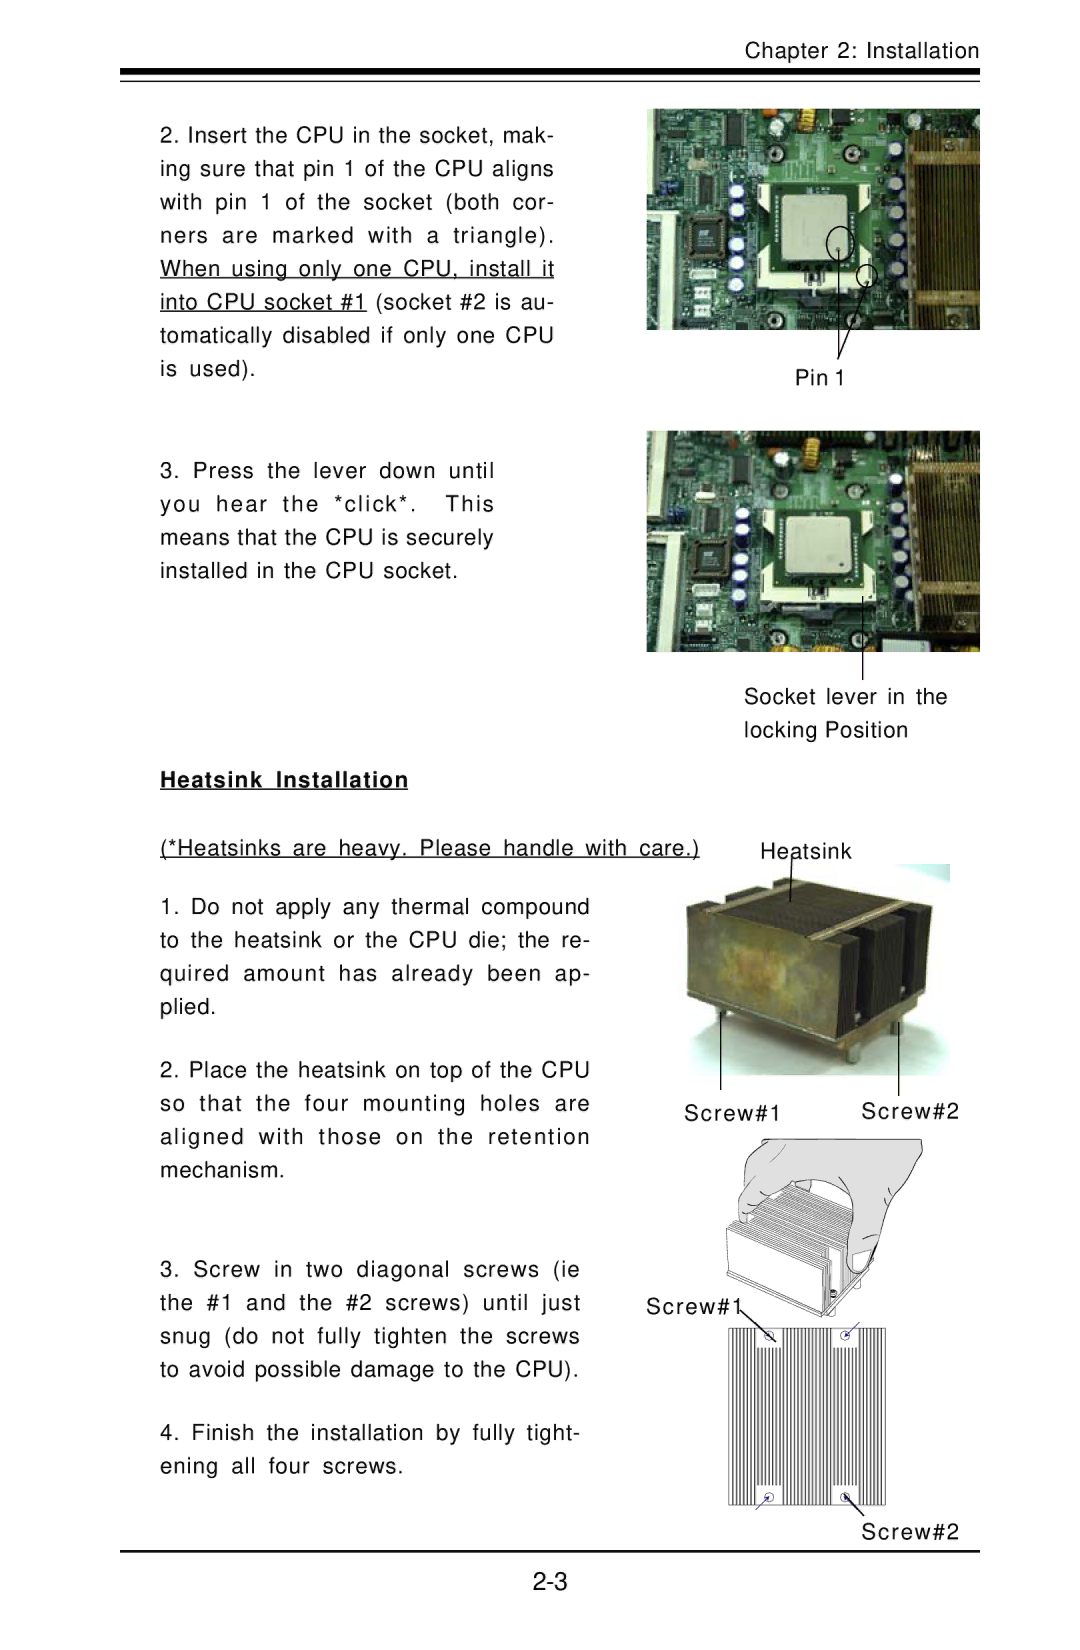
2.Insert the CPU in the socket, mak- ing sure that pin 1 of the CPU aligns with pin 1 of the socket (both cor-
ners are marked with a triangle). When using only one CPU, install it into CPU socket #1 (socket #2 is au- tomatically disabled if only one CPU is used).
3.Press the lever down until you hear the *click*. This means that the CPU is securely installed in the CPU socket.
Heatsink Installation
(*Heatsinks are heavy. Please handle with care.)
Pin 1
Socket lever in the locking Position
Heatsink
1. Do not apply any thermal compound to the heatsink or the CPU die; the re- quired amount has already been ap- plied.
2.Place the heatsink on top of the CPU so that the four mounting holes are aligned with those on the retention mechanism.
3.Screw in two diagonal screws (ie
the #1 and the #2 screws) until just snug (do not fully tighten the screws to avoid possible damage to the CPU).
4.Finish the installation by fully tight- ening all four screws.
Screw#1 Screw#2
Screw#1
Screw#2