MAIN MENU
SVAT ELECTRONICS
now you can see
From the setup menu, you can access various aspects of the system, including camera setup, schedule setup, network setup and password setup.
•▲▼- Press these buttons to change the highlighted item.
•ENTER - Press this button to enter the setup of the highlighted option. For the details of each option, please refer to the corresponding sections.
•ESC (MENU/ESC)
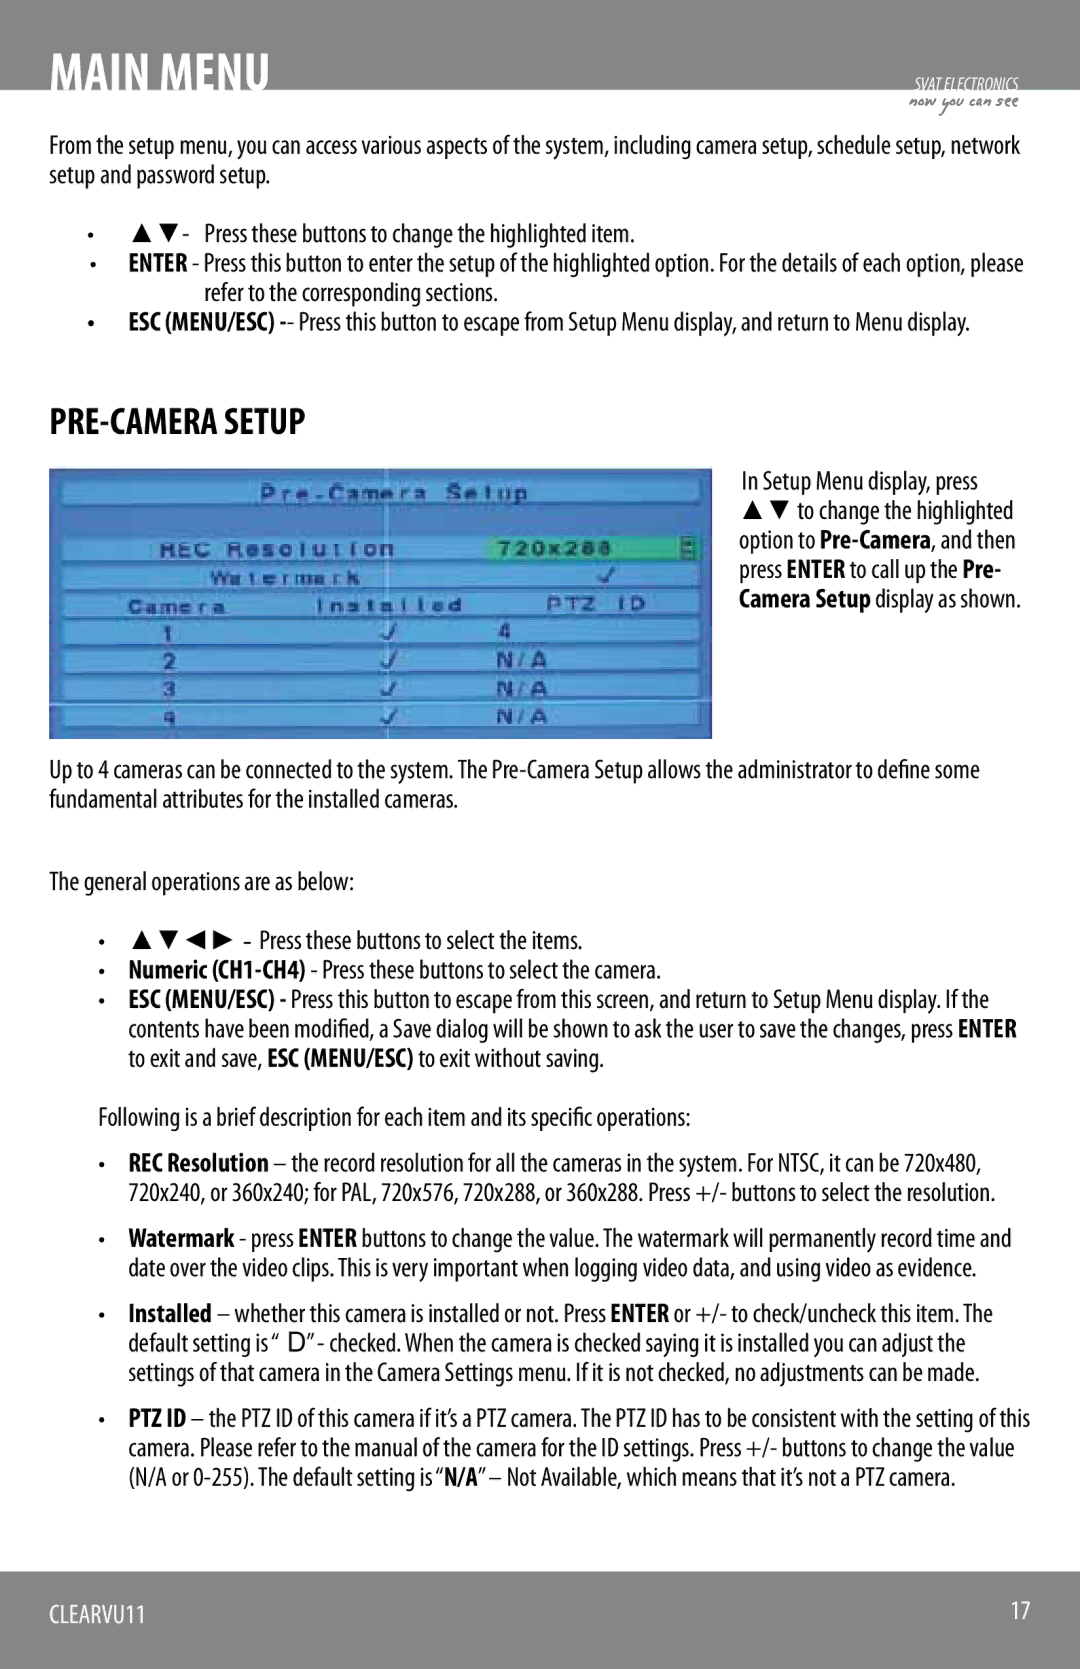
PRE-CAMERA SETUP
In Setup Menu display, press ▲▼ to change the highlighted option to
Up to 4 cameras can be connected to the system. The
The general operations are as below:
•▲▼◄► - Press these buttons to select the items.
•Numeric
•ESC (MENU/ESC) - Press this button to escape from this screen, and return to Setup Menu display. If the contents have been modified, a Save dialog will be shown to ask the user to save the changes, press ENTER to exit and save, ESC (MENU/ESC) to exit without saving.
Following is a brief description for each item and its specific operations:
•REC Resolution – the record resolution for all the cameras in the system. For NTSC, it can be 720x480, 720x240, or 360x240; for PAL, 720x576, 720x288, or 360x288. Press +/- buttons to select the resolution.
•Watermark - press ENTER buttons to change the value. The watermark will permanently record time and date over the video clips. This is very important when logging video data, and using video as evidence.
•Installed – whether this camera is installed or not. Press ENTER or +/- to check/uncheck this item. The default setting is “” - checked. When the camera is checked saying it is installed you can adjust the settings of that camera in the Camera Settings menu. If it is not checked, no adjustments can be made.
•PTZ ID – the PTZ ID of this camera if it’s a PTZ camera. The PTZ ID has to be consistent with the setting of this camera. Please refer to the manual of the camera for the ID settings. Press +/- buttons to change the value (N/A or
CLEARVU11 | 17 |
|
|