BUTTON FUNCTIONS AND CONNECTIONS | SVAT ELECTRONICS |
| now you can see |
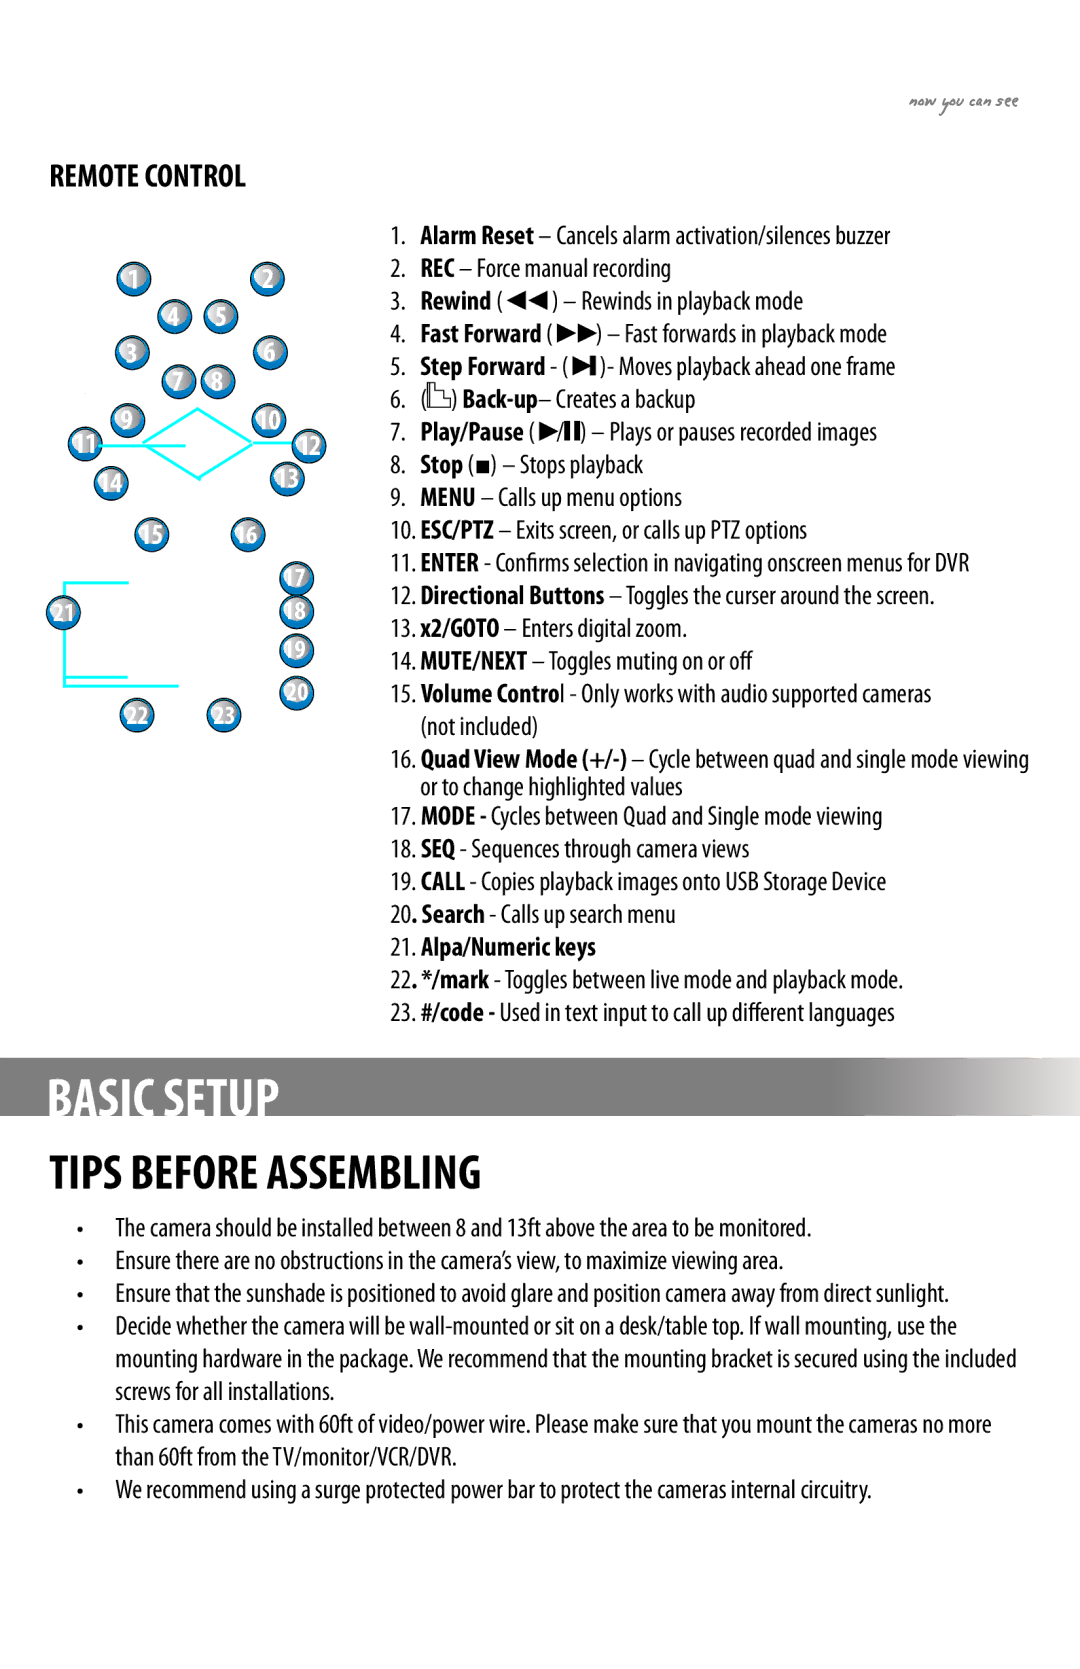
REMOTE CONTROL |
|
12
4 5
36
7 8
11 | 9 |
| 10 | 12 |
14 |
| 13 | ||
|
|
|
1516
17
2118
19
1. | Alarm Reset – Cancels alarm activation/silences buzzer | ||||||||
2. | REC – Force manual recording | ||||||||
3. | Rewind (◄◄) – Rewinds in playback mode | ||||||||
4. | Fast Forward (►►) – Fast forwards in playback mode | ||||||||
5. | Step Forward - (► |
| )- Moves playback ahead one frame | ||||||
| |||||||||
6. | ( |
| ) | ||||||
| |||||||||
| |||||||||
7. | Play/Pause (►/ |
|
|
| ) – Plays or pauses recorded images | ||||
|
| ||||||||
8. | Stop (■) – Stops playback | ||||||||
9. | MENU – Calls up menu options | ||||||||
10. ESC/PTZ – Exits screen, or calls up PTZ options | |||||||||
11. ENTER - Confirms selection in navigating onscreen menus for DVR | |||||||||
12. Directional Buttons – Toggles the curser around the screen. | |||||||||
13. x2/GOTO – Enters digital zoom. | |||||||||
14. MUTE/NEXT – Toggles muting on or off | |||||||||
22 23
20
15. Volume Control - Only works with audio supported cameras |
(not included) |
16. Quad View Mode |
or to change highlighted values |
17. MODE - Cycles between Quad and Single mode viewing |
18. SEQ - Sequences through camera views |
19. CALL - Copies playback images onto USB Storage Device |
20. Search - Calls up search menu
21.Alpa/Numeric keys
22. */mark - Toggles between live mode and playback mode. 23. #/code - Used in text input to call up different languages
BASIC SETUP
TIPS BEFORE ASSEMBLING
•The camera should be installed between 8 and 13ft above the area to be monitored.
•Ensure there are no obstructions in the camera’s view, to maximize viewing area.
•Ensure that the sunshade is positioned to avoid glare and position camera away from direct sunlight.
•Decide whether the camera will be
•This camera comes with 60ft of video/power wire. Please make sure that you mount the cameras no more than 60ft from the TV/monitor/VCR/DVR.
•We recommend using a surge protected power bar to protect the cameras internal circuitry.
CLEARVU11 | 6 |
|
|