2.5Installation under Windows XP/Server2003 (USB with Plug & Play enabled)
1.
2.
3.
4.
Turn on the PC.
Note: Log on as the user with administrative privilege.
Turn on the printer, and connect it to the PC with a USB cable.
“USB DEVICE” is detected, and the “USB Print Support” is automatically installed.
After a while, new devices are detected.
New device names
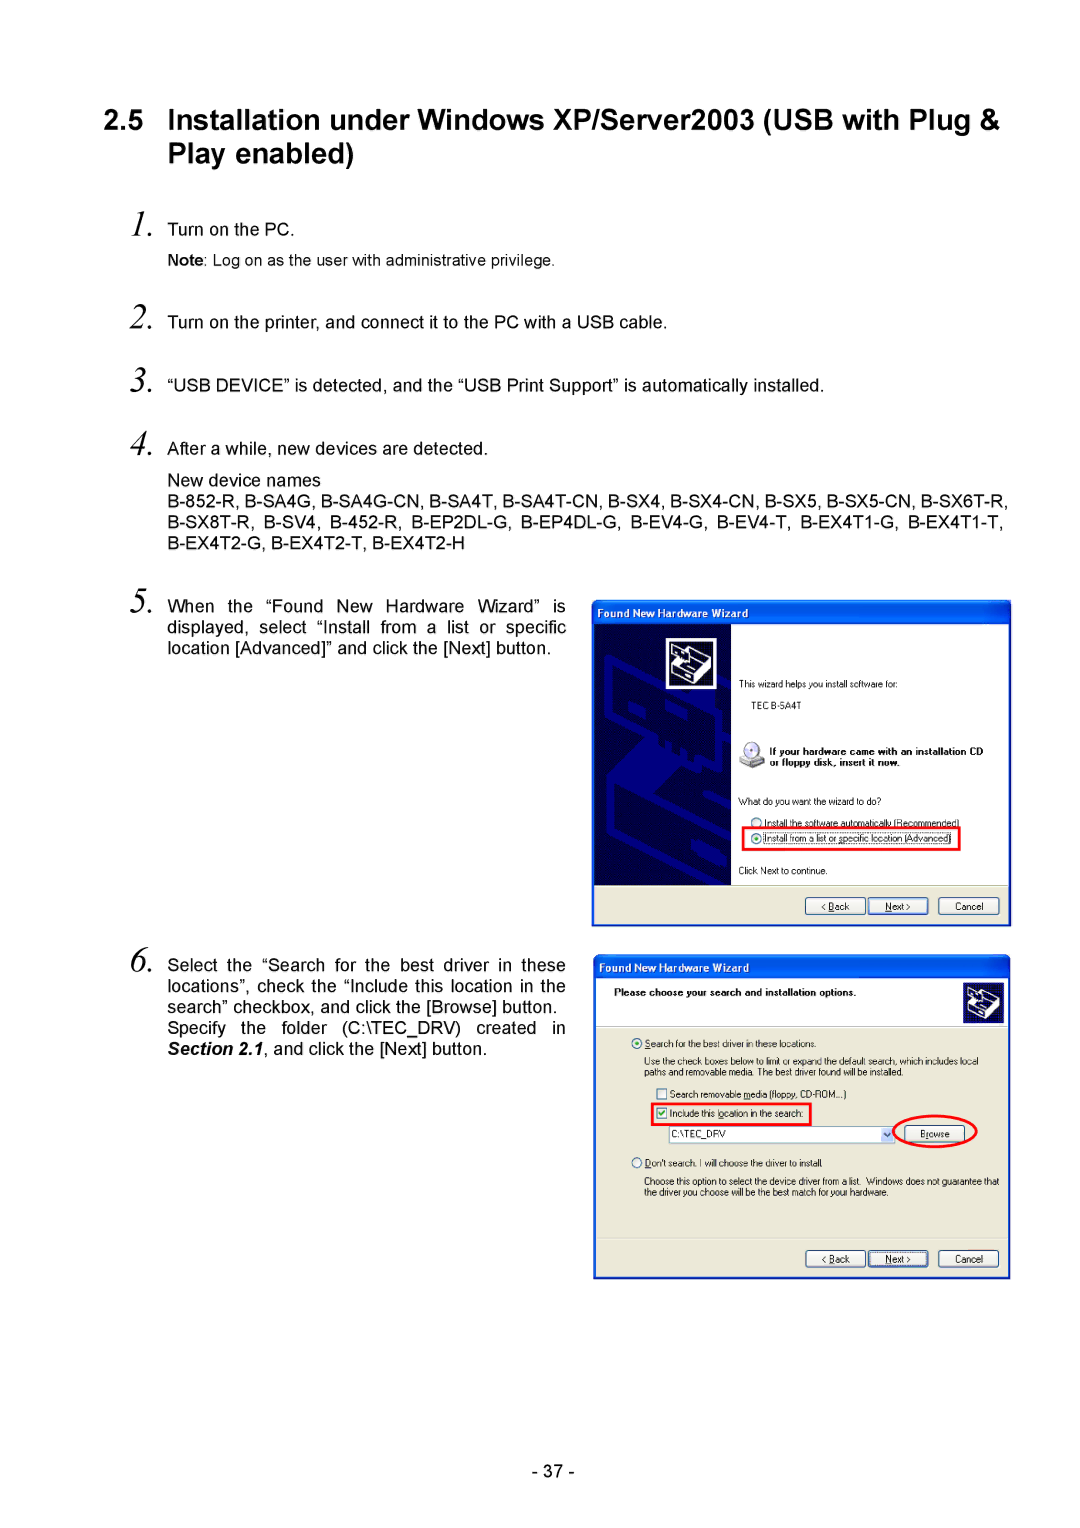
5. When the “Found New Hardware Wizard” is displayed, select “Install from a list or specific location [Advanced]” and click the [Next] button.
6. Select the “Search for the best driver in these locations”, check the “Include this location in the search” checkbox, and click the [Browse] button. Specify the folder (C:\TEC_DRV) created in Section 2.1, and click the [Next] button.
- 37 -