TL-WR1042ND 300Mbps Wireless N Gigabit Router
¾Rule - In this field, create a name for the rule. Note that this name should be unique (e.g. Rule_1).
¾Host - In this field, select a host from the
¾Target - In this filed, select a target from the
¾Schedule - In this field, select a schedule from the
¾Status - In this field, there are two options, Enabled or Disabled. Select Enabled so that the rule will take effect. Select Disabled so that the rule won't take effect.
5.Click Finish to complete adding a new rule.
Method Two:
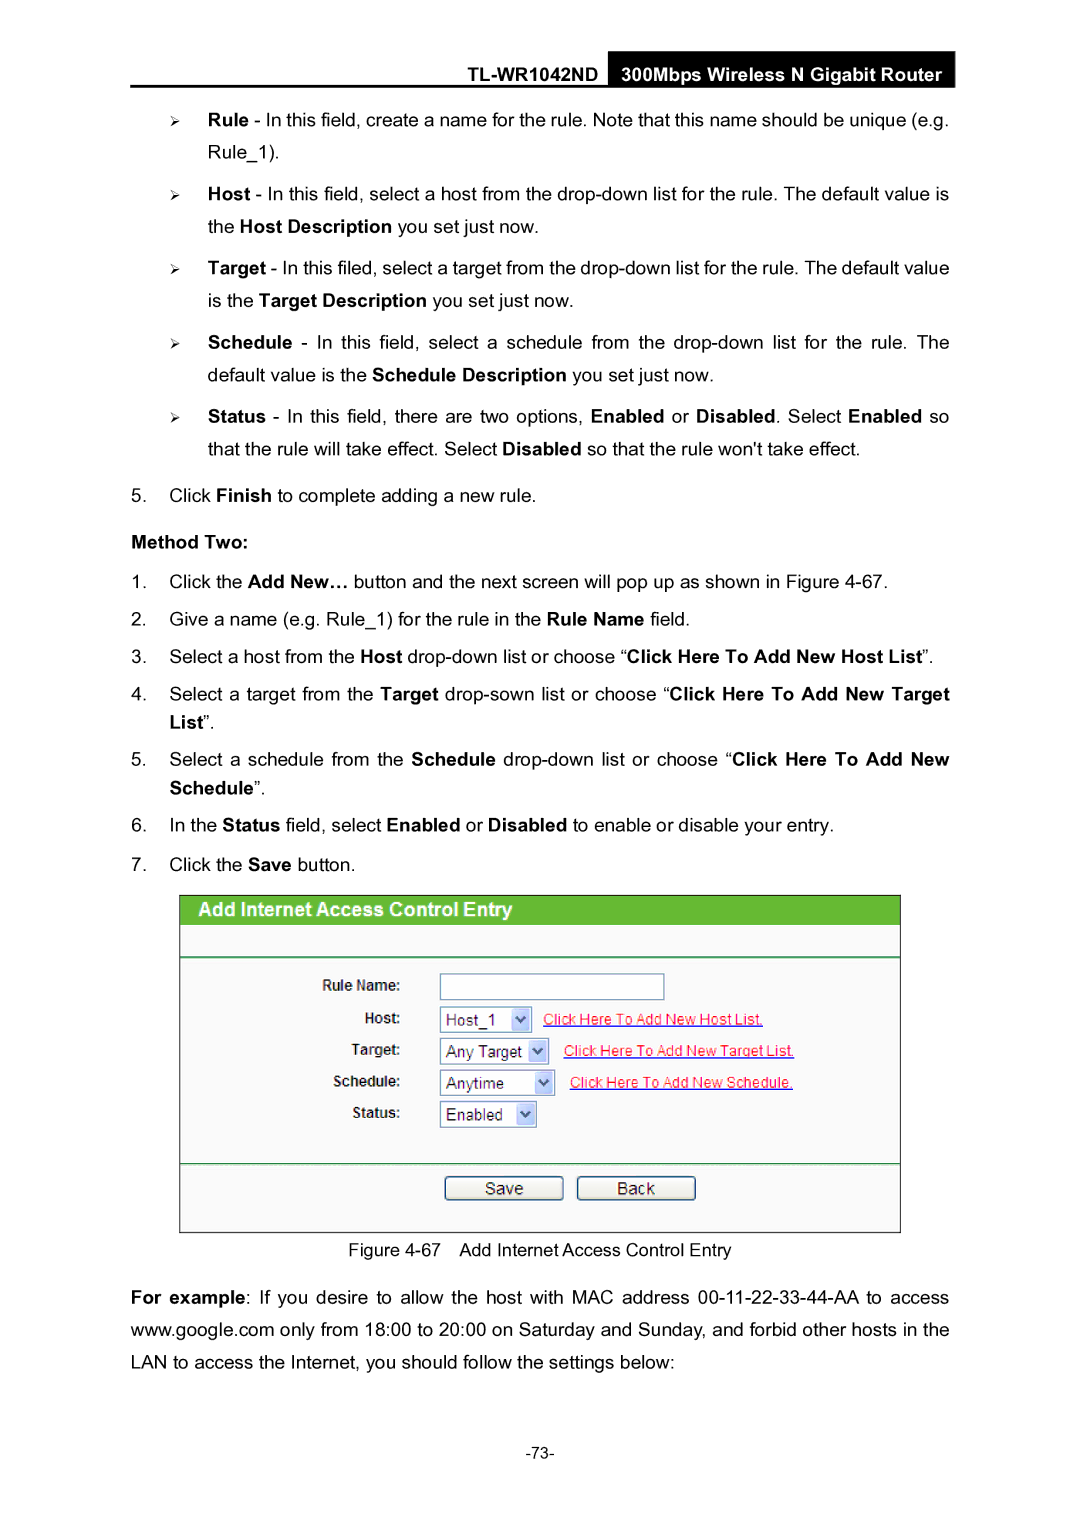
1.Click the Add New… button and the next screen will pop up as shown in Figure
2.Give a name (e.g. Rule_1) for the rule in the Rule Name field.
3.Select a host from the Host
4.Select a target from the Target
5.Select a schedule from the Schedule
6.In the Status field, select Enabled or Disabled to enable or disable your entry.
7.Click the Save button.
Figure 4-67 Add Internet Access Control Entry
For example: If you desire to allow the host with MAC address
