TL-WR1042ND 300Mbps Wireless N Gigabit Router
Choose menu “System Tools”, and you can see the submenus under the main menu: Time Settings, Diagnostic, Firmware Upgrade, Factory Defaults, Backup & Restore, Reboot, Password, System Log and Statistics. Click any of them, and you will be able to configure the corresponding function. The detailed explanations for each submenu are provided below.
4.17.1 Time Setting
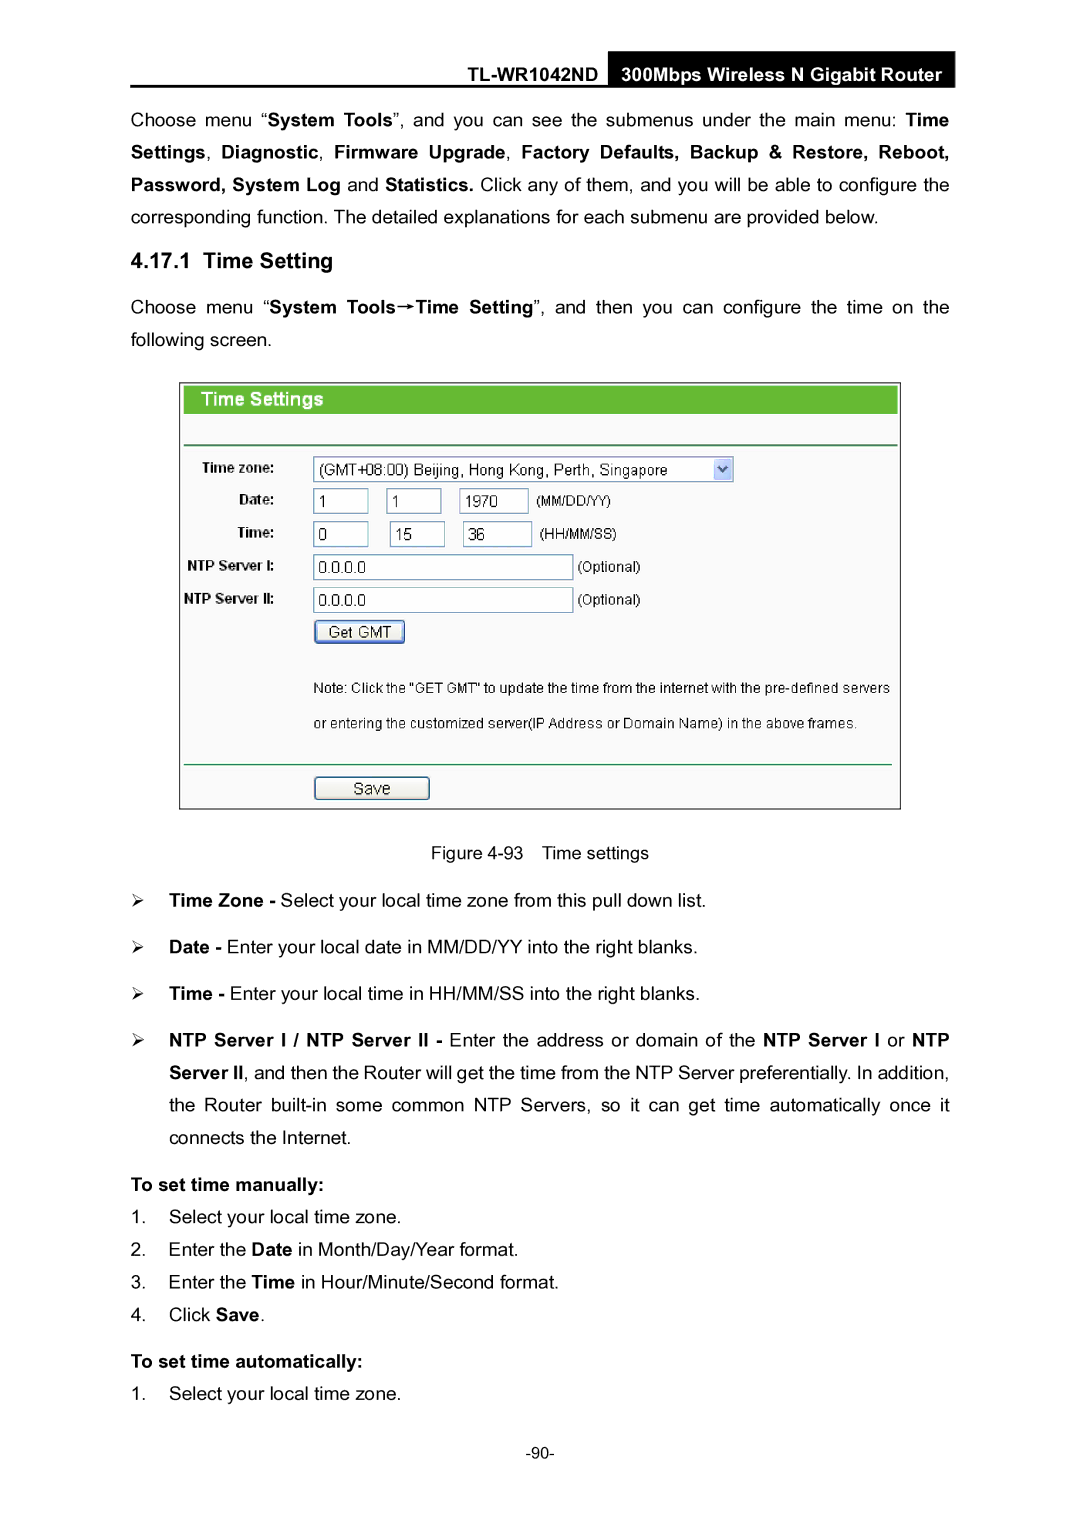
Choose menu “System Tools→Time Setting”, and then you can configure the time on the following screen.
Figure 4-93 Time settings
¾Time Zone - Select your local time zone from this pull down list.
¾Date - Enter your local date in MM/DD/YY into the right blanks.
¾Time - Enter your local time in HH/MM/SS into the right blanks.
¾NTP Server I / NTP Server II - Enter the address or domain of the NTP Server I or NTP Server II, and then the Router will get the time from the NTP Server preferentially. In addition, the Router
To set time manually:
1.Select your local time zone.
2.Enter the Date in Month/Day/Year format.
3.Enter the Time in Hour/Minute/Second format.
4.Click Save.
To set time automatically:
1.Select your local time zone.