Installing Standalone Units
Installing Standalone Units
Introduction | This section explains how to set up a 6500PLUS standalone enclosure. When you | ||
|
|
| receive the enclosure, it already contains a 6505PLUS, 6507PLUS, or 6525PLUS card. |
Unpacking |
| ||
Before you unpack the 6500 standalone enclosure, check the outside of the package. | |||
|
|
| If the package is damaged, contact the shipping agent. |
Site Preparation |
| ||
Install the standalone enclosure in a clean location free from shock, vibration, and | |||
|
|
| extremes of temperature and humidity. The site must meet the physical and |
|
|
| environmental requirements listed in Appendix B, Specifications. Be sure there is at |
|
|
| least 12 inches (30.5 cm) clearance at the rear of the unit for interface cabling and |
|
|
| ventilation. |
|
|
| Caution |
|
|
| Be sure that the standalone enclosure's air vents are uncovered. If the vents are |
|
|
| |
|
|
| covered, the unit could overheat. |
Example of |
| ||
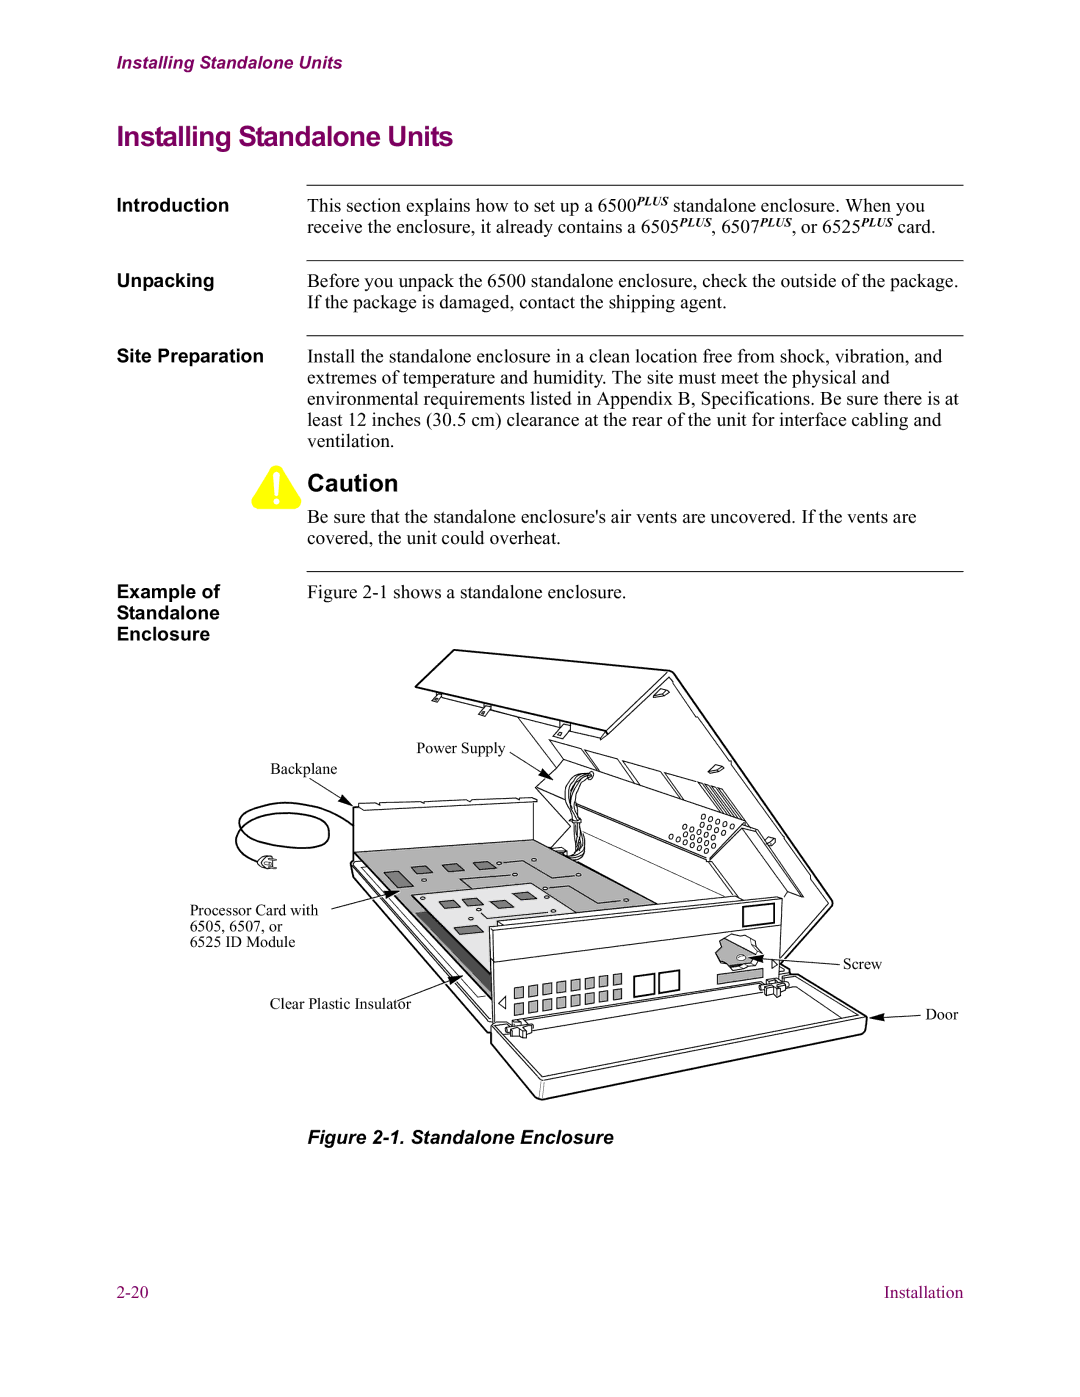
Figure | |||
Standalone |
| ||
Enclosure |
| ||
Power Supply
Backplane
Processor Card with
6505, 6507, or 6525 ID Module
![]()
![]()
![]()
![]()
![]()
![]() Screw
Screw
Clear Plastic Insulator
![]() Door
Door
Figure 2-1. Standalone Enclosure
Installation |
