Drawing Floor Plan (continued) |
| |
|
| |
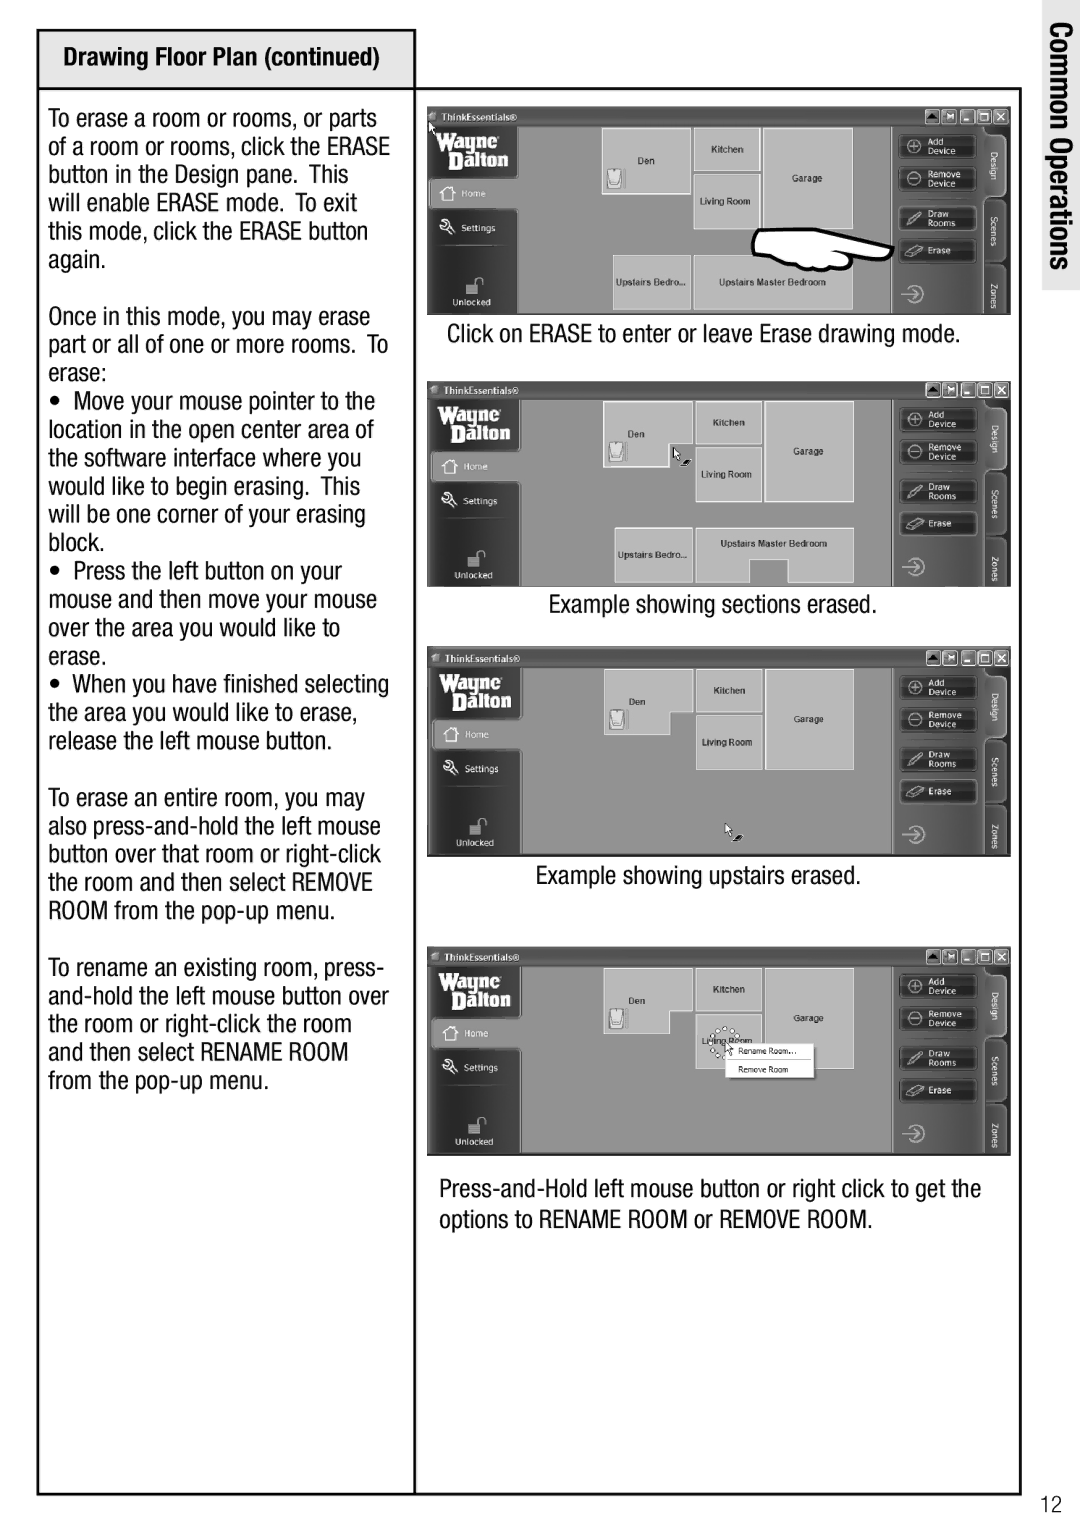
To erase a room or rooms, or parts |
| |
of a room or rooms, click the ERASE |
| |
button in the Design pane. This |
| |
will enable ERASE mode. To exit |
| |
this mode, click the ERASE button |
| |
again. |
| |
Once in this mode, you may erase | Click on ERASE to enter or leave Erase drawing mode. | |
part or all of one or more rooms. To | ||
| ||
erase: |
| |
• Move your mouse pointer to the |
| |
location in the open center area of |
| |
the software interface where you |
| |
would like to begin erasing. This |
| |
will be one corner of your erasing |
| |
block. |
| |
• Press the left button on your |
| |
mouse and then move your mouse | Example showing sections erased. | |
over the area you would like to |
| |
erase. |
| |
• When you have finished selecting |
| |
the area you would like to erase, |
| |
release the left mouse button. |
| |
To erase an entire room, you may |
| |
also |
| |
button over that room or | Example showing upstairs erased. | |
the room and then select REMOVE | ||
ROOM from the |
| |
To rename an existing room, press- |
| |
| ||
the room or |
| |
and then select RENAME ROOM |
| |
from the |
| |
| ||
| options to RENAME ROOM or REMOVE ROOM. | |
|
|
Common Operations
12