Remove/Replace Broken
Modules
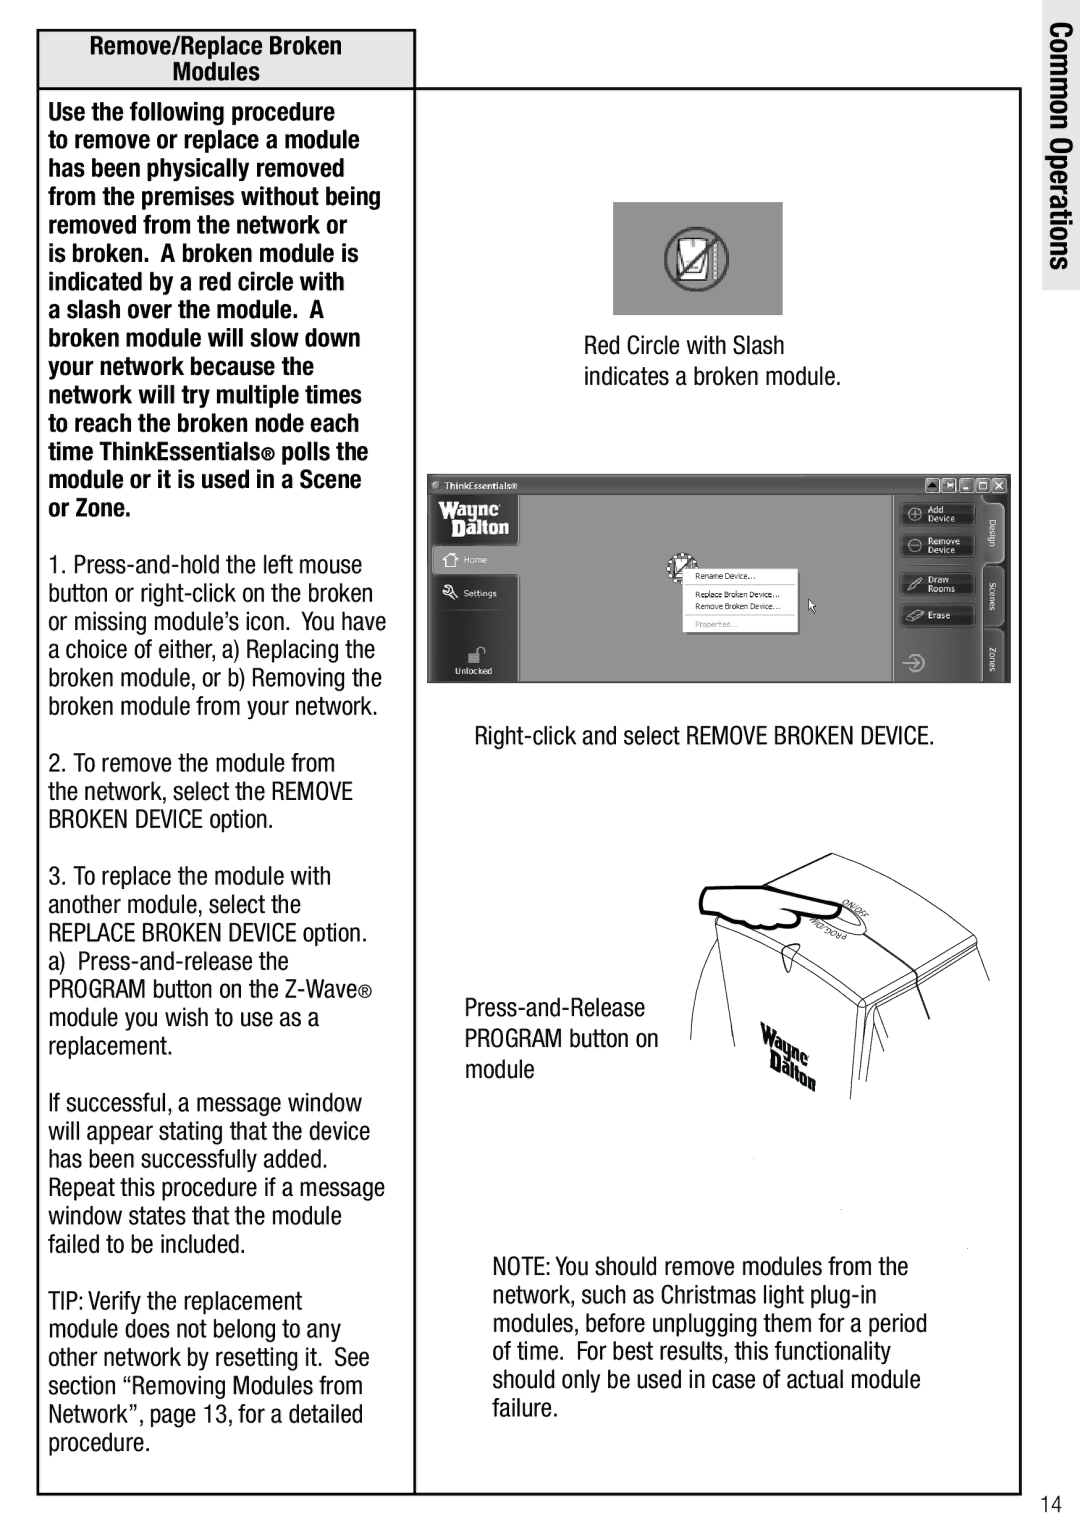
Use the following procedure to remove or replace a module has been physically removed from the premises without being removed from the network or is broken. A broken module is indicated by a red circle with
a slash over the module. A broken module will slow down your network because the network will try multiple times to reach the broken node each time ThinkEssentials® polls the module or it is used in a Scene or Zone.
1.
2.To remove the module from
the network, select the REMOVE BROKEN DEVICE option.
3.To replace the module with another module, select the REPLACE BROKEN DEVICE option. a)
If successful, a message window will appear stating that the device has been successfully added.
Repeat this procedure if a message window states that the module failed to be included.
TIP: Verify the replacement module does not belong to any other network by resetting it. See section “Removing Modules from Network”, page 13, for a detailed procedure.
Red Circle with Slash indicates a broken module.
Right-click and select REMOVE BROKEN DEVICE.
| O |
|
| N/ | |
|
| O |
|
| F |
M | F | |
I |
| |
| D |
|
| /. |
|
| G |
|
| O |
|
| RP |
|
NOTE: You should remove modules from the network, such as Christmas light
Common Operations
14