Adding Modules to the Network
(continued)
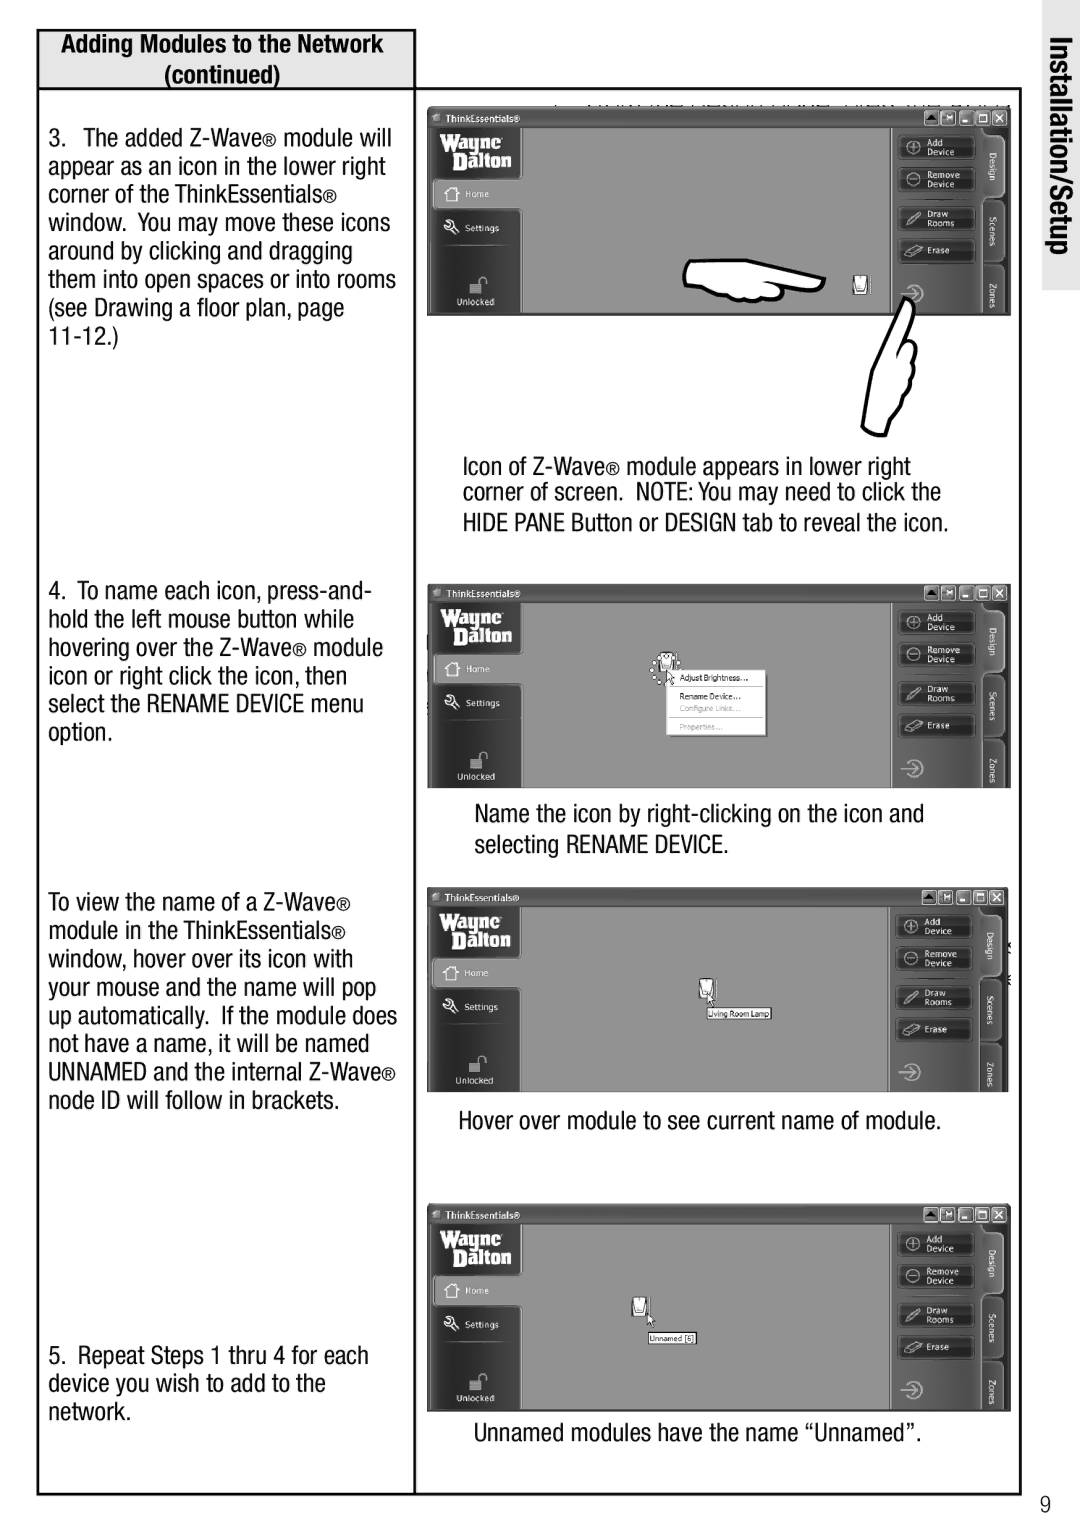
3.The added
4.To name each icon,
To view the name of a
5.Repeat Steps 1 thru 4 for each device you wish to add to the network.
| |
|
Icon of
HIDE PANE Button or DESIGN tab to reveal the icon.
Name the icon by
Hover over module to see current name of module.
Unnamed modules have the name “Unnamed”.
Installation/Setup
9