XW Solar Charge Controller Installation
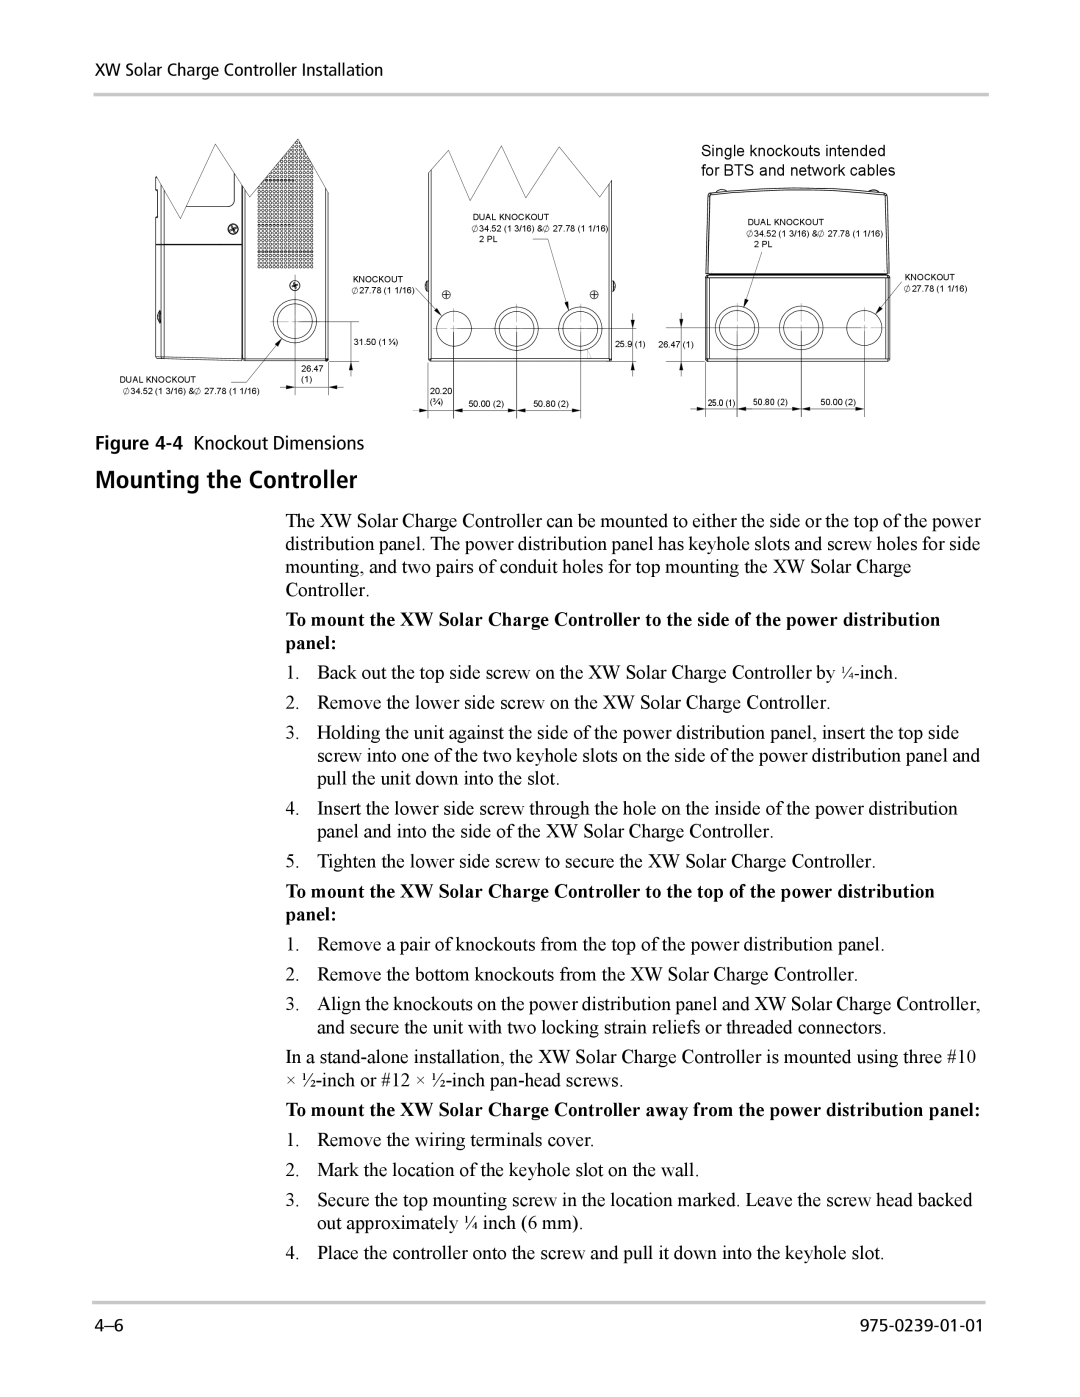
Single knockouts intended for BTS and network cables
| KNOCKOUT |
| 27.78 (1 1/16) |
| 31.50 (1 ¼) |
| 26.47 |
DUAL KNOCKOUT | (1) |
34.52 (1 3/16) & | 27.78 (1 1/16) |
Figure 4-4 Knockout Dimensions
Mounting the Controller
DUAL KNOCKOUT | DUAL KNOCKOUT | |
34.52 (1 3/16) & 27.78 (1 1/16) | ||
34.52 (1 3/16) & 27.78 (1 1/16) | ||
2 PL | ||
2 PL | ||
|
25.9 (1) | 26.47 (1) |
20.20 |
|
|
|
|
|
(¾) | 50.00 (2) | 50.80 (2) | 25.0 (1) | 50.80 (2) | 50.00 (2) |
KNOCKOUT ![]() 27.78 (1 1/16)
27.78 (1 1/16)
The XW Solar Charge Controller can be mounted to either the side or the top of the power distribution panel. The power distribution panel has keyhole slots and screw holes for side mounting, and two pairs of conduit holes for top mounting the XW Solar Charge Controller.
To mount the XW Solar Charge Controller to the side of the power distribution panel:
1.Back out the top side screw on the XW Solar Charge Controller by
2.Remove the lower side screw on the XW Solar Charge Controller.
3.Holding the unit against the side of the power distribution panel, insert the top side screw into one of the two keyhole slots on the side of the power distribution panel and pull the unit down into the slot.
4.Insert the lower side screw through the hole on the inside of the power distribution panel and into the side of the XW Solar Charge Controller.
5.Tighten the lower side screw to secure the XW Solar Charge Controller.
To mount the XW Solar Charge Controller to the top of the power distribution panel:
1.Remove a pair of knockouts from the top of the power distribution panel.
2.Remove the bottom knockouts from the XW Solar Charge Controller.
3.Align the knockouts on the power distribution panel and XW Solar Charge Controller, and secure the unit with two locking strain reliefs or threaded connectors.
In a
To mount the XW Solar Charge Controller away from the power distribution panel:
1.Remove the wiring terminals cover.
2.Mark the location of the keyhole slot on the wall.
3.Secure the top mounting screw in the location marked. Leave the screw head backed out approximately ¼ inch (6 mm).
4.Place the controller onto the screw and pull it down into the keyhole slot.