3With a dry
CAUTION: While cleaning the inside of the machine, be careful not to touch the transfer roller, located underneath the toner cartridge. Oil from your fingers can cause print scan quality problems.
4Locate the long strip of glass (LSU) inside the top of the toner cartridge compartment, and gently swab the glass to see if dirt turns the white cotton black.
5Reinsert the toner cartridge and close the front cover.
6 Plug in the power cord and turn the machine on.
Cleaning the drum
If there are streaks or spots on your print, the OPC drum of the toner cartridge may require cleaning.
1Before starting the cleaning procedure, make sure that paper is loaded in the machine.
2Press ![]() button until Maintenance appears on the top line of the display.
button until Maintenance appears on the top line of the display.
3Press ![]() button when Clean Drum appears.
button when Clean Drum appears.
8.2
Maintenance
The machine prints out a cleaning page. Toner particles on the drum surface are affixed to the paper.
4If the problem remains, repeat steps 1 through 3.
Cleaning the scan unit
Keeping the scan unit clean helps ensure the best possible copies. We suggest that you clean the scan unit at the start of each day and during the day, as needed.
1Slightly dampen a soft
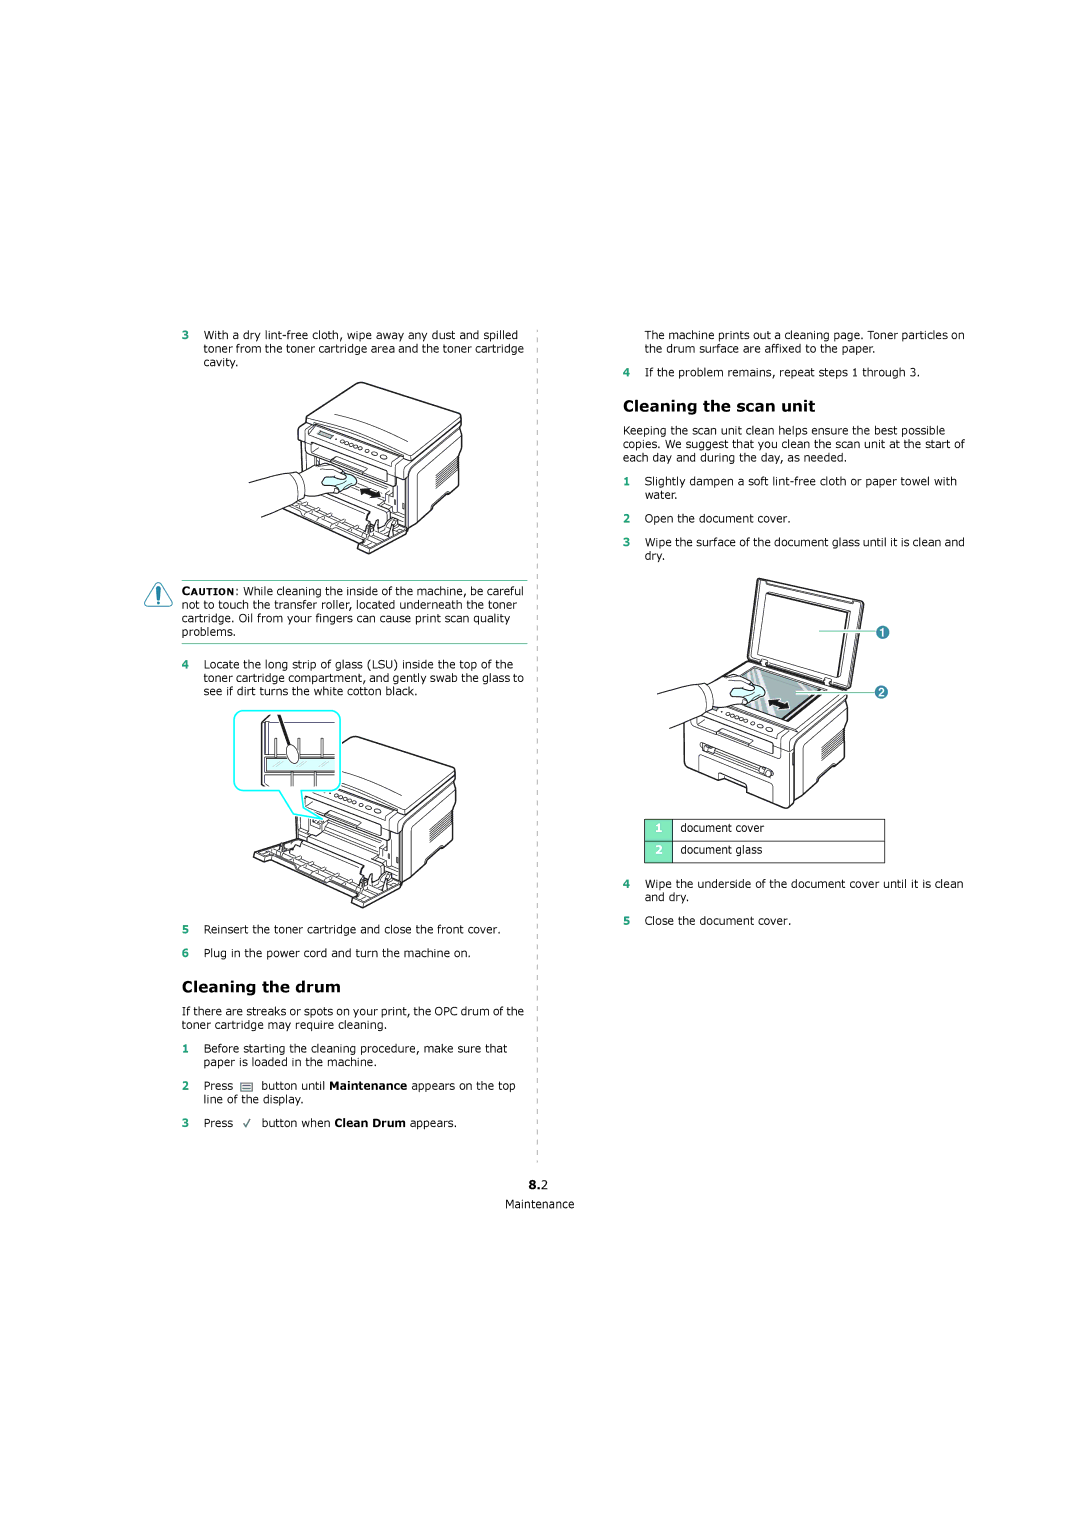
2Open the document cover.
3Wipe the surface of the document glass until it is clean and dry.
1document cover
2document glass
4Wipe the underside of the document cover until it is clean and dry.
5Close the document cover.