Using the Control Panel
Using the Control Panel
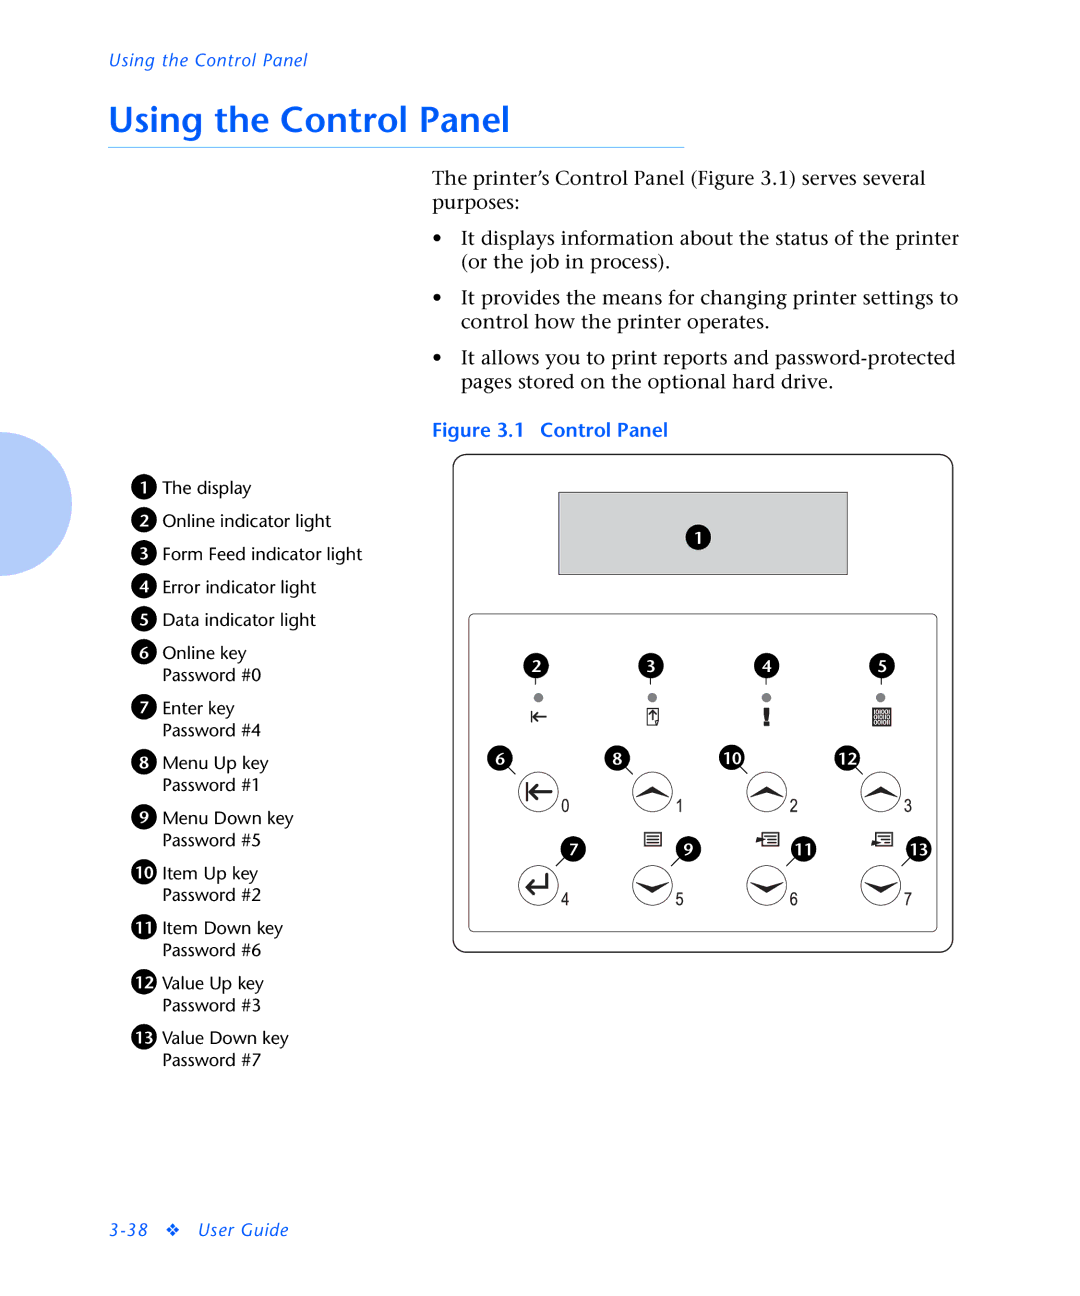
1The display
2Online indicator light
3Form Feed indicator light
4Error indicator light
5Data indicator light
6Online key Password #0
7Enter key Password #4
8Menu Up key Password #1
9Menu Down key Password #5
10Item Up key Password #2
11Item Down key Password #6
12Value Up key Password #3
13Value Down key Password #7
The printer’s Control Panel (Figure 3.1) serves several purposes:
•It displays information about the status of the printer (or the job in process).
•It provides the means for changing printer settings to control how the printer operates.
•It allows you to print reports and
Figure 3.1 Control Panel
1
2 | 3 | 4 | 5 |
6 | 8 | 10 | 12 |
7 | 9 | 11 | 13 |