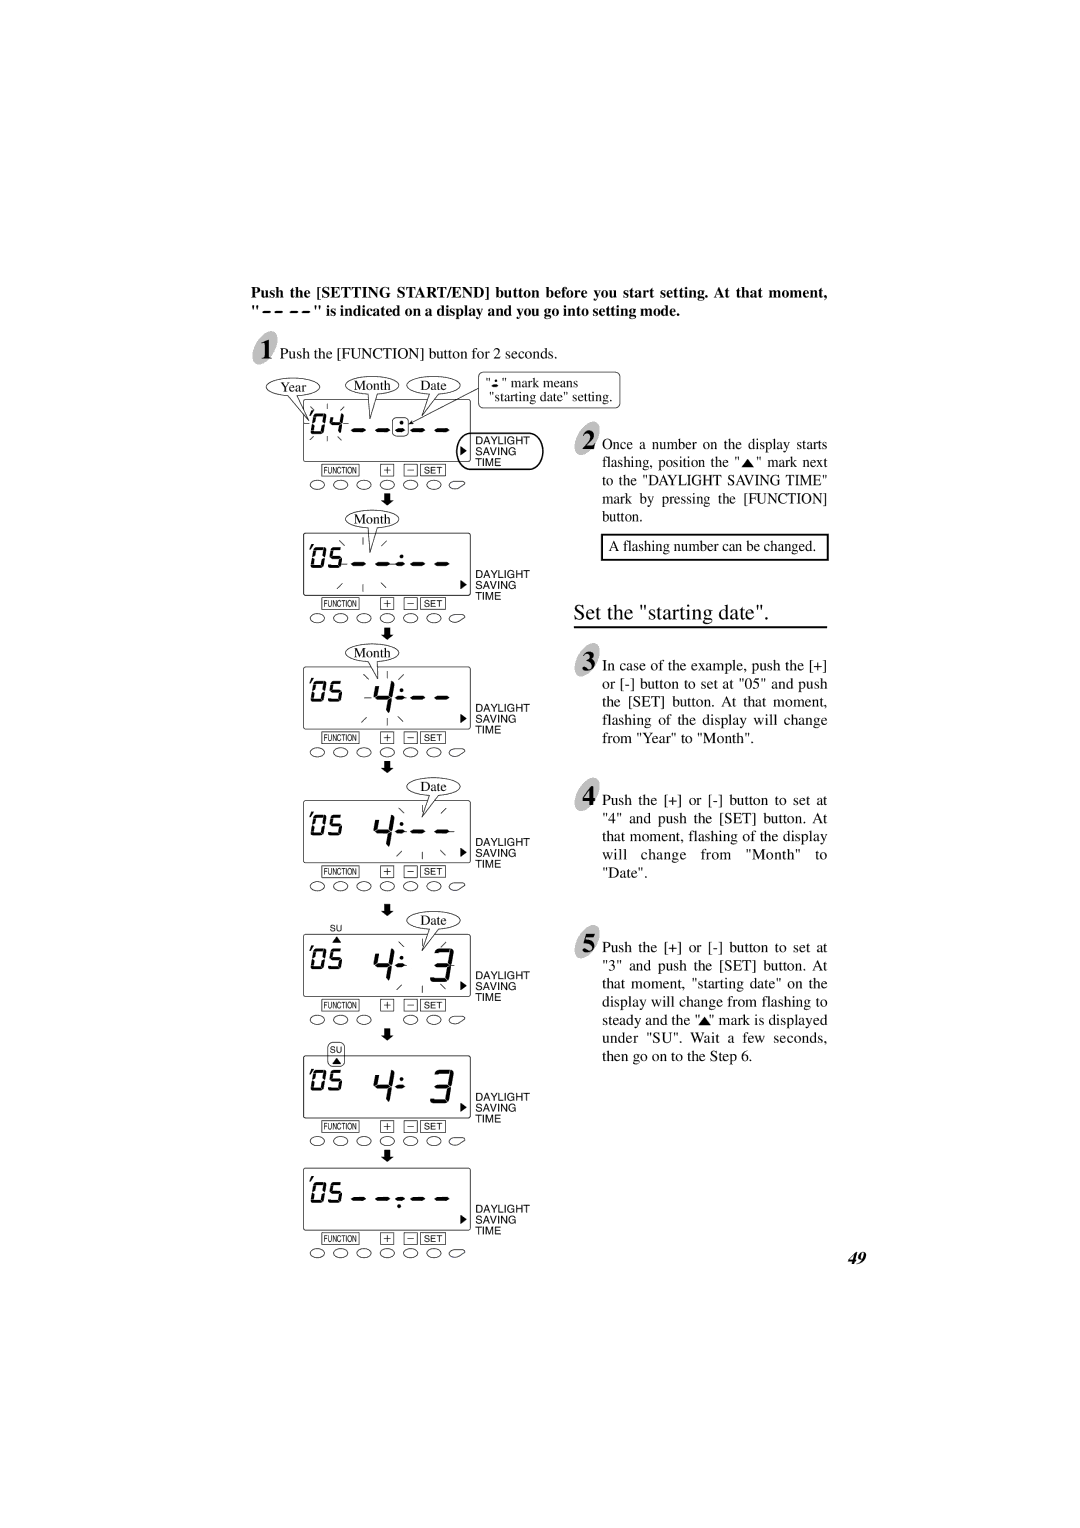
Push the [SETTING START/END] button before you start setting. At that moment,
"![]()
![]()
![]()
![]() " is indicated on a display and you go into setting mode. 1 Push the [FUNCTION] button for 2 seconds.
" is indicated on a display and you go into setting mode. 1 Push the [FUNCTION] button for 2 seconds.
Year Month
Date
"![]() " mark means "starting date" setting.
" mark means "starting date" setting.
FUNCTION
Month
SET
DAYLIGHT SAVING TIME
DAYLIGHT SAVING TIME
2 Once a number on the display starts flashing, position the "![]() " mark next to the "DAYLIGHT SAVING TIME" mark by pressing the [FUNCTION] button.
" mark next to the "DAYLIGHT SAVING TIME" mark by pressing the [FUNCTION] button.
A flashing number can be changed.
FUNCTION
Month
FUNCTION
FUNCTION
SU
FUNCTION
SU
FUNCTION
SET
SET
Date
SET
Date
SET
SET
DAYLIGHT SAVING TIME
DAYLIGHT SAVING TIME
DAYLIGHT SAVING TIME
DAYLIGHT SAVING TIME
Set the "starting date".
3 In case of the example, push the [+] or
4 Push the [+] or
5 Push the [+] or
FUNCTION
SET
DAYLIGHT SAVING TIME
49