|
| SU MO | TU WE TH |
| FR SA | ||||||||
|
|
|
|
|
|
|
|
|
|
|
|
| WEEKLY |
|
|
|
|
|
|
|
|
|
|
|
|
| PROGRAM |
| AM |
|
|
|
|
|
|
|
| FOR EXT. | |||
|
|
|
|
|
|
|
|
|
|
|
|
| SIGNAL |
| 2 |
|
| 3 |
| 5 |
|
| 7 |
| |||
|
|
|
|
|
|
| |||||||
|
|
|
|
|
|
|
|
|
|
|
|
|
|
|
| FUNCTION |
|
|
|
|
|
| SET |
|
| ||
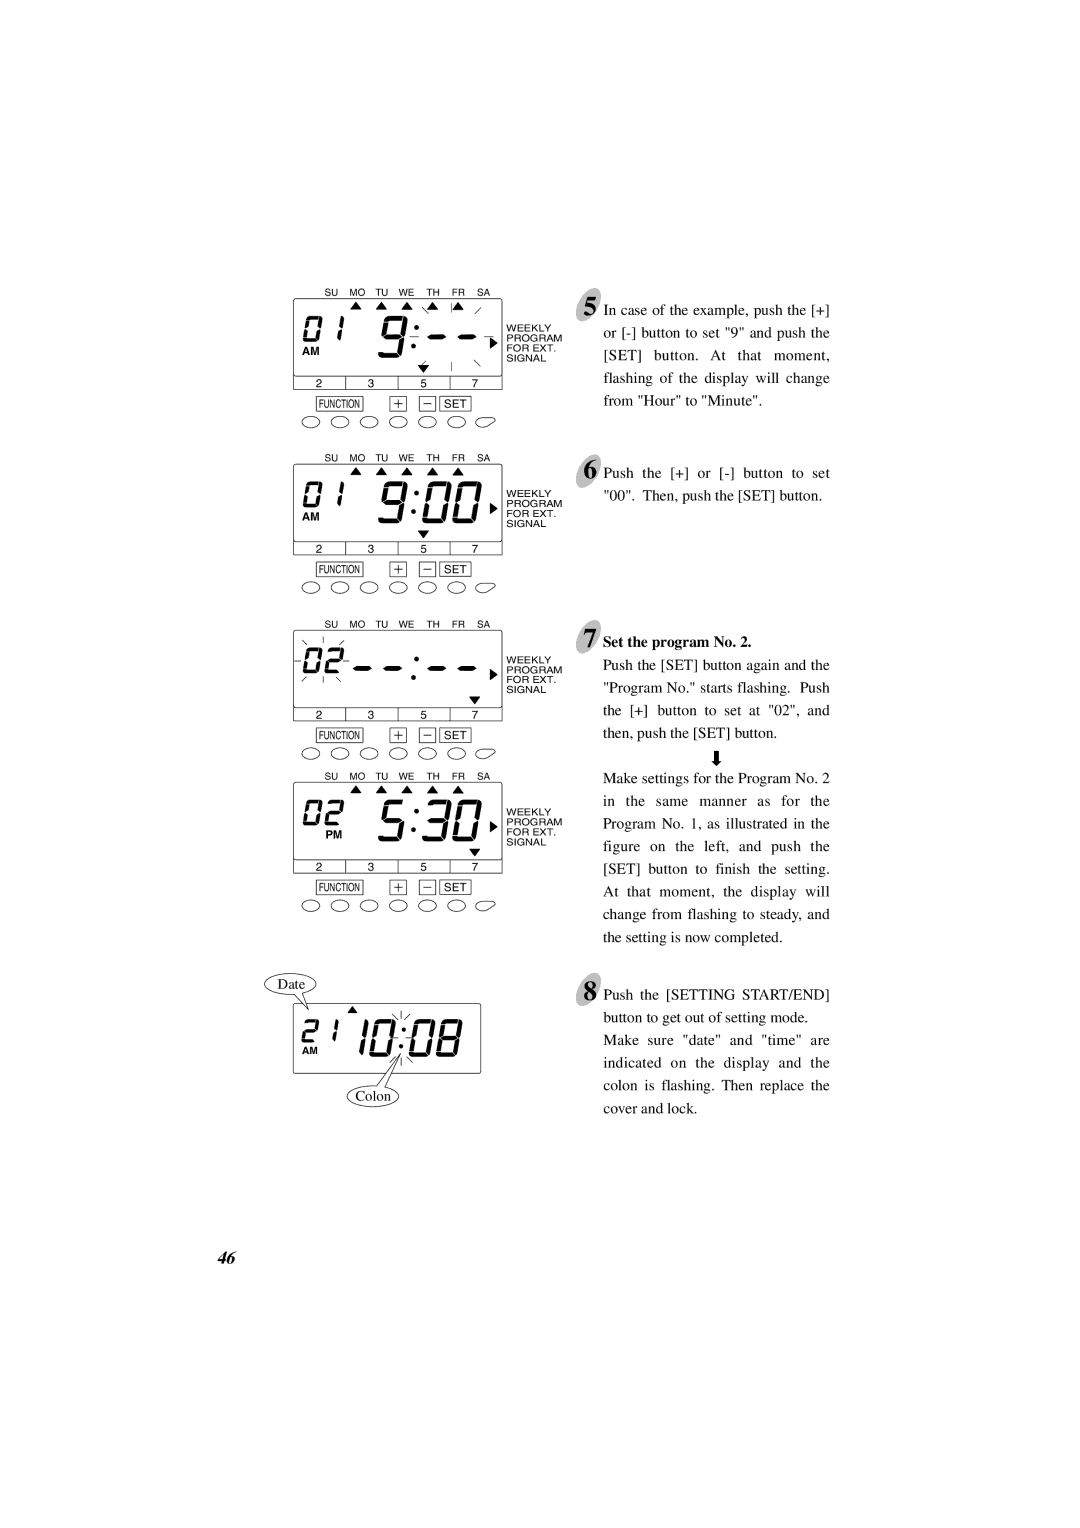
5 In case of the example, push the [+] or
SU | MO | TU WE | TH | FR | SA | |
|
|
|
|
|
| WEEKLY |
|
|
|
|
|
| PROGRAM |
AM |
|
|
|
|
| FOR EXT. |
|
|
|
|
|
| SIGNAL |
2 |
| 3 | 5 |
|
| 7 |
FUNCTION |
|
|
| SET |
| |
SU | MO | TU WE | TH | FR | SA | |
|
|
|
|
|
| WEEKLY |
|
|
|
|
|
| PROGRAM |
|
|
|
|
|
| FOR EXT. |
|
|
|
|
|
| SIGNAL |
2 |
| 3 | 5 |
|
| 7 |
FUNCTION |
|
|
| SET |
| |
SU | MO | TU WE | TH | FR | SA | |
|
|
|
|
|
| WEEKLY |
|
|
|
|
|
| PROGRAM |
PM |
|
|
|
|
| FOR EXT. |
|
|
|
|
|
| SIGNAL |
2 |
| 3 | 5 |
|
| 7 |
FUNCTION |
|
|
| SET |
| |
6 Push the [+] or [-] button to set "00". Then, push the [SET] button.
7 Set the program No. 2.
Push the [SET] button again and the "Program No." starts flashing. Push the [+] button to set at "02", and then, push the [SET] button.
Make settings for the Program No. 2 in the same manner as for the Program No. 1, as illustrated in the figure on the left, and push the [SET] button to finish the setting. At that moment, the display will change from flashing to steady, and the setting is now completed.
Date
AM
Colon
8 Push the [SETTING START/END] button to get out of setting mode. Make sure "date" and "time" are indicated on the display and the colon is flashing. Then replace the cover and lock.
46
