Setting Pay Period and Pay Period Ending Date
The clock default is "weekly pay period".
All time cards will be reset automatically after pay ending date.
You will not be allowed to change pay period while in a current pay period.
Error message
Push the [SETTING START/END] button before you start setting. At that moment,
"![]()
![]() " is indicated on a display and you go into setting mode.
" is indicated on a display and you go into setting mode.
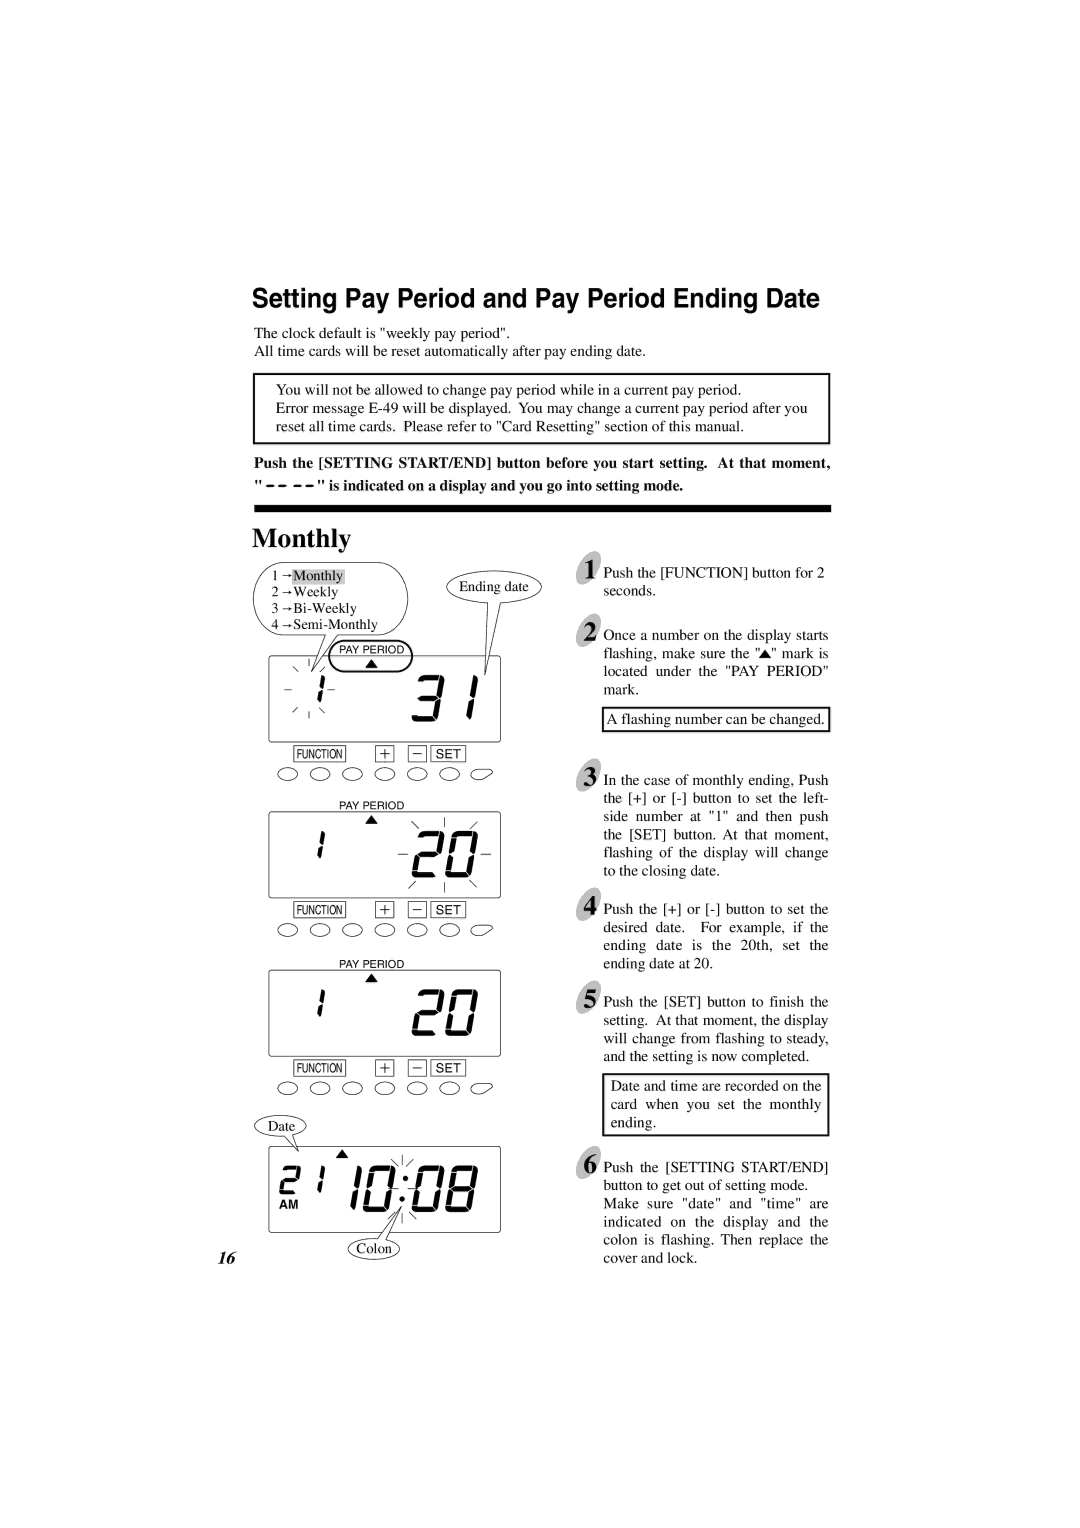
Monthly
1![]() Monthly
Monthly
2![]() Weekly
Weekly
3![]() Bi-Weekly
Bi-Weekly
4![]() Semi-Monthly
Semi-Monthly
PAY PERIOD
FUNCTION
PAY PERIOD
FUNCTION
PAY PERIOD
FUNCTION
Date
Ending date
SET
SET
SET
1 Push the [FUNCTION] button for 2 seconds.
2 Once a number on the display starts flashing, make sure the "![]() " mark is located under the "PAY PERIOD" mark.
" mark is located under the "PAY PERIOD" mark.
A flashing number can be changed.
3 In the case of monthly ending, Push the [+] or
4 Push the [+] or
5 Push the [SET] button to finish the setting. At that moment, the display will change from flashing to steady, and the setting is now completed.
Date and time are recorded on the card when you set the monthly ending.
6 Push the [SETTING START/END]
AM
button to get out of setting mode. Make sure "date" and "time" are indicated on the display and the colon is flashing. Then replace the
16
Colon
cover and lock.