Semi-Monthly
1![]() Monthly
Monthly
2![]() Weekly
Weekly
3![]() Bi-Weekly
Bi-Weekly
4![]() Semi-Monthly
Semi-Monthly
PAY PERIOD
FUNCTION
The1st
ending date
The 2nd
ending date
SET
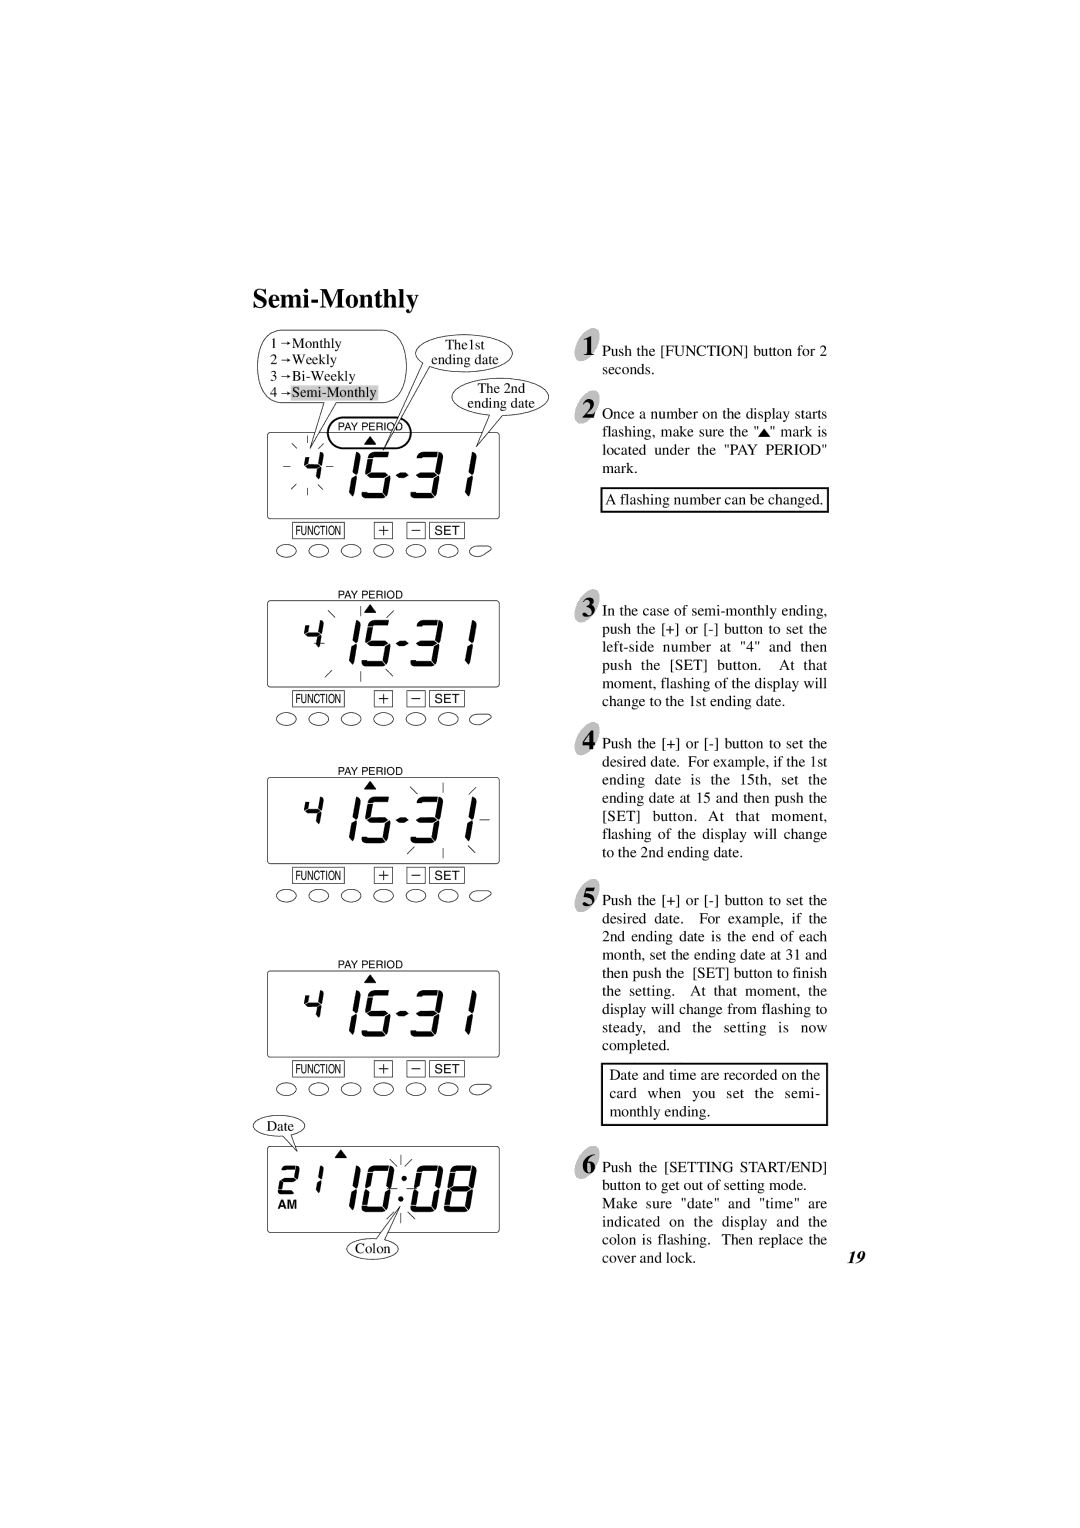
1 Push the [FUNCTION] button for 2 seconds.
2 Once a number on the display starts flashing, make sure the "![]() " mark is located under the "PAY PERIOD" mark.
" mark is located under the "PAY PERIOD" mark.
A flashing number can be changed.
PAY PERIOD
FUNCTIONSET
PAY PERIOD
FUNCTIONSET
PAY PERIOD
FUNCTION |
|
| SET |
|
Date
AM
Colon
3 In the case of |
|
push the [+] or |
|
| |
push the [SET] button. At that |
|
moment, flashing of the display will |
|
change to the 1st ending date. |
|
4 Push the [+] or |
|
desired date. For example, if the 1st |
|
ending date is the 15th, set the |
|
ending date at 15 and then push the |
|
[SET] button. At that moment, |
|
flashing of the display will change |
|
to the 2nd ending date. |
|
5 Push the [+] or |
|
desired date. For example, if the |
|
2nd ending date is the end of each |
|
month, set the ending date at 31 and |
|
then push the [SET] button to finish |
|
the setting. At that moment, the |
|
display will change from flashing to |
|
steady, and the setting is now |
|
completed. |
|
Date and time are recorded on the |
|
card when you set the semi- |
|
monthly ending. |
|
6 Push the [SETTING START/END] |
|
button to get out of setting mode. |
|
Make sure "date" and "time" are |
|
indicated on the display and the |
|
colon is flashing. Then replace the | 19 |
cover and lock. |