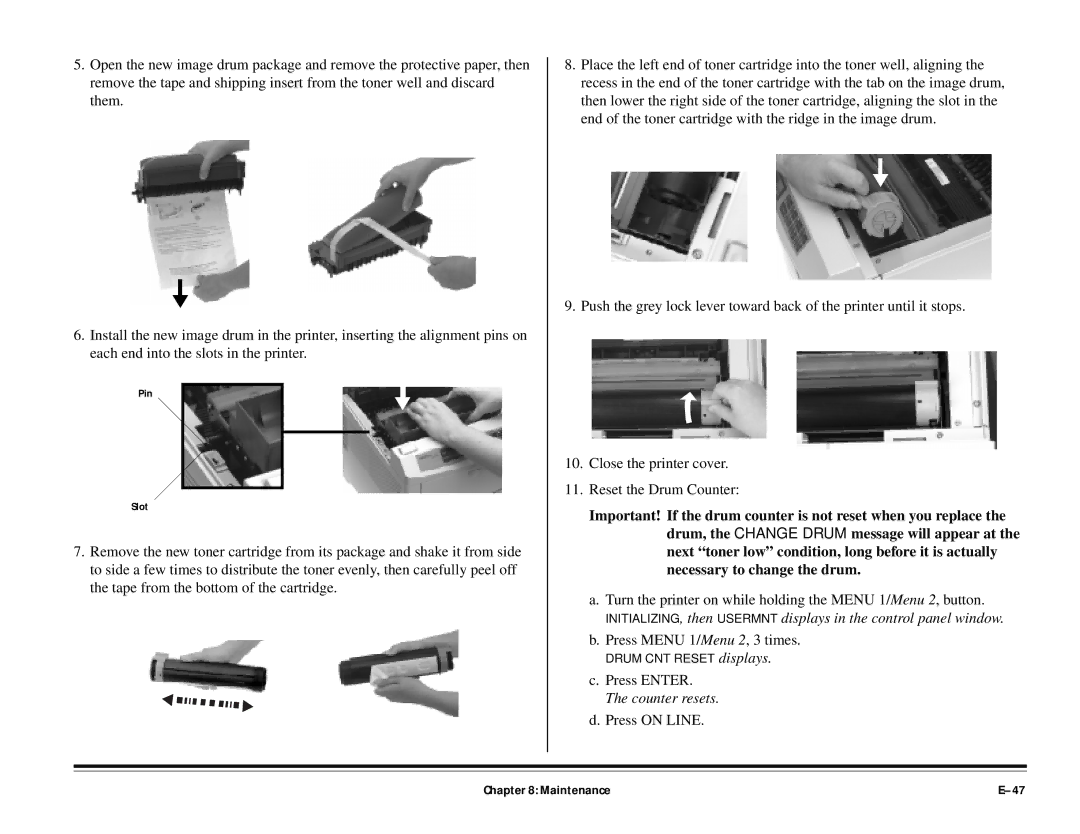
5.Open the new image drum package and remove the protective paper, then remove the tape and shipping insert from the toner well and discard them.
6.Install the new image drum in the printer, inserting the alignment pins on each end into the slots in the printer.
Pin
Slot
7.Remove the new toner cartridge from its package and shake it from side to side a few times to distribute the toner evenly, then carefully peel off the tape from the bottom of the cartridge.
8.Place the left end of toner cartridge into the toner well, aligning the recess in the end of the toner cartridge with the tab on the image drum, then lower the right side of the toner cartridge, aligning the slot in the end of the toner cartridge with the ridge in the image drum.
9. Push the grey lock lever toward back of the printer until it stops.
10.Close the printer cover.
11.Reset the Drum Counter:
Important! If the drum counter is not reset when you replace the drum, the CHANGE DRUM message will appear at the next “toner low” condition, long before it is actually necessary to change the drum.
a.Turn the printer on while holding the MENU 1/Menu 2, button.
INITIALIZING, then USERMNT displays in the control panel window.
b.Press MENU 1/Menu 2, 3 times.
displays.
c.Press ENTER. The counter resets.
d.Press ON LINE.
Chapter 8: Maintenance |