Detailed instructions for printing documents
If your document is not standard, follow these steps:
1If you haven’t already selected the Color StyleWriter 4500 in the Chooser, do so now.
You already selected the Color StyleWriter 4500 in Chapter 1, and if it’s the only printer you ever use, you won’t need to do it again. If you do need to switch, see “Switching Between Printers,” later in this chapter.
2Load the paper, envelopes, or other materials into the printer, as described in Chapter 1.
Remember to adjust the external paper selector before filling the sheet feeder.
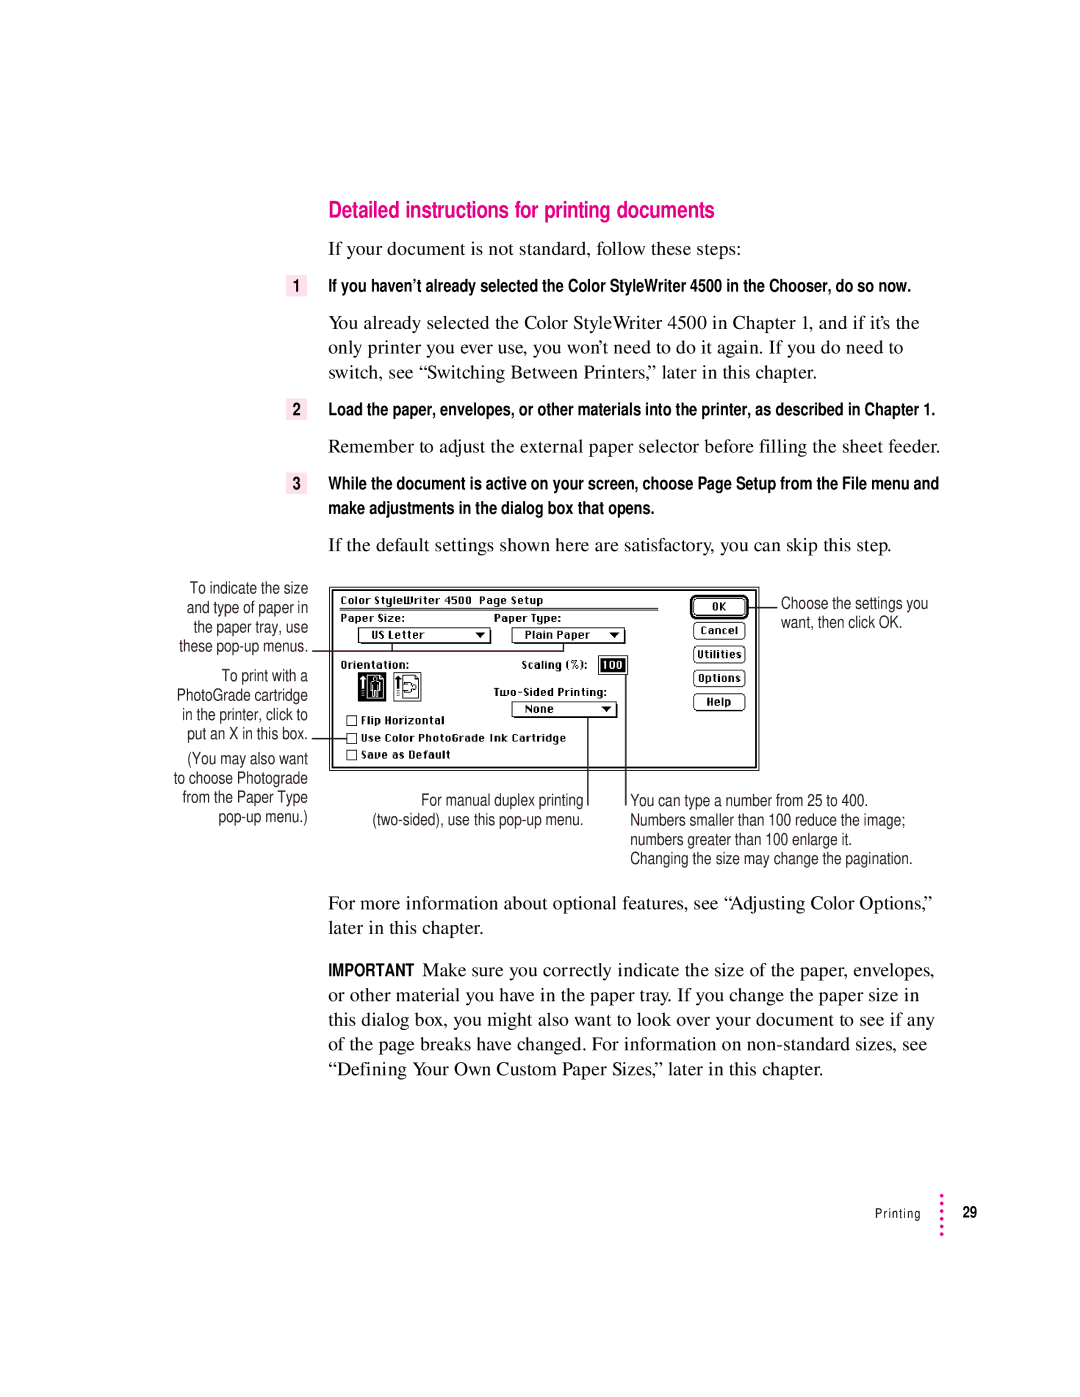
3While the document is active on your screen, choose Page Setup from the File menu and make adjustments in the dialog box that opens.
To indicate the size and type of paper in the paper tray, use these
To print with a PhotoGrade cartridge in the printer, click to put an X in this box.
(You may also want to choose Photograde from the Paper Type
If the default settings shown here are satisfactory, you can skip this step.
Choose the settings you want, then click OK.
For manual duplex printing |
|
|
| You can type a number from 25 to 400. |
|
|
| ||
|
| |||
|
|
| Numbers smaller than 100 reduce the image; | |
|
|
|
| numbers greater than 100 enlarge it. |
|
|
|
| Changing the size may change the pagination. |
For more information about optional features, see “Adjusting Color Options,” later in this chapter.
IMPORTANT Make sure you correctly indicate the size of the paper, envelopes, or other material you have in the paper tray. If you change the paper size in this dialog box, you might also want to look over your document to see if any of the page breaks have changed. For information on
Printing ![]() 29
29