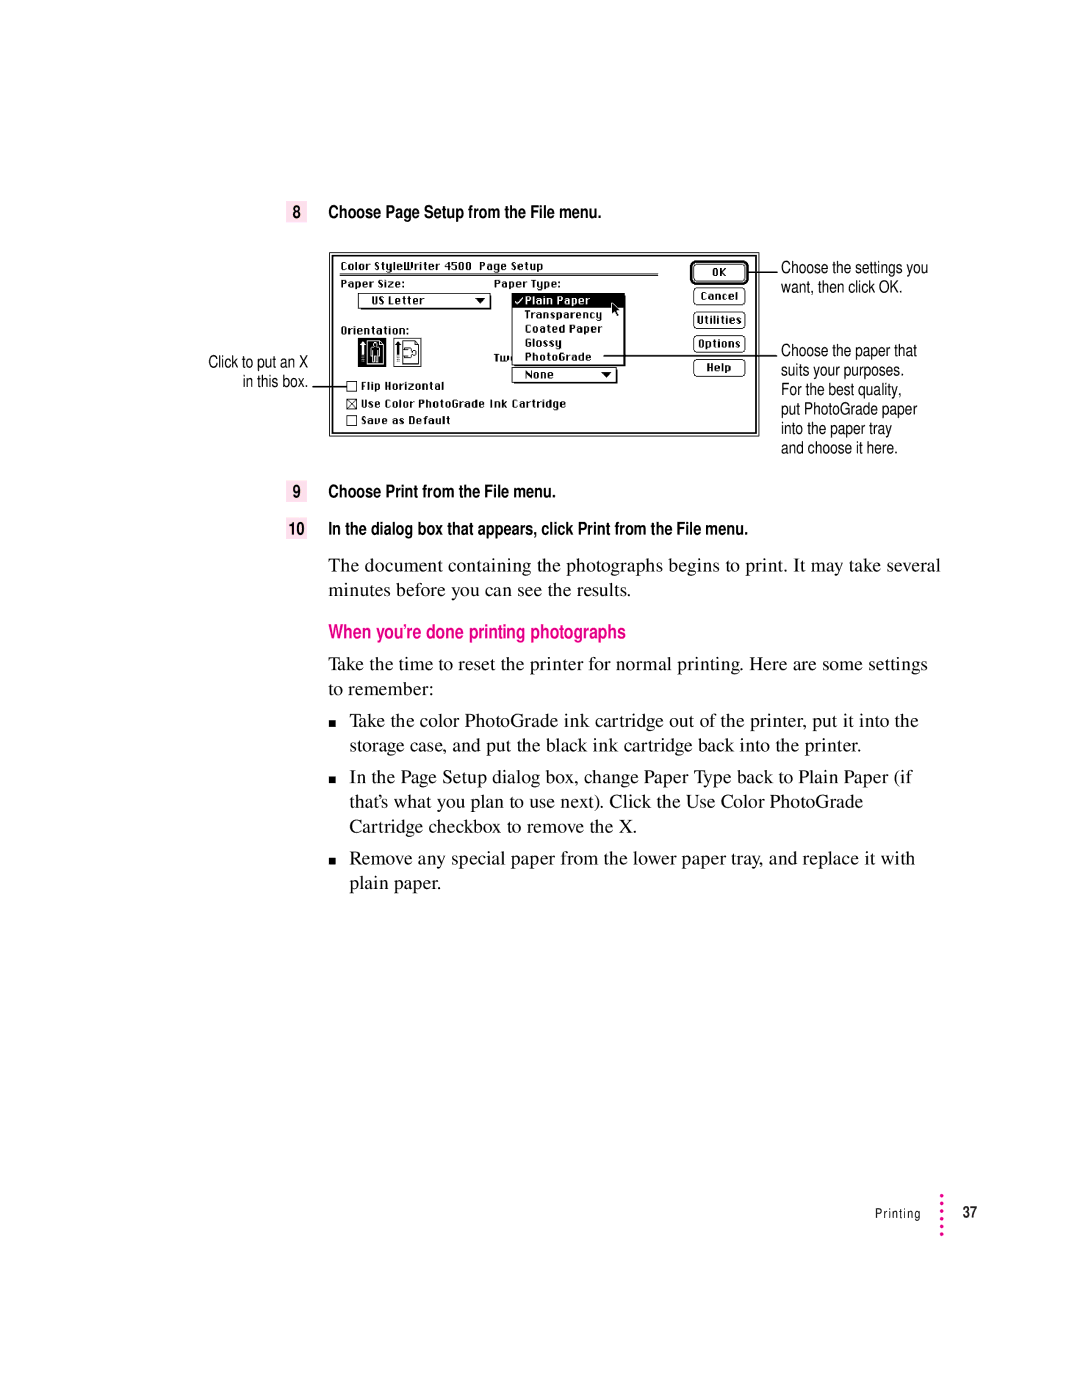
8 Choose Page Setup from the File menu.
Click to put an X in this box.
Choose the settings you want, then click OK.
Choose the paper that suits your purposes. For the best quality, put PhotoGrade paper into the paper tray and choose it here.
9 Choose Print from the File menu.
10In the dialog box that appears, click Print from the File menu.
The document containing the photographs begins to print. It may take several minutes before you can see the results.
When you’re done printing photographs
Take the time to reset the printer for normal printing. Here are some settings to remember:
m Take the color PhotoGrade ink cartridge out of the printer, put it into the storage case, and put the black ink cartridge back into the printer.
m In the Page Setup dialog box, change Paper Type back to Plain Paper (if that’s what you plan to use next). Click the Use Color PhotoGrade Cartridge checkbox to remove the X.
m Remove any special paper from the lower paper tray, and replace it with plain paper.
Printing  37
37