Setting Up Your Printer
Important safety instructions
Watch for these situations, and if one occurs pull the plug
Unpacking the printer
Remove the packing material
Plugging in the printer
Connecting the printer directly to your computer
Connecting to a LocalTalk network optional
Power Macintosh users and virtual memory
Turning the printer on and off
Installing the ink cartridges
For the printer to work, you must install two ink cartridges
Storing the ink cartridge you aren’t using
Close the printer’s front cover
Installing your printer software
Using the Minimal Printer Software floppy disk
Using the Apple Printer Software Collection CD-ROM
Installer dialog box, click Install
Installation troubleshooting
More information about the Installer program
Chapter
Finally, click to make AppleTalk active
Special information for PowerBook owners
PowerBook computers with one serial port
PowerBook computers with two serial ports
Slide the paper adjusters out as far as you can
Loading paper into the paper tray
Load the paper into the lower tray, print side down
Aligning the ink cartridges
Examine the patterns that appear on the printed
Printing the sample
To see what your printer can do, print the demonstration
Using onscreen help
Tips for using CSW 4000 Series Printer Guide
Using the electronic user’s manual
Printing
Planning documents with the Color StyleWriter 4500 in mind
Printing a document
Quick instructions for printing standard documents
Detailed instructions for printing documents
For manual duplex printing
Item in dialog box What you use it for
Printing while you use your computer
Monitoring and controlling background printing
Documents waiting to print
Adjusting color options
To adjust the way colors are printed, follow these steps
Printing a photograph
Open the top cover
Close the printer’s cover
When you’re done printing photographs
Printing a banner
Estimate how many sheets your banner needs to print
Chapter
When you’re done printing banners
Printing envelopes
Single business-size envelopes
Choose Print from the File menu
Stack of envelopes
If the envelopes are thick, reduce the number in the stack
When you’re done printing envelopes
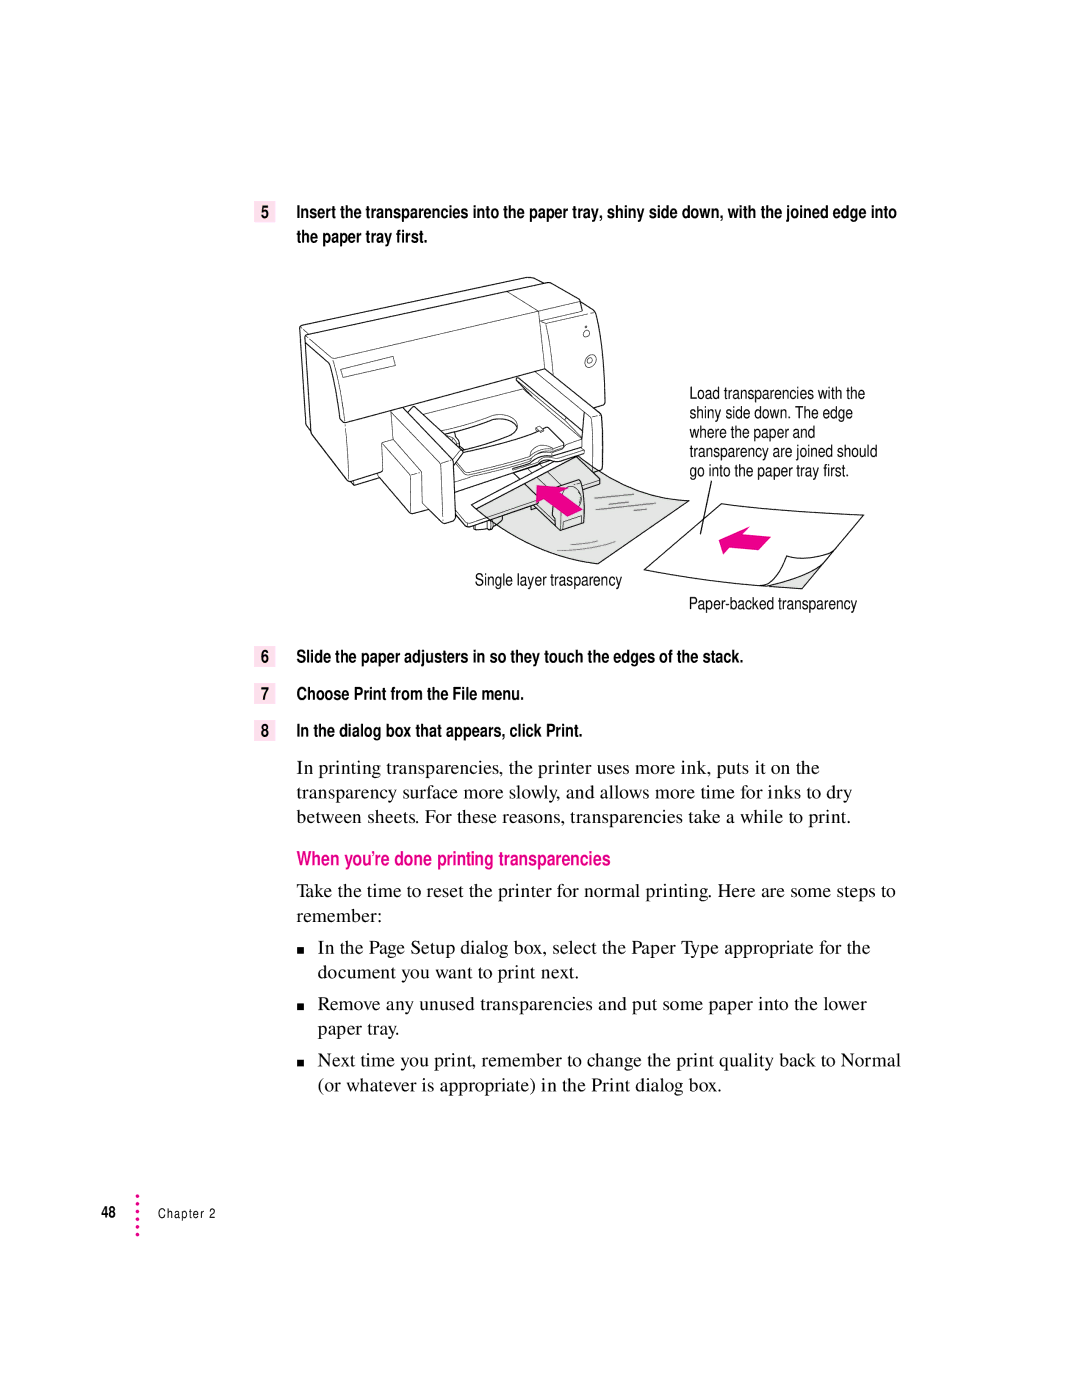
Printing transparencies
When you’re done printing transparencies
Printing labels
For best results, use labels designed for ink-jet printers
When you’re done printing labels
You can insert up to 25 sheets of labels
Printing index cards and postcards
Chapter
When you’re done printing index cards or postcards
Manual duplex printing two-sided
Remove any paper from the upper tray
When you’re done with manual duplex printing two-sided
If you’re using transparencies, put them in rough side down
Printing a flipped document
When you’re done printing flipped documents
Defining your own custom paper sizes
If the paper is shorter than
Specify the size in inches or centimeters
Page
Choosing print materials
Plain paper
Apple Color Ink-Jet Premium Coated Paper
Apple Color Ink-Jet Glossy Paper
Apple Color Ink-Jet PhotoGrade Paper
Apple Color Ink-Jet Banner Paper
Apple Color Ink-Jet Transparency Film
Labels
Index cards and postcards
Materials you can print on
Print material
Quality
Speed
Cost
Maintaining Your Printer
Replacing ink cartridges
Cleaning the outside of the printer
Troubleshooting
Safety precautions
Installation is unsuccessful
Chooser doesn’t show the Color SW 4000 Series icon
For more details about fonts, see Appendix B
Computer crashes while attempting to print
Computer doesn’t recognize the Color StyleWriter
PowerBook has trouble printing to the Color StyleWriter
Lights indicate a problem
Printer seems slow
Paper is jammed
Paper or envelopes feed improperly
Color StyleWriter 4500 won’t print a particular document
Printer acts as if it’s working, but nothing is printed on
Symptoms that indicate a memory problem
If you have a memory problem, try the following
Messages appear on your computer screen
Memory is low
Documents did not print as expected
Text appears in the Geneva font or prints jagged
Graphic images appear jagged
Breaks change unexpectedly
Prints off center
Print quality is poor
Everything prints backwards
Ink smears when rubbed
Image is too light or too dark
Thin lines fade or break up
Printing appears on only part of the paper
Colors don’t look right on the printed
Unwanted horizontal white lines or stripes appear
Cleaning the cartridges
Image prints wavy or distorted
Stains appear on printed pages
Ink cartridges run out of ink too quickly
Page
General specifications
Appendix a Technical Information
Apple System/Peripheral-8 cable
Height 7.9 199 mm Width 17.2 436 mm Depth 16 405 mm
Power consumption
Power requirements for AC power adapter
Operating environment
Storage environment
Apple printer supplies and accessories
Where can you obtain these supplies and accessories?
Page
Appendix B Using Fonts With the Color StyleWriter
Kinds of fonts
TrueType fonts
Bitmapped fonts
PostScript fonts
Using Fonts With the Color StyleWriter
How TrueType fonts work with other kinds of fonts
TrueType and bitmapped fonts
TrueType and PostScript fonts
Keeping two font versions available
How the computer looks for fonts
Where fonts are stored
Suitcases
Styled fonts
Common questions about fonts
What does the term Apple classic fonts mean?
What is font substitution?
Appendix C Font List
Total
Appendix D Using ColorSync
Problem that ColorSync solves
How ColorSync works
111
Setting up ColorSync
Setting the ColorSync System Profile
ColorSync System Profile control panel appears
Setting other ColorSync profiles
Tips for best results
For more information
Publications
Internet Resources
Index
Color StyleWriter 2500 Disk 1
Index
Can’t Find It?
Index
Can’t Find It?
Index
Can’t Find It?
Index
Can’t Find It?
Index
Color StyleWriter
Apple Computer, Inc
Contents
Printing
Tips on Paper, Quality, Speed, and Cost
Maintaining Your Printer
Troubleshooting
Using ColorSync
107
109 Index
Communications regulation information
Vcci Class 2 statement
Page
Main features of the Color StyleWriter
Welcome
System requirements

