Menu Options
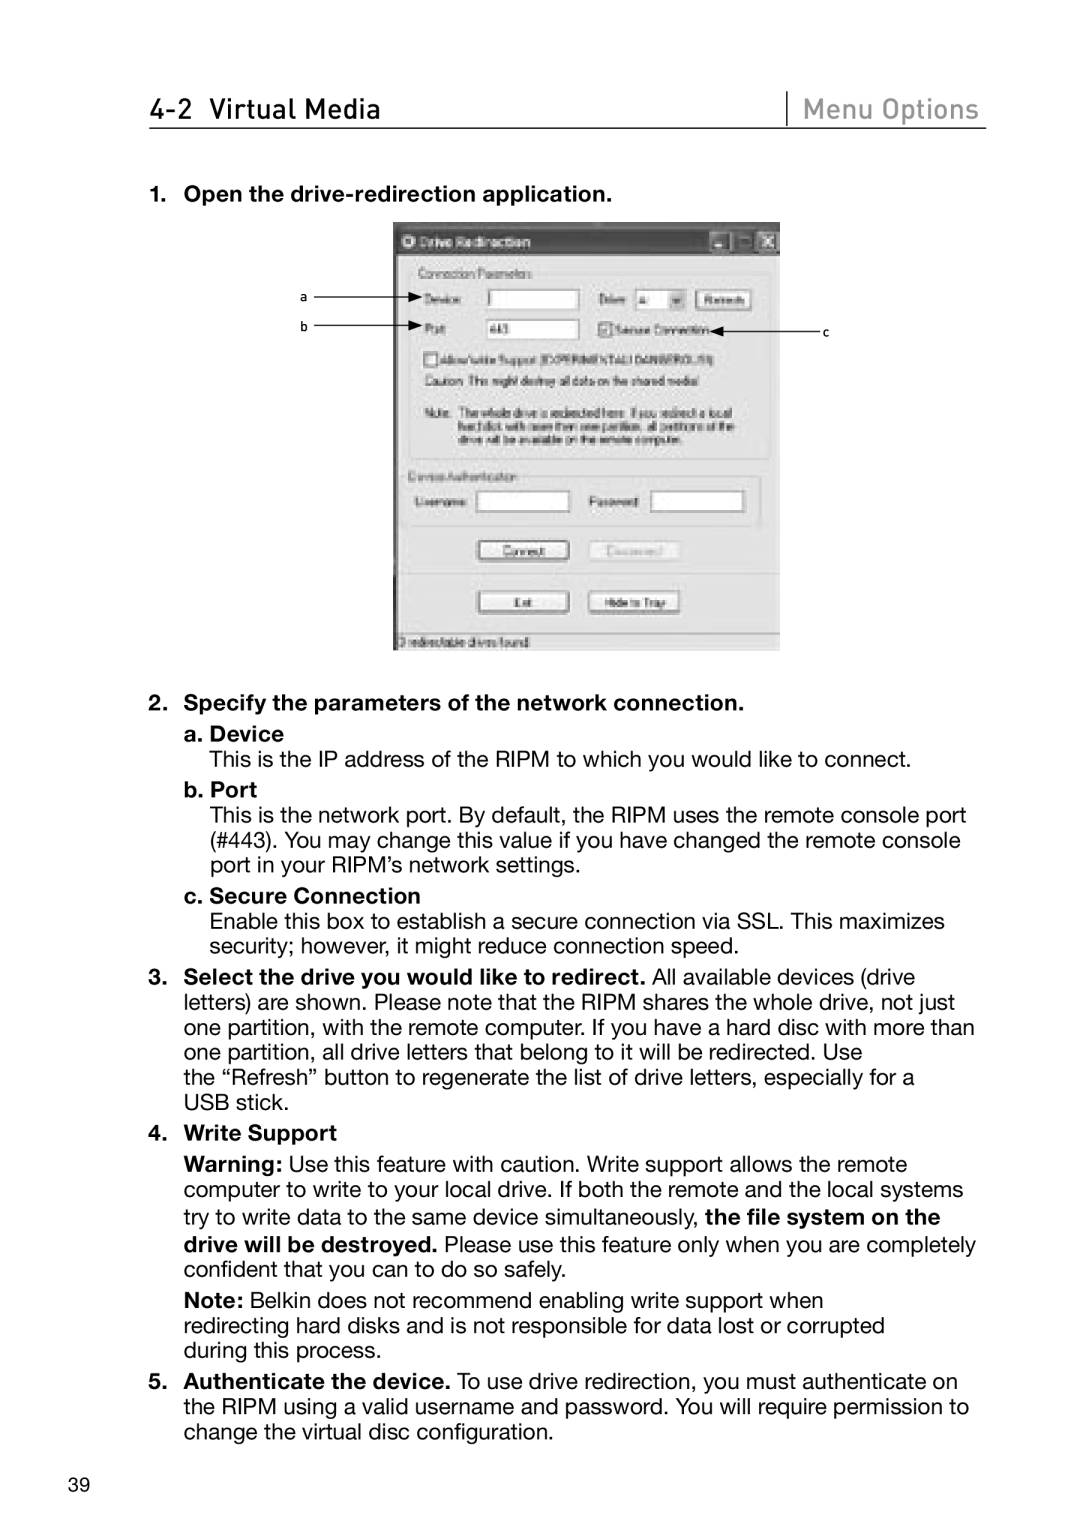
1. Open the
a
b | c |
|
2.Specify the parameters of the network connection.
a.Device
This is the IP address of the RIPM to which you would like to connect.
b.Port
This is the network port. By default, the RIPM uses the remote console port (#443). You may change this value if you have changed the remote console port in your RIPM’s network settings.
c.Secure Connection
Enable this box to establish a secure connection via SSL. This maximizes security; however, it might reduce connection speed.
3.Select the drive you would like to redirect. All available devices (drive letters) are shown. Please note that the RIPM shares the whole drive, not just one partition, with the remote computer. If you have a hard disc with more than one partition, all drive letters that belong to it will be redirected. Use
the “Refresh” button to regenerate the list of drive letters, especially for a USB stick.
4.Write Support
Warning: Use this feature with caution. Write support allows the remote computer to write to your local drive. If both the remote and the local systems try to write data to the same device simultaneously, the file system on the
drive will be destroyed. Please use this feature only when you are completely confident that you can to do so safely.
Note: Belkin does not recommend enabling write support when redirecting hard disks and is not responsible for data lost or corrupted during this process.
5.Authenticate the device. To use drive redirection, you must authenticate on the RIPM using a valid username and password. You will require permission to change the virtual disc configuration.
39