
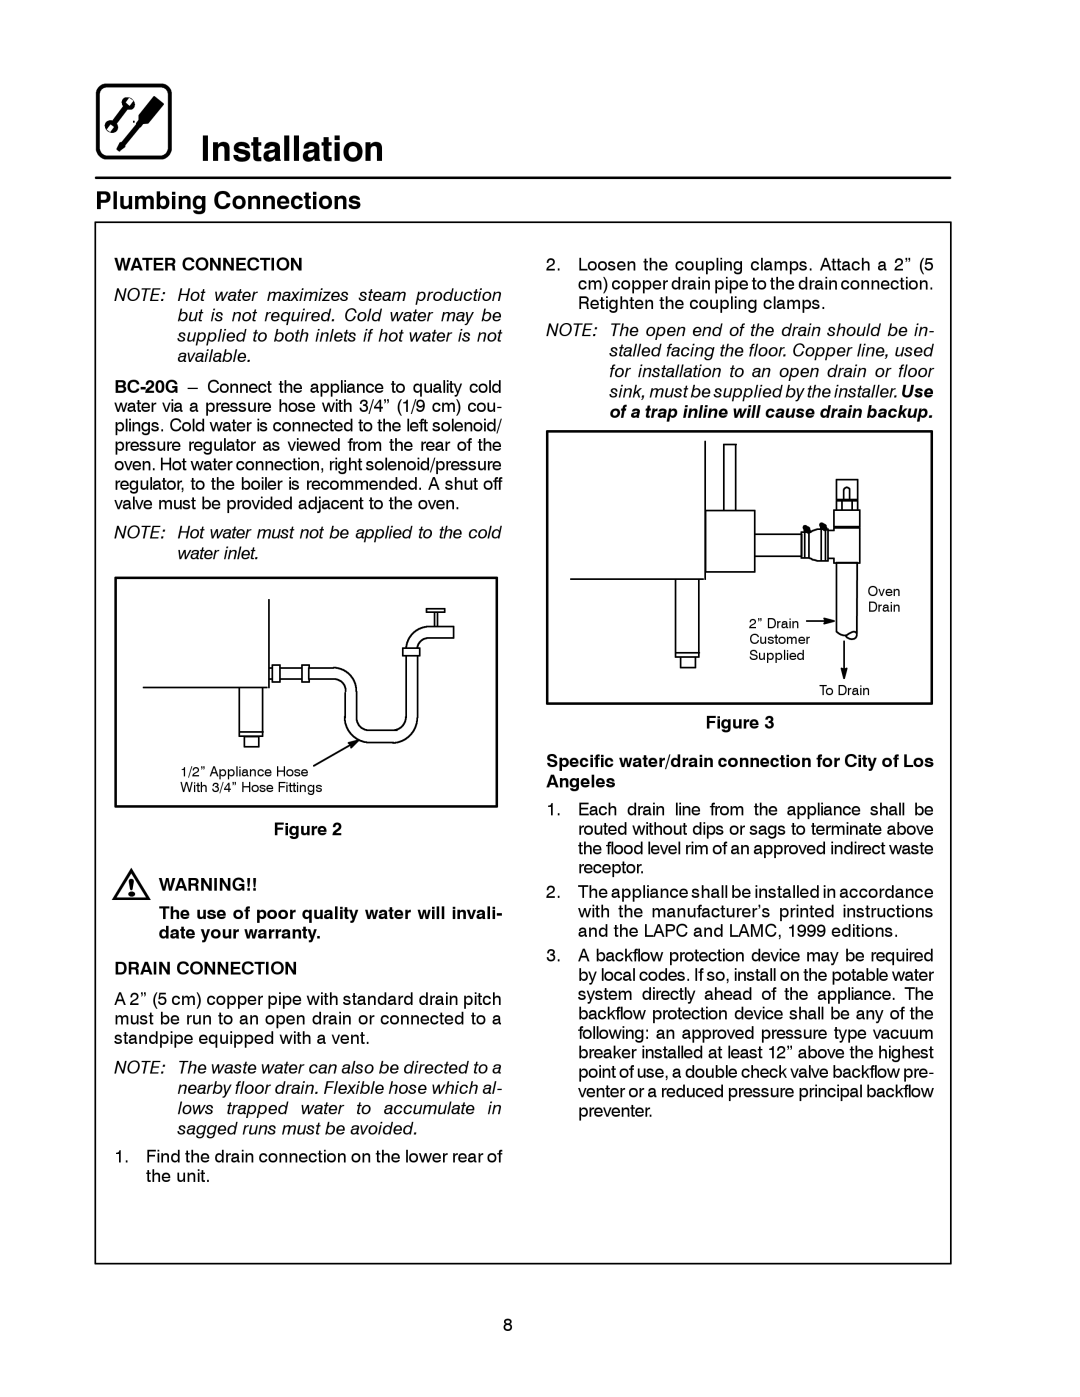
BC-20G specifications
The Blodgett BC-20G is a high-performance gas convection oven designed for commercial kitchens, catering operations, and foodservice establishments. Recognized for its reliability and efficiency, the BC-20G stands out as a versatile tool that enhances cooking capabilities while ensuring consistent results.One of its main features is the 20 cu. ft. capacity, which allows for large batches of food to be prepared simultaneously. This spacious interior accommodates up to five full-size sheet pans, making it ideal for bakeries and restaurants that require substantial baking or roasting space. The oven’s ability to handle various cooking tasks—from baking bread to roasting meats—makes it a key asset in busy kitchen environments.
The BC-20G utilizes a unique convection cooking system that circulates hot air evenly throughout the cavity. This technology ensures uniform cooking results, allowing food to be cooked quickly and efficiently. The built-in, adjustable, high-quality blower provides even air circulation, minimizing hot and cold spots within the oven, which ultimately leads to better browning and overall texture of the food.
The oven features an intuitive digital control panel, which allows users to set precise cooking times and temperatures with ease. It also includes a programmable timer that helps in maintaining consistency across different dishes and cooking styles. The adjustable humidity feature further enhances the cooking process by allowing operators to introduce steam when needed, which is particularly useful for baking delicate items like soufflés or crusty bread.
In terms of construction, the Blodgett BC-20G is built with a durable stainless steel exterior and interior, ensuring longevity and ease of cleaning. The heavy-duty door is designed with a double-pane glass window that provides visibility while maintaining optimal temperatures inside. The unit is also equipped with insulated sidewalls to improve energy efficiency.
Additional characteristics include a safety shut-off feature, automatic ignition, and a removable rack guide that simplifies the loading and unloading process. The oven operates on natural gas or propane, providing flexibility depending on the kitchen's infrastructure.
In conclusion, the Blodgett BC-20G is an exceptional investment for any commercial kitchen looking to enhance their cooking capability. With its thoughtful design, advanced cooking technology, and robust construction, this gas convection oven delivers on performance, reliability, and versatility, making it a favorite among professional chefs and culinary experts.