Ethernet Full Duplex Configuration Screen
3.Use the arrow keys to highlight the SAVE command at the bottom of the screen.
4.Press ENTER. The message “SAVED OK” is displayed.
5.11ETHERNET FULL DUPLEX CONFIGURATION SCREEN
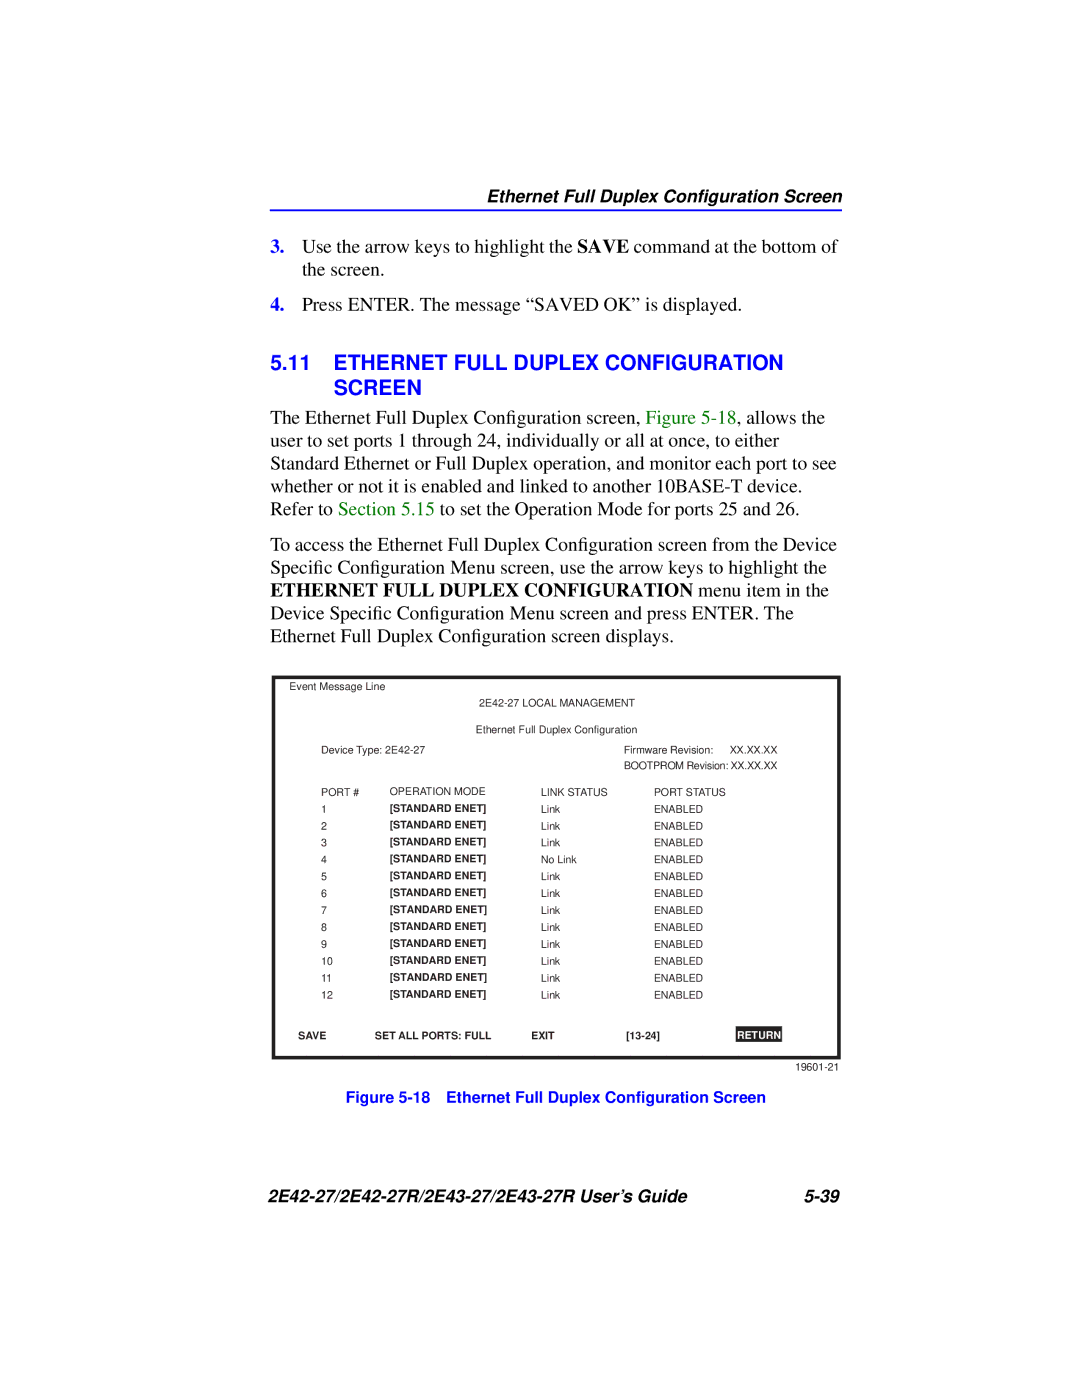
The Ethernet Full Duplex Configuration screen, Figure
To access the Ethernet Full Duplex Configuration screen from the Device Specific Configuration Menu screen, use the arrow keys to highlight the ETHERNET FULL DUPLEX CONFIGURATION menu item in the Device Specific Configuration Menu screen and press ENTER. The Ethernet Full Duplex Configuration screen displays.
Event Message Line
|
|
|
| ||
| Ethernet Full Duplex Configuration |
|
| ||
Device Type: |
| Firmware Revision: | XX.XX.XX | ||
|
|
| BOOTPROM Revision: XX.XX.XX | ||
PORT # | OPERATION MODE | LINK STATUS | PORT STATUS |
|
|
1 | [STANDARD ENET] | Link | ENABLED |
|
|
2 | [STANDARD ENET] | Link | ENABLED |
|
|
3 | [STANDARD ENET] | Link | ENABLED |
|
|
4 | [STANDARD ENET] | No Link | ENABLED |
|
|
5 | [STANDARD ENET] | Link | ENABLED |
|
|
6 | [STANDARD ENET] | Link | ENABLED |
|
|
7 | [STANDARD ENET] | Link | ENABLED |
|
|
8 | [STANDARD ENET] | Link | ENABLED |
|
|
9 | [STANDARD ENET] | Link | ENABLED |
|
|
10 | [STANDARD ENET] | Link | ENABLED |
|
|
11 | [STANDARD ENET] | Link | ENABLED |
|
|
12 | [STANDARD ENET] | Link | ENABLED |
|
|
|
|
|
|
| RETURN |
SAVE | SET ALL PORTS: FULL | EXIT |
| RETURN | |
Figure 5-18 Ethernet Full Duplex Configuration Screen
|
