ES-8 Replacing the Printer
| Applicable Models: | ||
| Replacing the Printer | Printer Unit |
|
1. Open the control unit into upper and lower bodies by referring |
|
| |
to the Section |
| ||
|
|
| |
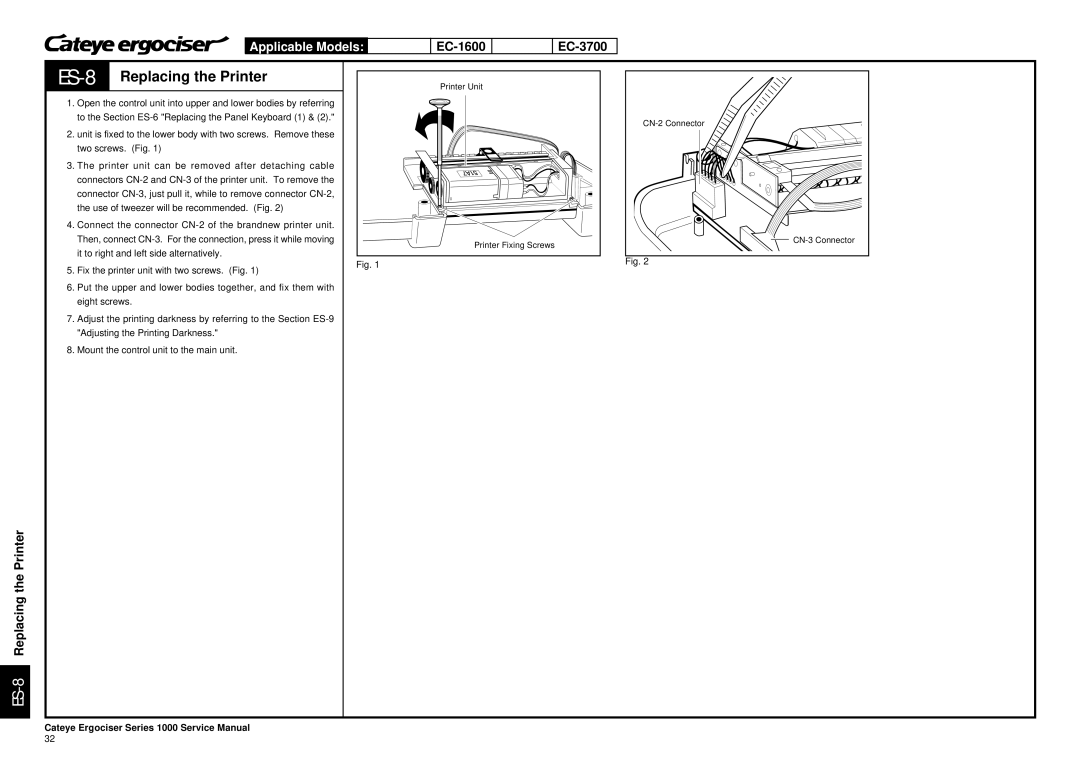
2. unit is fixed to the lower body with two screws. Remove these |
|
| |
two screws. (Fig. 1) |
|
| |
3. The printer unit can be removed after detaching cable |
|
| |
connectors |
|
| |
connector |
|
| |
the use of tweezer will be recommended. (Fig. 2) |
|
| |
4. Connect the connector |
|
| |
Then, connect | Printer Fixing Screws | ||
it to right and left side alternatively. |
| ||
|
| ||
5. | Fix the printer unit with two screws. (Fig. 1) | Fig. 1 | Fig. 2 |
| |||
|
| ||
6. | Put the upper and lower bodies together, and fix them with |
|
|
| eight screws. |
|
|
7. | Adjust the printing darkness by referring to the Section |
|
|
| "Adjusting the Printing Darkness." |
|
|
8. | Mount the control unit to the main unit. |
|
|
Cateye Ergociser Series 1000 Service Manual
32
