Applicable Models: EC-1200 EC-1600 EC-3600 EC-3700
| No Display on Control Unit after Power ON. (2) |
| ||
|
| Check Method of Causes | Repair Method | Explanation Figures |
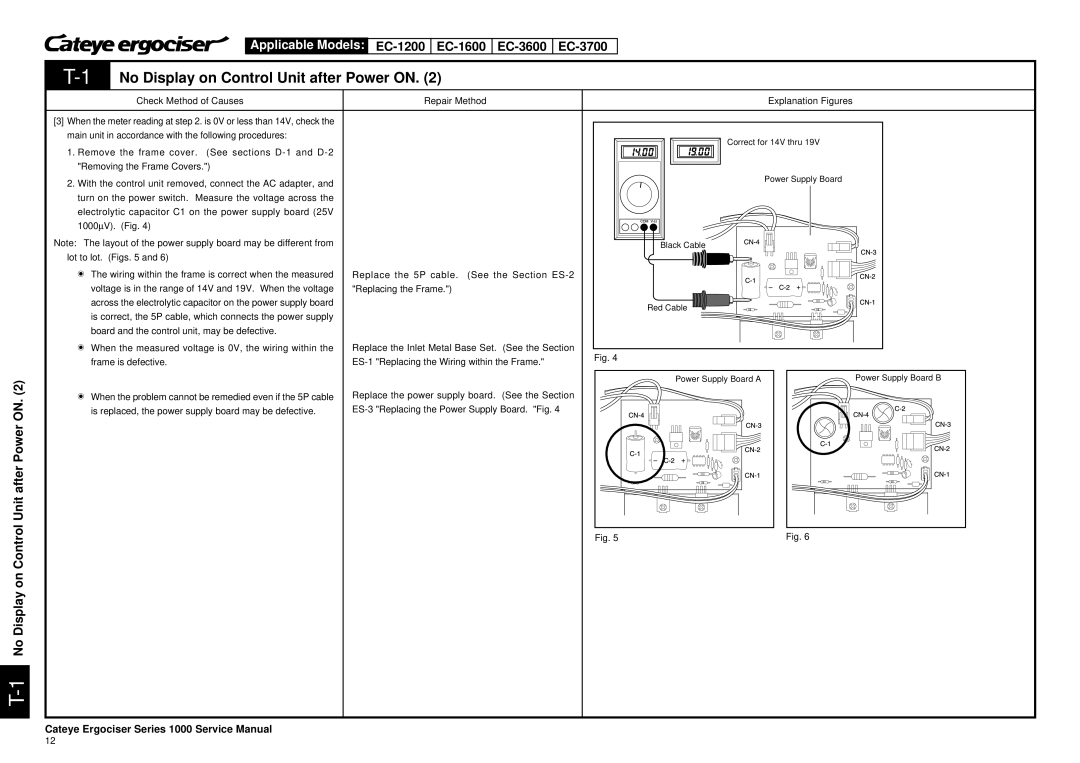
[3] When the meter reading at step 2. is 0V or less than 14V, check the |
|
|
| |
main unit in accordance with the following procedures: |
|
| Correct for 14V thru 19V | |
|
|
| ||
1. Remove the frame cover. (See sections |
|
|
| |
"Removing the Frame Covers.") |
|
|
| |
2. With the control unit removed, connect the AC adapter, and |
|
| Power Supply Board | |
|
|
| ||
turn on the power switch. Measure the voltage across the |
|
|
| |
electrolytic capacitor C1 on the power supply board (25V |
|
|
| |
1000μV). (Fig. 4) |
|
|
| |
Note: The layout of the power supply board may be different from |
|
| Black Cable | |
lot to lot. (Figs. 5 and 6) |
|
|
| |
t The wiring within the frame is correct when the measured | Replace the 5P cable. | (See the Section |
| |
voltage is in the range of 14V and 19V. When the voltage | "Replacing the Frame.") |
|
| |
across the electrolytic capacitor on the power supply board |
|
| Red Cable | |
is correct, the 5P cable, which connects the power supply |
|
| ||
|
|
| ||
board and the control unit, may be defective. |
|
|
| |
t When the measured voltage is 0V, the wiring within the | Replace the Inlet Metal Base Set. (See the Section | Fig. 4 | ||
frame is defective. | ||||
| ||||
Power Supply Board A | Power Supply Board B |
t When the problem cannot be remedied even if the 5P cable | Replace the power supply board. (See the Section | |
is replaced, the power supply board may be defective. |
Fig. 5 | Fig. 6 |
Cateye Ergociser Series 1000 Service Manual
12
