Chapter 3 Configuring and Managing the IP Camera
Network Setup Windows
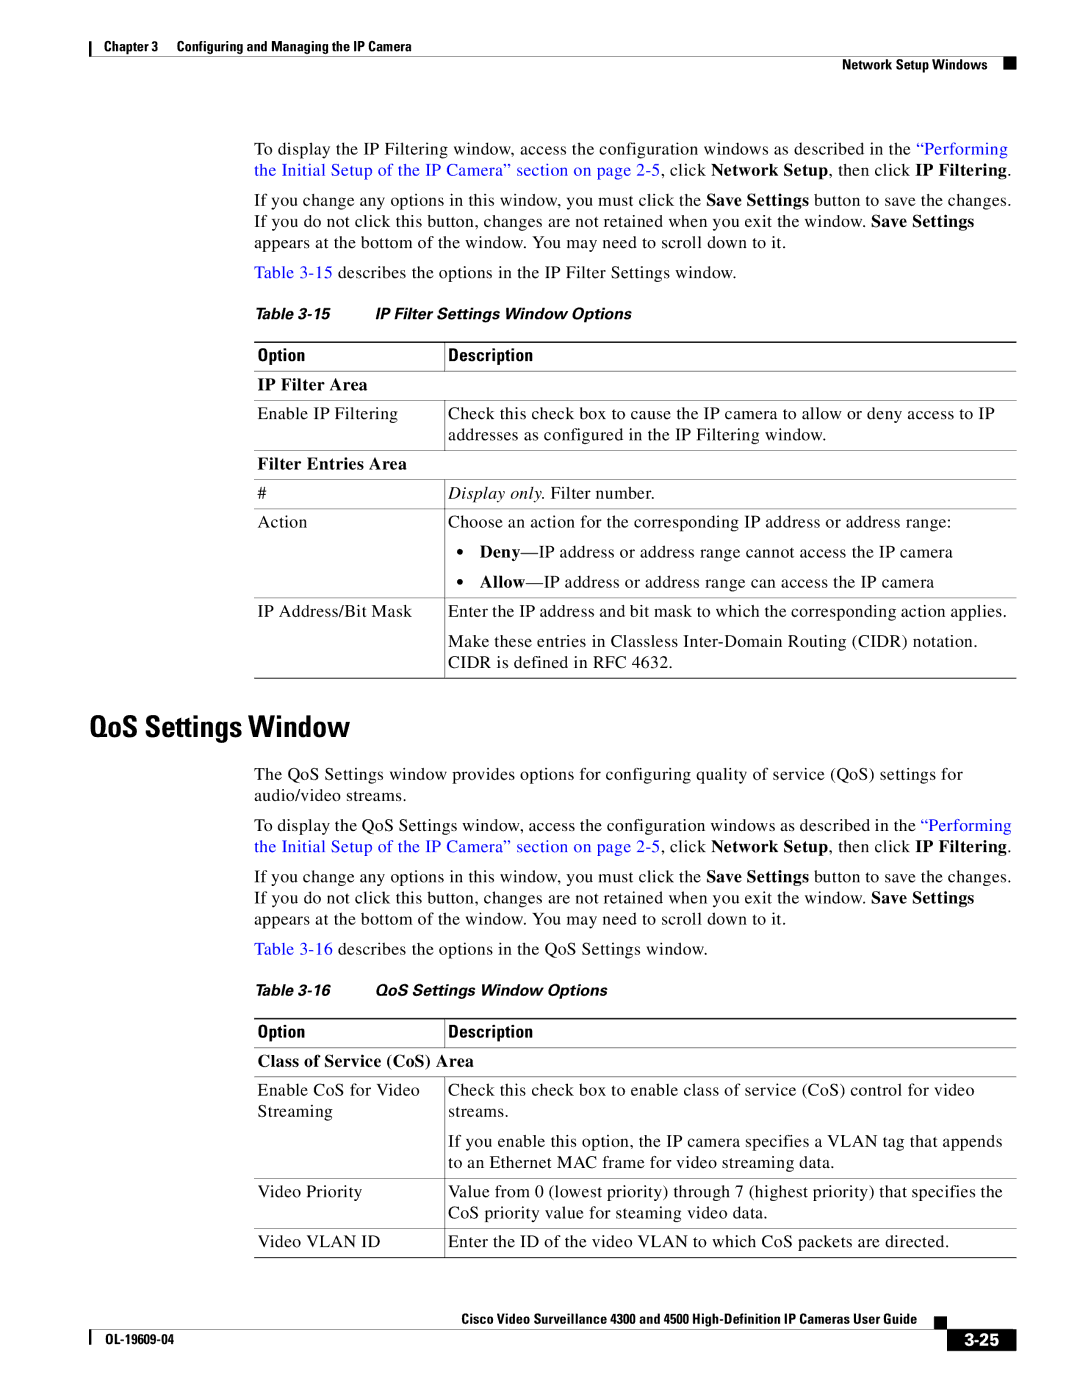
To display the IP Filtering window, access the configuration windows as described in the “Performing the Initial Setup of the IP Camera” section on page
If you change any options in this window, you must click the Save Settings button to save the changes. If you do not click this button, changes are not retained when you exit the window. Save Settings appears at the bottom of the window. You may need to scroll down to it.
Table
Table
Option | Description |
|
|
IP Filter Area
Enable IP Filtering
Check this check box to cause the IP camera to allow or deny access to IP addresses as configured in the IP Filtering window.
Filter Entries Area
# | Display only. Filter number. |
|
|
Action | Choose an action for the corresponding IP address or address range: |
| • |
| • |
|
|
IP Address/Bit Mask | Enter the IP address and bit mask to which the corresponding action applies. |
| Make these entries in Classless |
| CIDR is defined in RFC 4632. |
|
|
QoS Settings Window
The QoS Settings window provides options for configuring quality of service (QoS) settings for audio/video streams.
To display the QoS Settings window, access the configuration windows as described in the “Performing the Initial Setup of the IP Camera” section on page
If you change any options in this window, you must click the Save Settings button to save the changes. If you do not click this button, changes are not retained when you exit the window. Save Settings appears at the bottom of the window. You may need to scroll down to it.
Table
Table
Option
Description
Class of Service (CoS) Area
|
| Enable CoS for Video | Check this check box to enable class of service (CoS) control for video | |||
|
| Streaming | streams. | |||
|
|
| If you enable this option, the IP camera specifies a VLAN tag that appends | |||
|
|
| to an Ethernet MAC frame for video streaming data. | |||
|
|
|
| |||
|
| Video Priority | Value from 0 (lowest priority) through 7 (highest priority) that specifies the | |||
|
|
| CoS priority value for steaming video data. | |||
|
|
|
| |||
|
| Video VLAN ID | Enter the ID of the video VLAN to which CoS packets are directed. | |||
|
|
|
|
|
| |
|
|
| Cisco Video Surveillance 4300 and 4500 |
|
| |
|
|
|
| |||
|
|
|
|
|
|
|
|
|
|
| |||
|
|
|
| |||
