Chapter 3 Configuring and Managing the IP Camera
Applications Windows
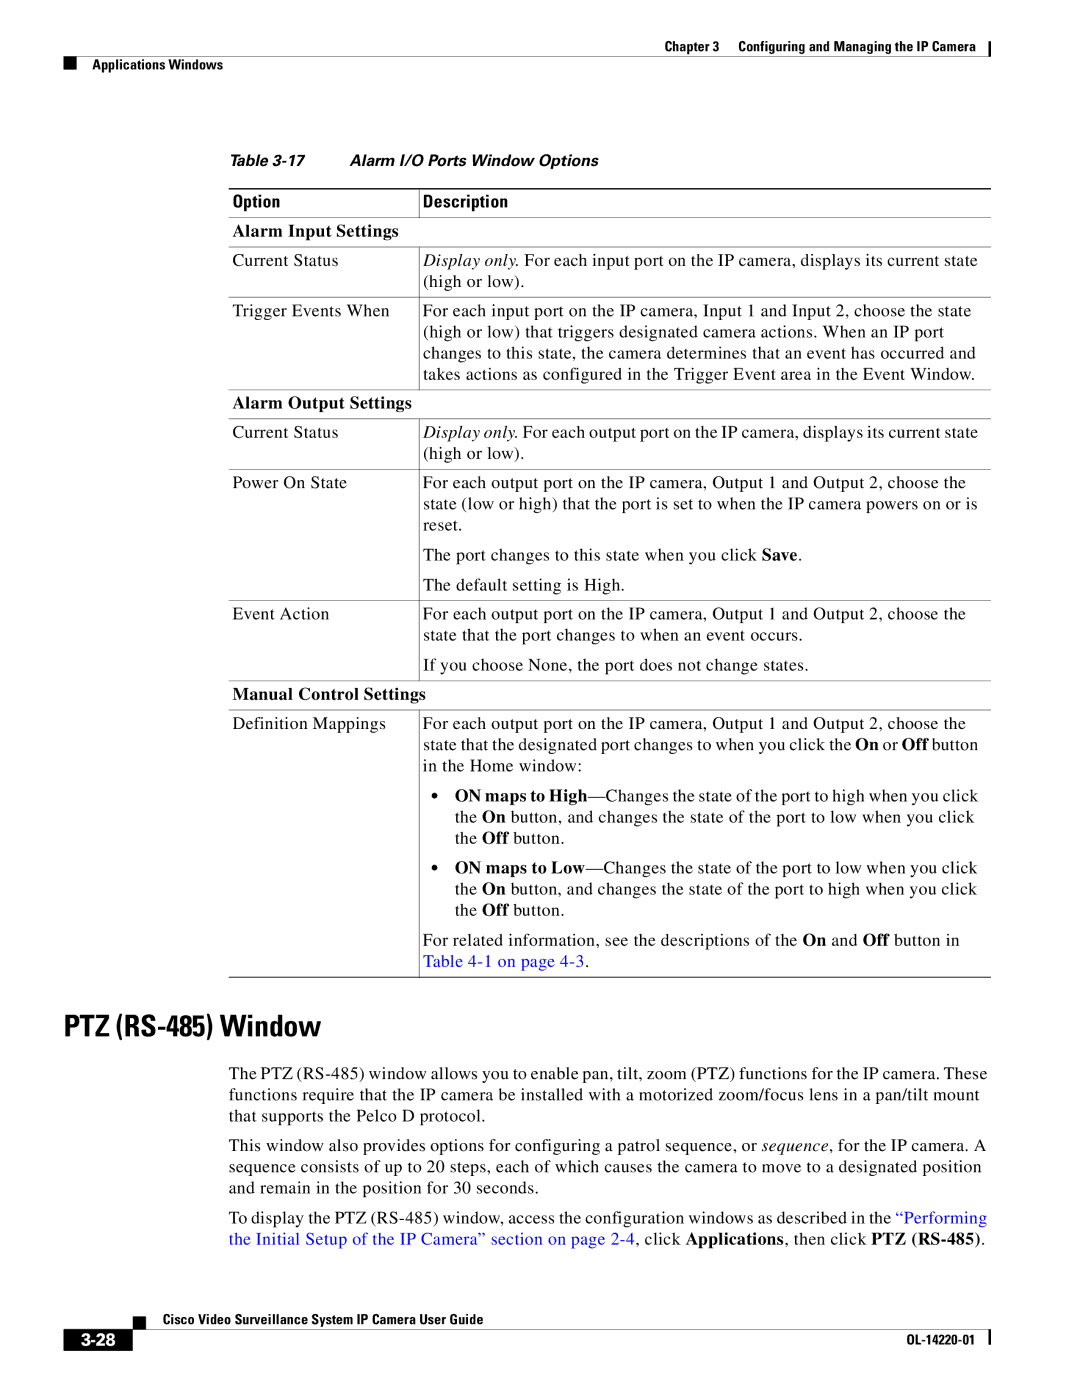
Table | Alarm I/O Ports Window Options | |
|
|
|
Option |
| Description |
|
| |
Alarm Input Settings |
| |
|
|
|
Current Status |
| Display only. For each input port on the IP camera, displays its current state |
|
| (high or low). |
|
| |
Trigger Events When | For each input port on the IP camera, Input 1 and Input 2, choose the state | |
|
| (high or low) that triggers designated camera actions. When an IP port |
|
| changes to this state, the camera determines that an event has occurred and |
|
| takes actions as configured in the Trigger Event area in the Event Window. |
|
| |
Alarm Output Settings |
| |
|
|
|
Current Status |
| Display only. For each output port on the IP camera, displays its current state |
|
| (high or low). |
|
|
|
Power On State |
| For each output port on the IP camera, Output 1 and Output 2, choose the |
|
| state (low or high) that the port is set to when the IP camera powers on or is |
|
| reset. |
|
| The port changes to this state when you click Save. |
|
| The default setting is High. |
|
|
|
Event Action |
| For each output port on the IP camera, Output 1 and Output 2, choose the |
|
| state that the port changes to when an event occurs. |
|
| If you choose None, the port does not change states. |
|
|
|
Manual Control Settings
Definition Mappings
For each output port on the IP camera, Output 1 and Output 2, choose the state that the designated port changes to when you click the On or Off button in the Home window:
•ON maps to
•ON maps to
For related information, see the descriptions of the On and Off button in Table
PTZ (RS-485) Window
The PTZ
This window also provides options for configuring a patrol sequence, or sequence, for the IP camera. A sequence consists of up to 20 steps, each of which causes the camera to move to a designated position and remain in the position for 30 seconds.
To display the PTZ
| Cisco Video Surveillance System IP Camera User Guide |