Chapter 4 Viewing and Live Video
Viewing Video through the Home Window Overview
Table | Home Window Controls (continued) | |
|
|
|
Control |
| Description |
|
|
|
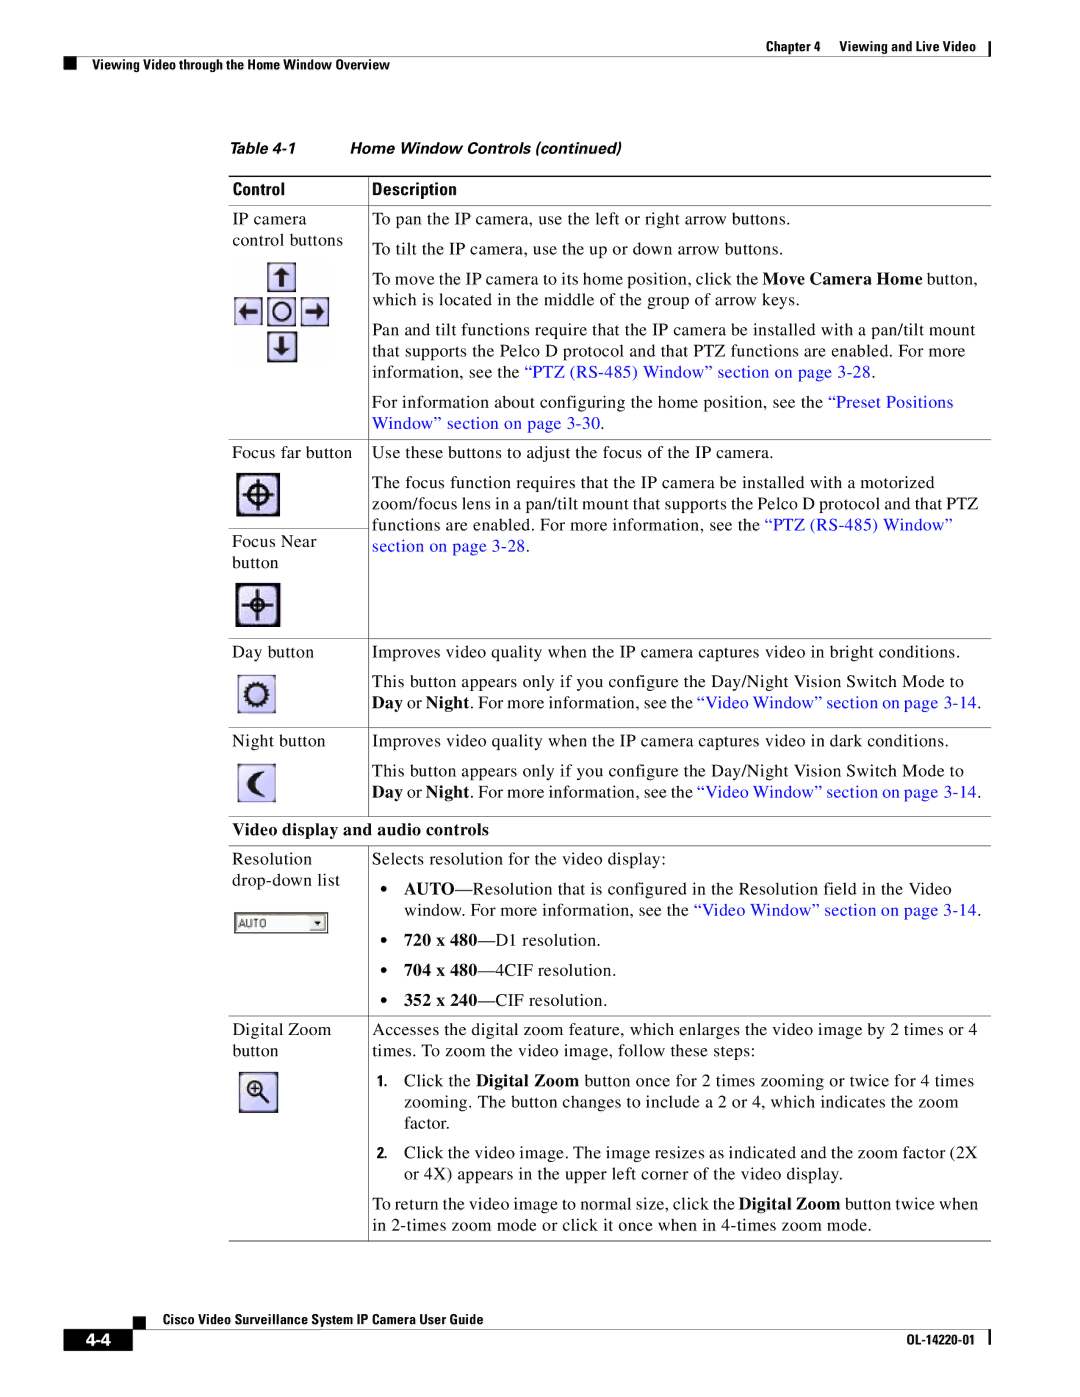
IP camera |
| To pan the IP camera, use the left or right arrow buttons. |
control buttons |
| To tilt the IP camera, use the up or down arrow buttons. |
|
| |
|
| To move the IP camera to its home position, click the Move Camera Home button, |
|
| which is located in the middle of the group of arrow keys. |
|
| Pan and tilt functions require that the IP camera be installed with a pan/tilt mount |
|
| that supports the Pelco D protocol and that PTZ functions are enabled. For more |
|
| information, see the “PTZ |
|
| For information about configuring the home position, see the “Preset Positions |
|
| Window” section on page |
|
| |
Focus far button | Use these buttons to adjust the focus of the IP camera. | |
|
| The focus function requires that the IP camera be installed with a motorized |
|
| zoom/focus lens in a pan/tilt mount that supports the Pelco D protocol and that PTZ |
|
| functions are enabled. For more information, see the “PTZ |
Focus Near |
| |
| section on page | |
button |
|
|
Day button | Improves video quality when the IP camera captures video in bright conditions. |
| This button appears only if you configure the Day/Night Vision Switch Mode to |
| Day or Night. For more information, see the “Video Window” section on page |
|
|
Night button | Improves video quality when the IP camera captures video in dark conditions. |
| This button appears only if you configure the Day/Night Vision Switch Mode to |
| Day or Night. For more information, see the “Video Window” section on page |
| |
Video display and audio controls | |
|
|
Resolution | Selects resolution for the video display: |
• | |
| |
| window. For more information, see the “Video Window” section on page |
| • 720 x |
| • 704 x |
| • 352 x |
|
|
Digital Zoom | Accesses the digital zoom feature, which enlarges the video image by 2 times or 4 |
button | times. To zoom the video image, follow these steps: |
| 1. Click the Digital Zoom button once for 2 times zooming or twice for 4 times |
| zooming. The button changes to include a 2 or 4, which indicates the zoom |
| factor. |
| 2. Click the video image. The image resizes as indicated and the zoom factor (2X |
| or 4X) appears in the upper left corner of the video display. |
| To return the video image to normal size, click the Digital Zoom button twice when |
| in |
|
|
Cisco Video Surveillance System IP Camera User Guide
| ||
|
