Chapter 1 Overview
IP Camera Physical Details
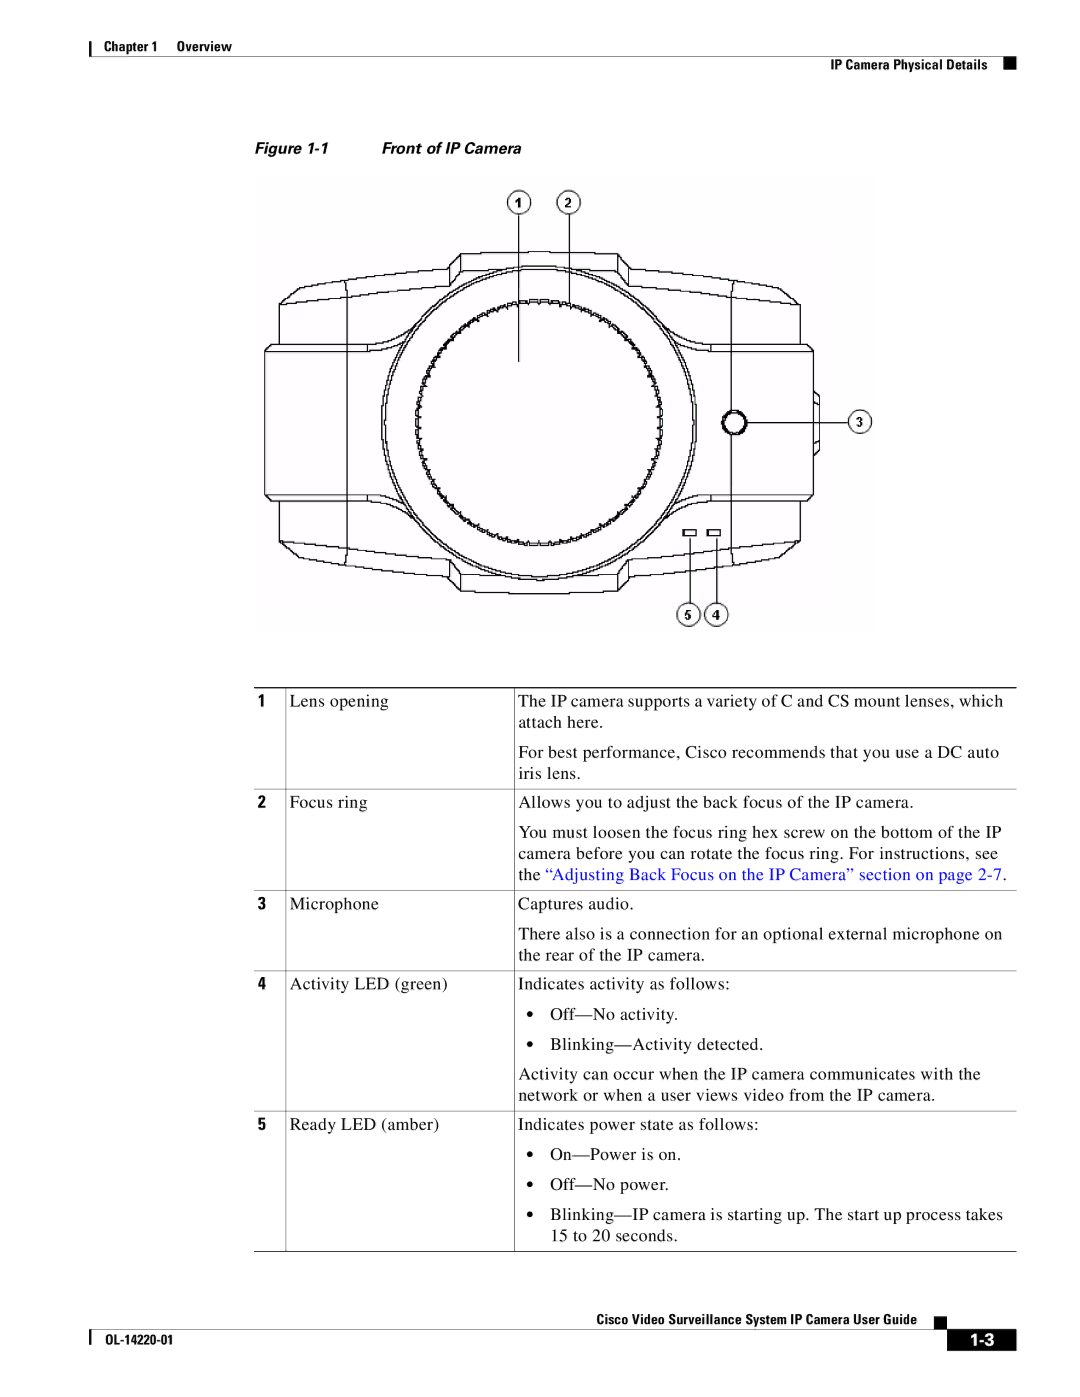
Figure 1-1 Front of IP Camera
| 1 | Lens opening | The IP camera supports a variety of C and CS mount lenses, which | |||||
|
|
|
| attach here. | ||||
|
|
|
| For best performance, Cisco recommends that you use a DC auto | ||||
|
|
|
| iris lens. | ||||
|
|
|
| |||||
2 | Focus ring | Allows you to adjust the back focus of the IP camera. | ||||||
|
|
|
| You must loosen the focus ring hex screw on the bottom of the IP | ||||
|
|
|
| camera before you can rotate the focus ring. For instructions, see | ||||
|
|
|
| the “Adjusting Back Focus on the IP Camera” section on page | ||||
|
|
|
| |||||
3 | Microphone | Captures audio. | ||||||
|
|
|
| There also is a connection for an optional external microphone on | ||||
|
|
|
| the rear of the IP camera. | ||||
|
|
|
| |||||
4 | Activity LED (green) | Indicates activity as follows: | ||||||
|
|
|
| • | ||||
|
|
|
| • | ||||
|
|
|
| Activity can occur when the IP camera communicates with the | ||||
|
|
|
| network or when a user views video from the IP camera. | ||||
|
|
|
| |||||
5 | Ready LED (amber) | Indicates power state as follows: | ||||||
|
|
|
| • | ||||
|
|
|
| • | ||||
|
|
|
| • | ||||
|
|
|
|
| 15 to 20 seconds. | |||
|
|
|
|
|
|
|
| |
|
|
|
|
| Cisco Video Surveillance System IP Camera User Guide |
|
| |
|
|
|
|
|
| |||
|
|
|
|
|
|
|
|
|
|
|
|
|
|
| |||
|
|
|
|
|
| |||