NOTICE: Before rotating the card retainer back into place, ensure that the tops of all cards and filler brackets are flush with the alignment bar and the notch in the top of each card or filler bracket fits around the alignment guide.
NOTICE: Do not route card cables over or behind the cards. Cables routed over the cards can prevent the computer cover from closing properly or cause damage to the equipment.
8. Rotate the card retainer back into its original position; push its tip so that its tab clicks into place.
NOTICE: To connect a network cable, first plug the cable into the network port or device and then plug the cable into the computer.
9.If present, lower the card retention device that lays over the installed cards and snap it into place.
10.Replace the computer cover (see Replacing the Computer Cover), reconnect the computer and devices to electrical outlets, and then turn them on.
11.Uninstall the driver for the card that you removed.
NOTE: If you removed a sound card or a network adapter, see Network Adapter and Sound Card Settings.
Installing PCI and PCI Express Cards
NOTICE: To avoid electrostatic discharge and damage to internal components, ground yourself by using a wrist grounding strap or by periodically touching an unpainted metal surface on the computer chassis.
NOTICE: If your computer came with a PCI graphics card installed, removal of the card is not necessary when installing additional graphics cards; however, the card is required for troubleshooting purposes. If you remove the card, store it in a safe and secure location.
NOTICE: If you have or are upgrading to the optional
1.Follow the procedures in Before You Begin.
2.Remove the computer cover (see Removing the Computer Cover).
3.If present, press the tab on the card retention device that lays over the installed cards and rotate it upwards to gain full access to the card.
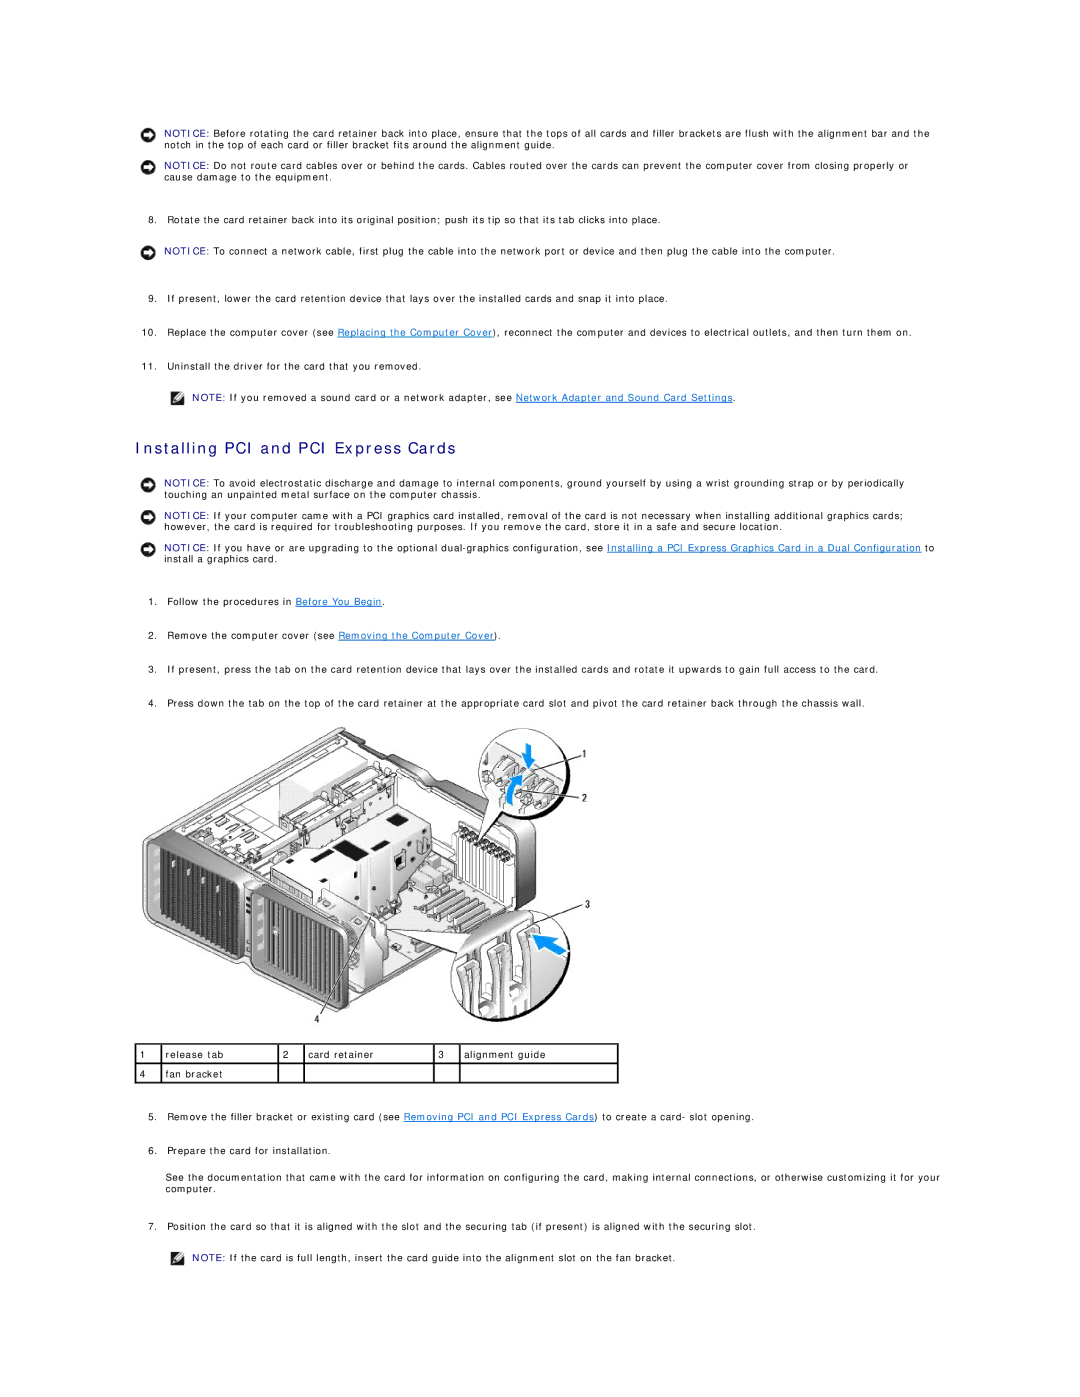
4.Press down the tab on the top of the card retainer at the appropriate card slot and pivot the card retainer back through the chassis wall.
1 | release tab | 2 | card retainer | 3 | alignment guide |
4fan bracket
5.Remove the filler bracket or existing card (see Removing PCI and PCI Express Cards) to create a card- slot opening.
6.Prepare the card for installation.
See the documentation that came with the card for information on configuring the card, making internal connections, or otherwise customizing it for your computer.
7.Position the card so that it is aligned with the slot and the securing tab (if present) is aligned with the securing slot.
NOTE: If the card is full length, insert the card guide into the alignment slot on the fan bracket.