for the current boot only, and then press <Enter>.
For example, if you are booting to a USB memory key, highlight USB Flash Device and press <Enter>.
NOTE: To boot to a USB device, the device must be bootable. To make sure that your device is bootable, check the device documentation.
Changing Boot Sequence for Future Boots
1.Enter system setup (see Entering System Setup).
2.Use the arrow keys to highlight the Boot Sequence menu option and press <Enter> to access the menu.
![]() NOTE: Write down your current boot sequence in case you want to restore it.
NOTE: Write down your current boot sequence in case you want to restore it.
3.Press the up- and
4.Press the spacebar to enable or disable a device (enabled devices have a checkmark).
5.Press plus (+) or minus
Clearing Forgotten Passwords
CAUTION: Before you begin any of the procedures in this section, follow the safety instructions in the Product Information Guide.
NOTICE: This process erases both the system and setup passwords
1.Follow the procedures in Before You Begin.
2.Remove the computer cover (see Removing the Computer Cover).
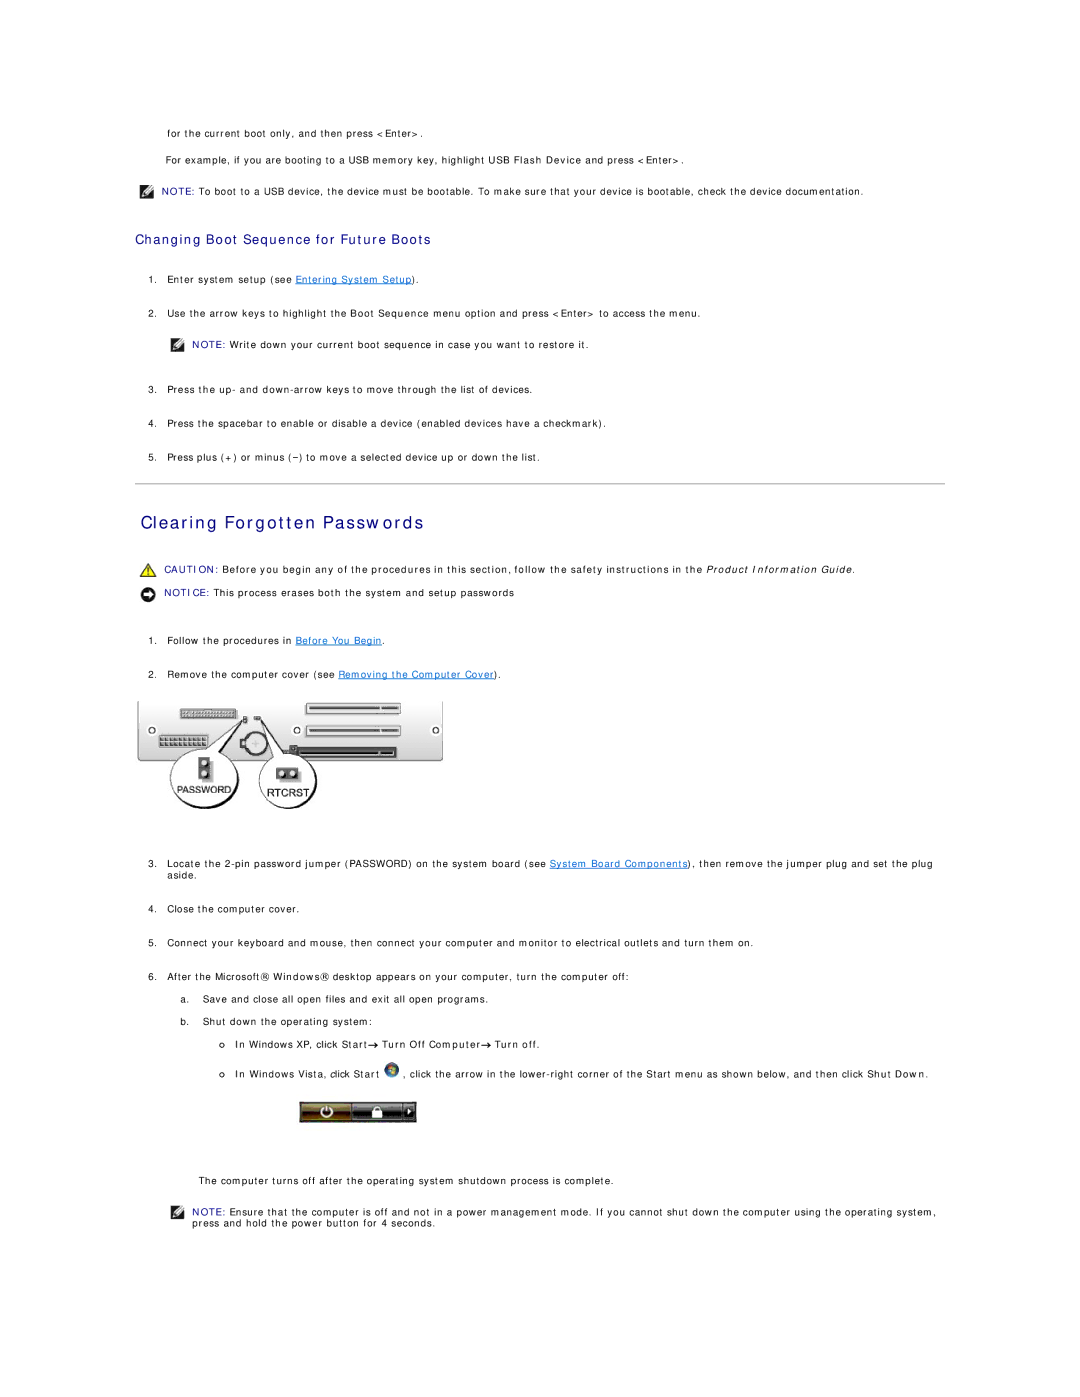
3.Locate the
4.Close the computer cover.
5.Connect your keyboard and mouse, then connect your computer and monitor to electrical outlets and turn them on.
6.After the Microsoft® Windows® desktop appears on your computer, turn the computer off:
a.Save and close all open files and exit all open programs.
b.Shut down the operating system:
¡In Windows XP, click Start→ Turn Off Computer→ Turn off.
¡In Windows Vista, click Start ![]() , click the arrow in the
, click the arrow in the
The computer turns off after the operating system shutdown process is complete.
NOTE: Ensure that the computer is off and not in a power management mode. If you cannot shut down the computer using the operating system, press and hold the power button for 4 seconds.