w w w . d e l l . c o m s u p p o r t . d e l l . c o m
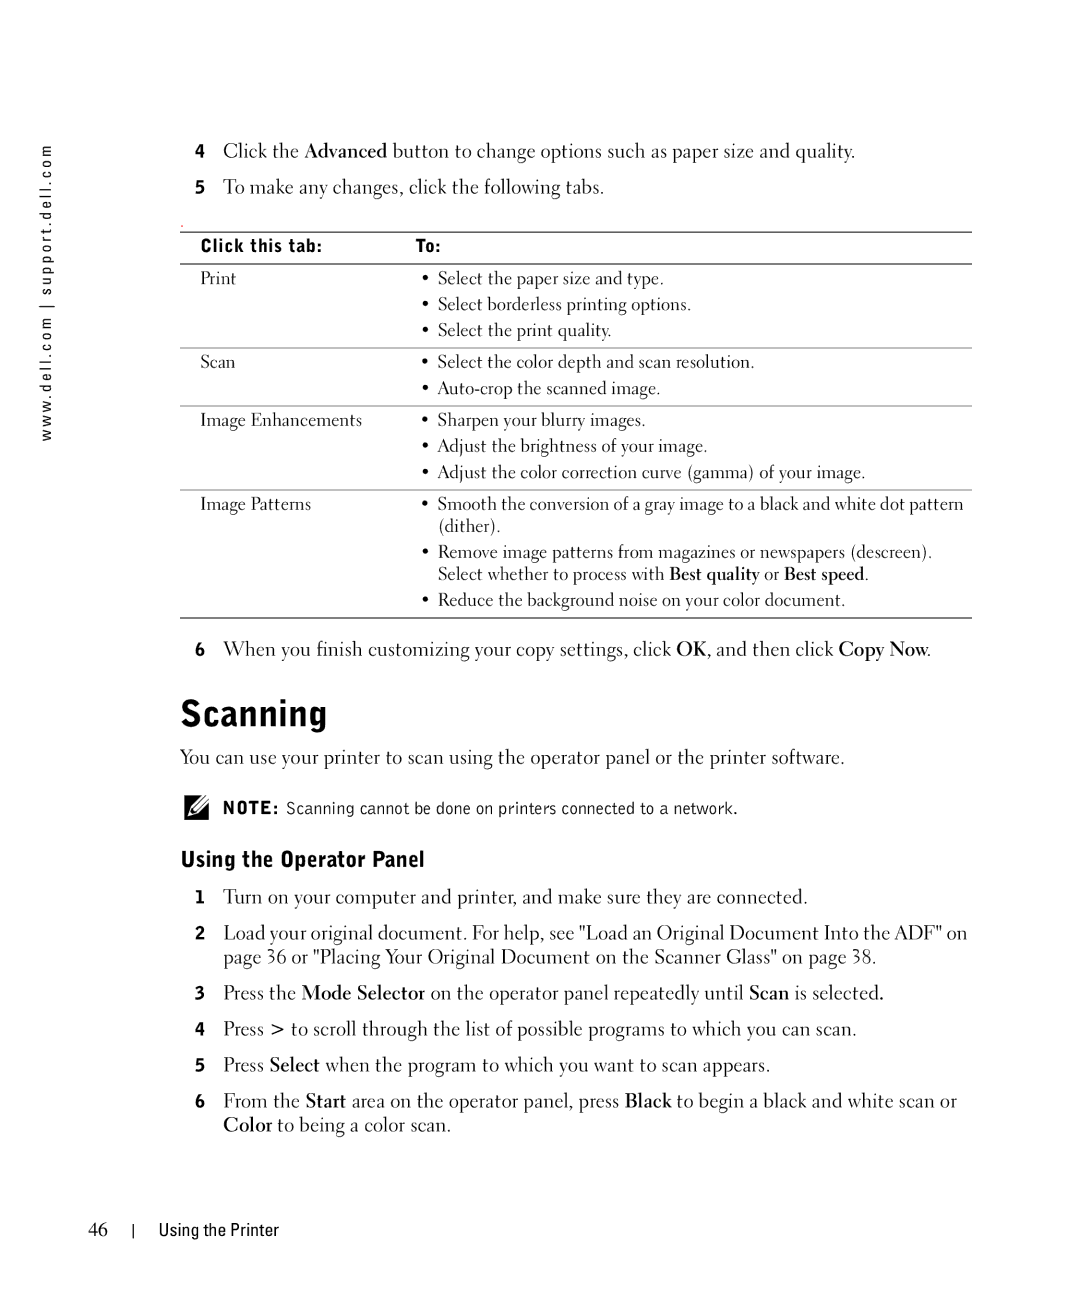
4Click the Advanced button to change options such as paper size and quality.
5To make any changes, click the following tabs.
.
Click this tab: | To: |
|
|
• Select the paper size and type. | |
| • Select borderless printing options. |
| • Select the print quality. |
|
|
Scan | • Select the color depth and scan resolution. |
| • |
|
|
Image Enhancements | • Sharpen your blurry images. |
| • Adjust the brightness of your image. |
| • Adjust the color correction curve (gamma) of your image. |
|
|
Image Patterns | • Smooth the conversion of a gray image to a black and white dot pattern |
| (dither). |
| • Remove image patterns from magazines or newspapers (descreen). |
| Select whether to process with Best quality or Best speed. |
| • Reduce the background noise on your color document. |
|
|
6When you finish customizing your copy settings, click OK, and then click Copy Now.
Scanning
You can use your printer to scan using the operator panel or the printer software.
NOTE: Scanning cannot be done on printers connected to a network.
Using the Operator Panel
1Turn on your computer and printer, and make sure they are connected.
2Load your original document. For help, see "Load an Original Document Into the ADF" on page 36 or "Placing Your Original Document on the Scanner Glass" on page 38.
3Press the Mode Selector on the operator panel repeatedly until Scan is selected.
4Press > to scroll through the list of possible programs to which you can scan.
5Press Select when the program to which you want to scan appears.
6From the Start area on the operator panel, press Black to begin a black and white scan or Color to being a color scan.
46
Using the Printer