Installing and Removing a Fan Tray
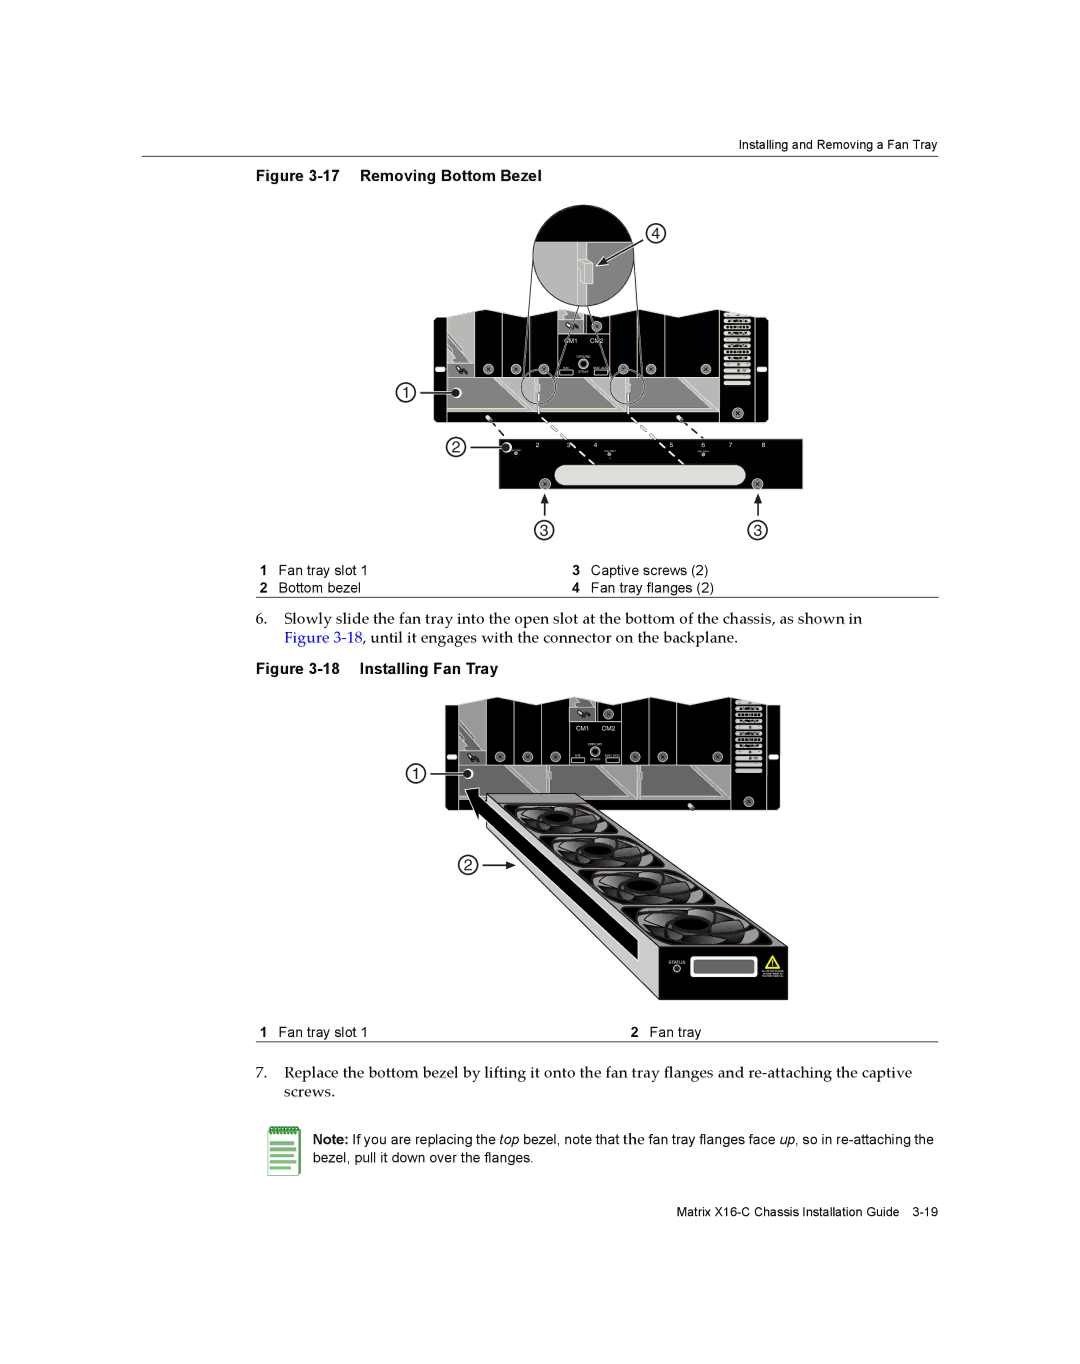
Figure 3-17 Removing Bottom Bezel
4
|
|
| CM1 | CM2 |
|
|
|
|
|
|
| GROUND |
|
|
|
| |
|
|
| S/N: | MAC ADD. |
|
|
|
|
|
|
|
| STRAP |
|
|
|
|
1 |
|
|
|
|
|
|
|
|
2 | 1 | 2 | 3 | 4 | 5 | 6 | 7 | 8 |
| FAN TRAY |
| FAN TRAY |
| FAN TRAY |
|
| |
|
|
|
|
|
| |||
|
| 1 |
| 2 |
|
|
|
|
|
|
|
|
|
|
| 3 |
|
| 3 |
| 3 |
1 | Fan tray slot 1 | 3 | Captive screws (2) |
2 | Bottom bezel | 4 | Fan tray flanges (2) |
6.Slowly slide the fan tray into the open slot at the bottom of the chassis, as shown in Figure 3‐18, until it engages with the connector on the backplane.
Figure 3-18 Installing Fan Tray
CM1 | CM2 |
GROUND | |
S/N: | MAC ADD. |
| STRAP |
1 |
|
2
|
| STATUS |
|
|
| ALLOW FAN BLADES |
|
|
| TO STOP PRIOR TO |
|
|
| FAN TRAY REMOVAL |
|
|
|
|
|
1 Fan tray slot 1 | 2 Fan tray | ||
7.Replace the bottom bezel by lifting it onto the fan tray flanges and re‐attaching the captive screws.
Note: If you are replacing the top bezel, note that the fan tray flanges face up, so in
Matrix
