Installing and Removing a Power Supply
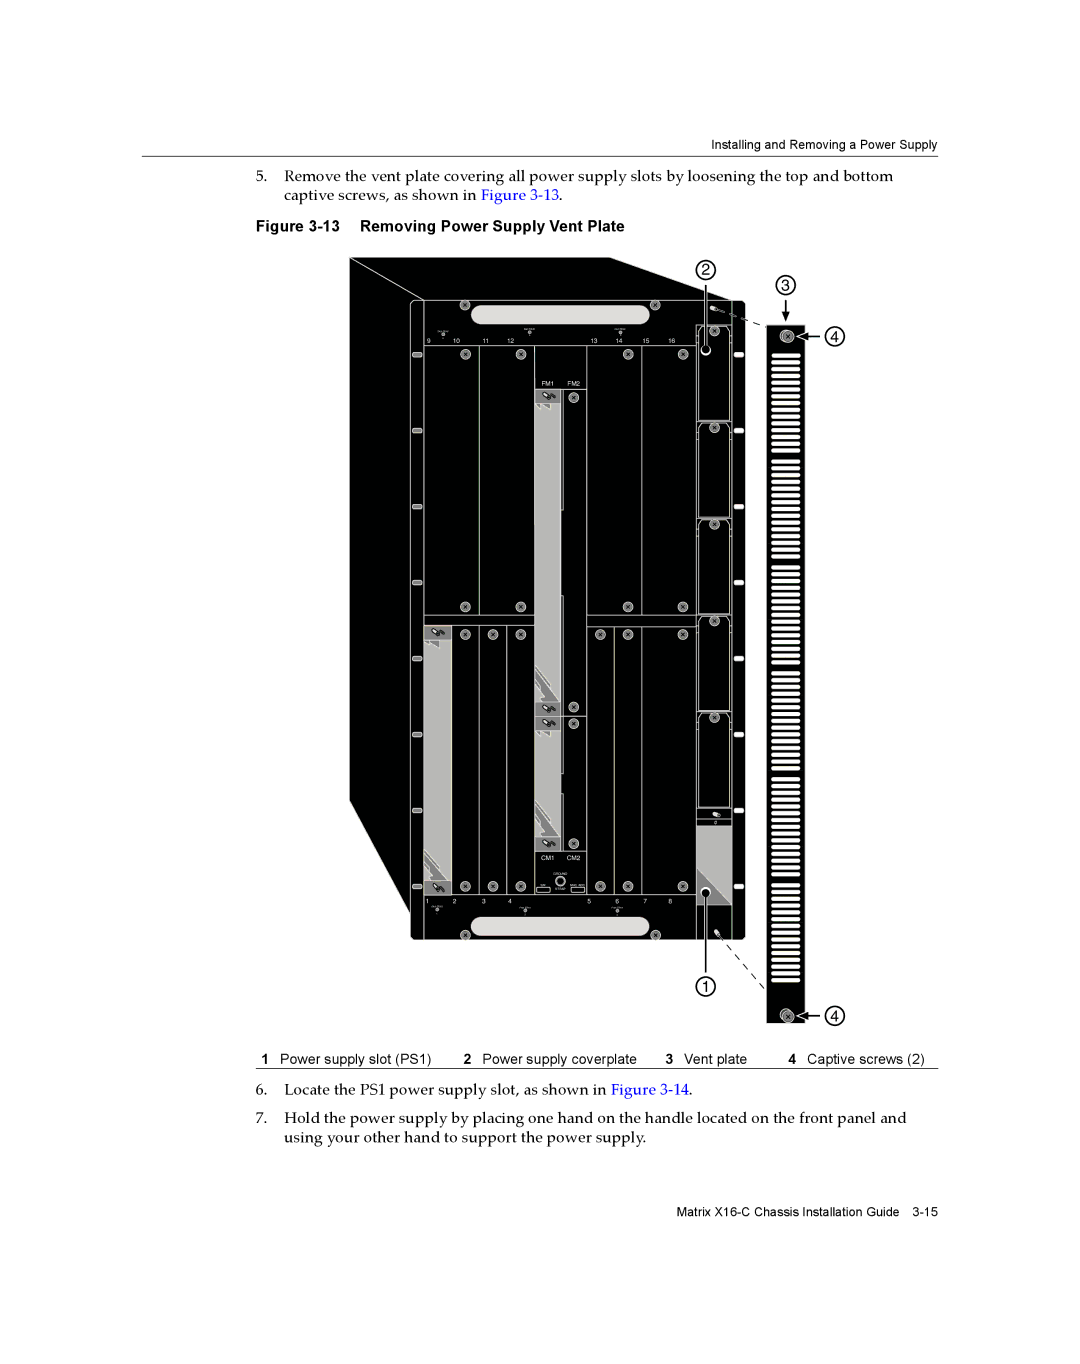
5.Remove the vent plate covering all power supply slots by loosening the top and bottom captive screws, as shown in Figure 3‐13.
Figure 3-13 Removing Power Supply Vent Plate
2
| FAN TRAY |
|
| FAN TRAY |
| FAN TRAY |
|
|
|
|
|
|
|
|
|
| |
9 |
| 10 | 11 | 5 | 13 | 3 | 15 | 16 |
4 | 12 | 14 | ||||||
|
|
|
| FM1 | FM2 |
|
|
|
|
|
| CM1 | CM2 |
|
|
|
|
|
| GROUND |
|
|
| |
|
|
| S/N: | MAC ADD. |
|
|
|
|
|
|
| STRAP |
|
|
|
1 | 2 | 3 | 4 | 5 | 6 | 7 | 8 |
| FAN TRAY |
| FAN TRAY |
| FAN TRAY |
|
|
| 1 |
| 2 |
| 3 |
|
|
|
|
|
|
|
|
| 1 |
1 Power supply slot (PS1) | 2 Power supply coverplate | 3 Vent plate |
3 |
|
| 4 |
| 4 |
4 | Captive screws (2) |
6.Locate the PS1 power supply slot, as shown in Figure 3‐14.
7.Hold the power supply by placing one hand on the handle located on the front panel and using your other hand to support the power supply.
Matrix
