6.3 REMOTE LIVE VIEW
4
3
2 |
|
|
| 1 |
| ||||
|
|
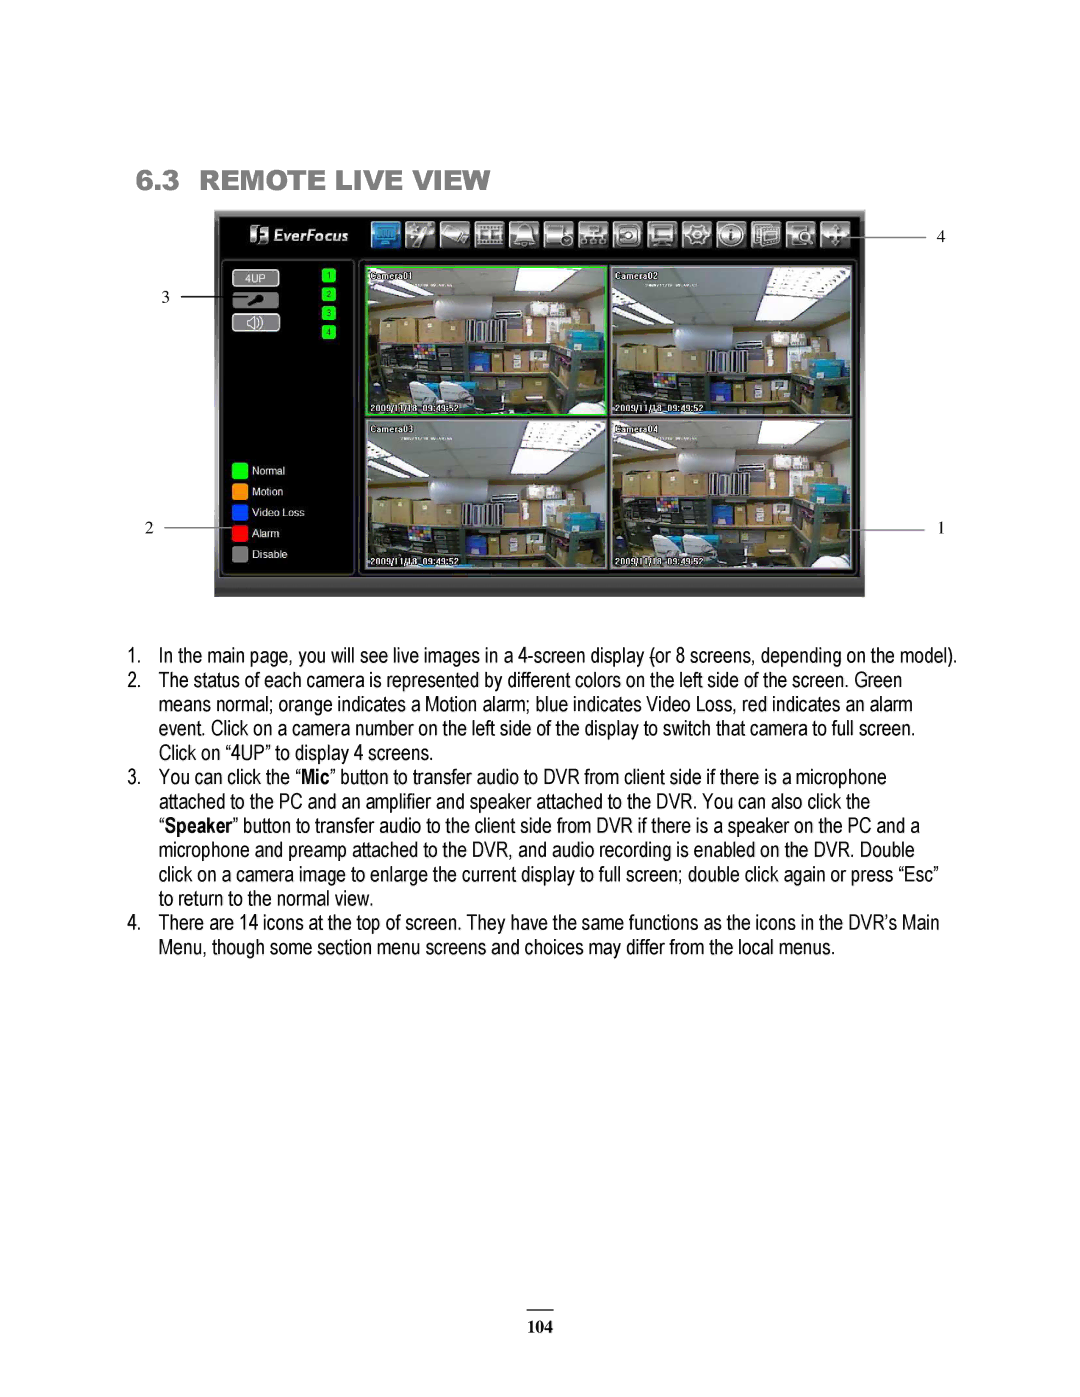
1.In the main page, you will see live images in a
2.The status of each camera is represented by different colors on the left side of the screen. Green means normal; orange indicates a Motion alarm; blue indicates Video Loss, red indicates an alarm event. Click on a camera number on the left side of the display to switch that camera to full screen. Click on “4UP” to display 4 screens.
3.You can click the “Mic” button to transfer audio to DVR from client side if there is a microphone attached to the PC and an amplifier and speaker attached to the DVR. You can also click the “Speaker” button to transfer audio to the client side from DVR if there is a speaker on the PC and a microphone and preamp attached to the DVR, and audio recording is enabled on the DVR. Double click on a camera image to enlarge the current display to full screen; double click again or press “Esc” to return to the normal view.
4.There are 14 icons at the top of screen. They have the same functions as the icons in the DVR’s Main Menu, though some section menu screens and choices may differ from the local menus.
104