32
C. Setting Up
the Windows
Printer Driver
NOTE
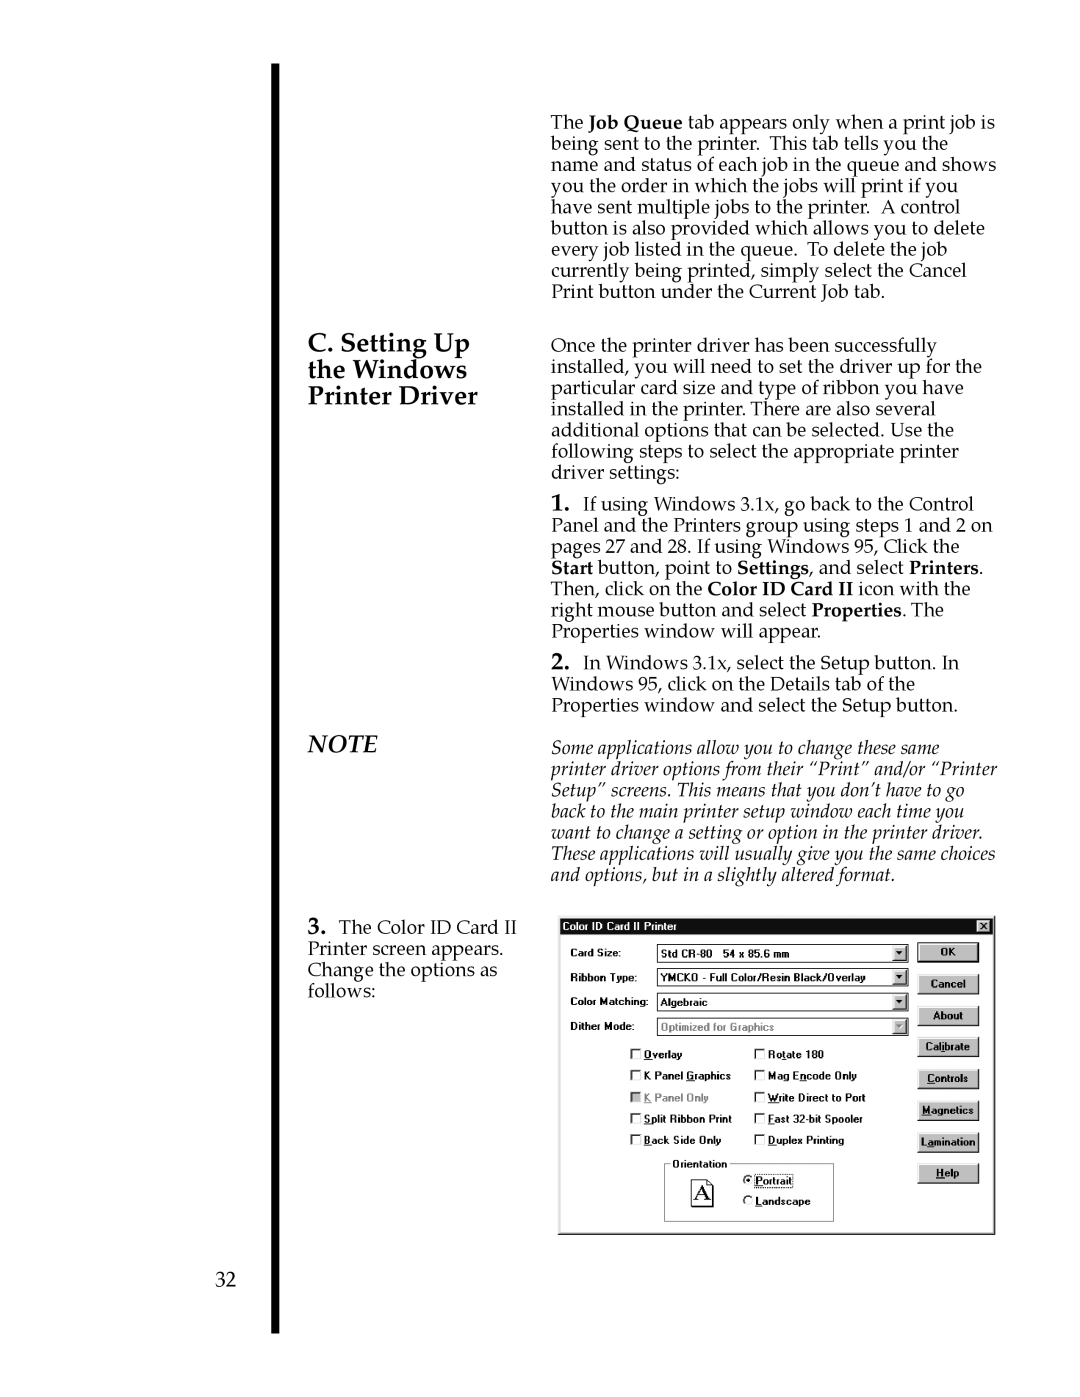
3.The Color ID Card II Printer screen appears. Change the options as follows:
The Job Queue tab appears only when a print job is being sent to the printer. This tab tells you the name and status of each job in the queue and shows you the order in which the jobs will print if you have sent multiple jobs to the printer. A control button is also provided which allows you to delete every job listed in the queue. To delete the job currently being printed, simply select the Cancel Print button under the Current Job tab.
Once the printer driver has been successfully installed, you will need to set the driver up for the particular card size and type of ribbon you have installed in the printer. There are also several additional options that can be selected. Use the following steps to select the appropriate printer driver settings:
1.If using Windows 3.1x, go back to the Control Panel and the Printers group using steps 1 and 2 on pages 27 and 28. If using Windows 95, Click the Start button, point to Settings, and select Printers. Then, click on the Color ID Card II icon with the right mouse button and select Properties. The Properties window will appear.
2.In Windows 3.1x, select the Setup button. In Windows 95, click on the Details tab of the Properties window and select the Setup button.
Some applications allow you to change these same printer driver options from their “Print” and/or “Printer Setup” screens. This means that you don’t have to go back to the main printer setup window each time you want to change a setting or option in the printer driver. These applications will usually give you the same choices and options, but in a slightly altered format.
