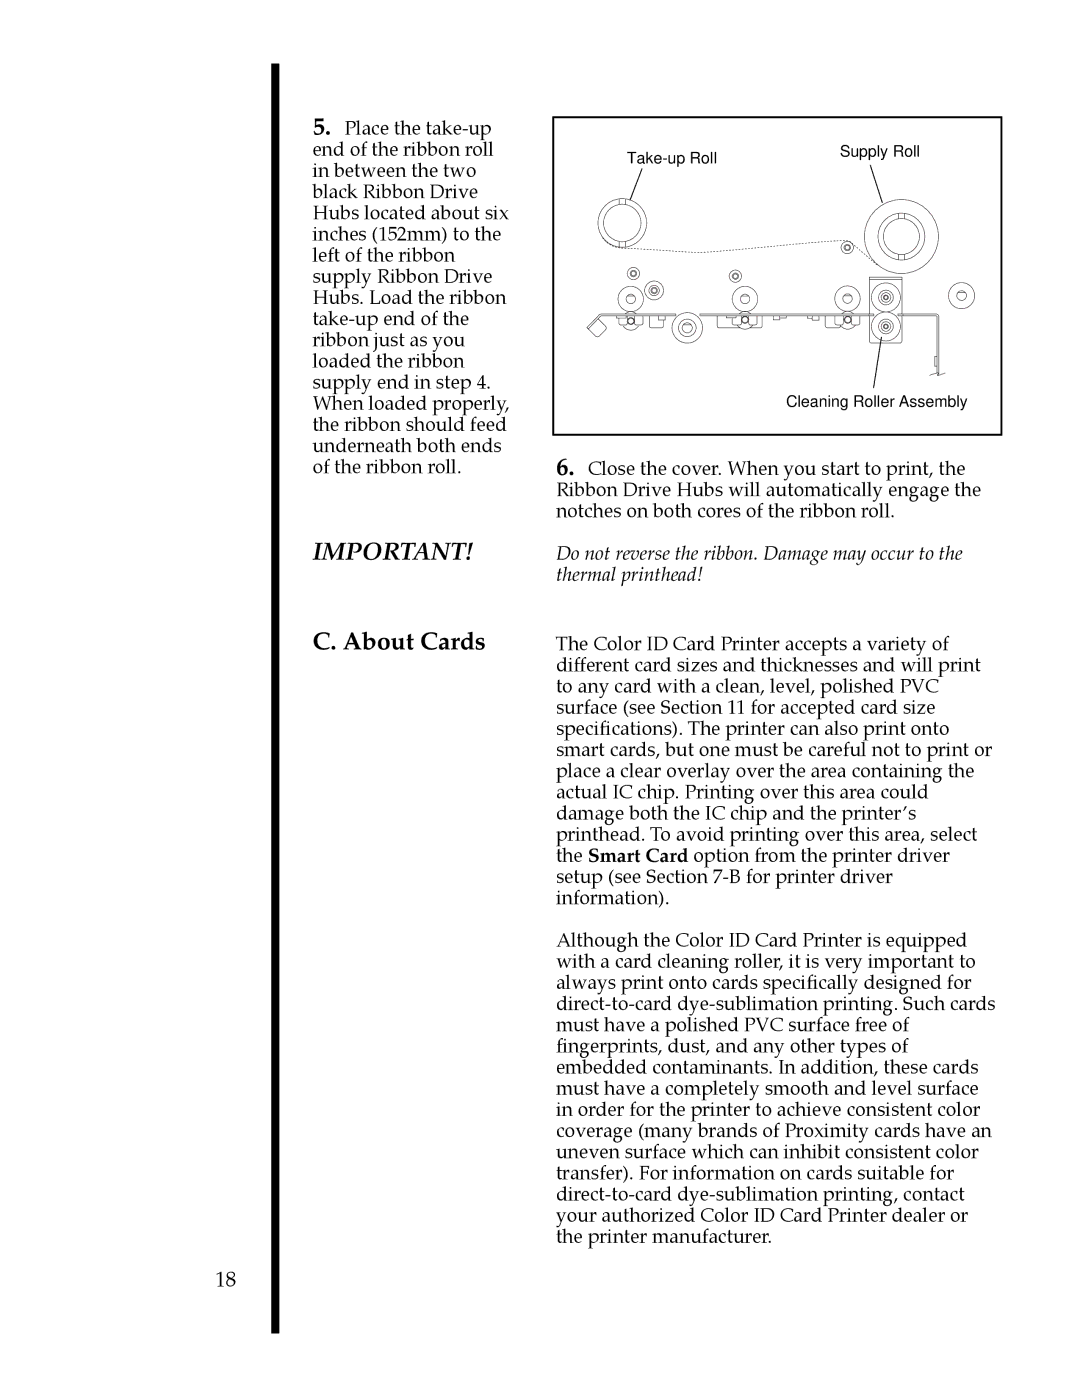
18

5.Place the take-up end of the ribbon roll in between the two black Ribbon Drive Hubs located about six inches (152mm) to the left of the ribbon supply Ribbon Drive Hubs. Load the ribbon take-up end of the ribbon just as you loaded the ribbon supply end in step 4. When loaded properly, the ribbon should feed underneath both ends of the ribbon roll.

IMPORTANT!

C. About Cards

Take-up Roll

Supply Roll


Cleaning Roller Assembly

6.Close the cover. When you start to print, the Ribbon Drive Hubs will automatically engage the notches on both cores of the ribbon roll.

Do not reverse the ribbon. Damage may occur to the thermal printhead!

The Color ID Card Printer accepts a variety of different card sizes and thicknesses and will print to any card with a clean, level, polished PVC surface (see Section 11 for accepted card size specifications). The printer can also print onto smart cards, but one must be careful not to print or place a clear overlay over the area containing the actual IC chip. Printing over this area could damage both the IC chip and the printerÕs printhead. To avoid printing over this area, select the Smart Card option from the printer driver setup (see Section 7-B for printer driver information).

Although the Color ID Card Printer is equipped with a card cleaning roller, it is very important to always print onto cards specifically designed for direct-to-card dye-sublimation printing. Such cards must have a polished PVC surface free of fingerprints, dust, and any other types of embedded contaminants. In addition, these cards must have a completely smooth and level surface in order for the printer to achieve consistent color coverage (many brands of Proximity cards have an uneven surface which can inhibit consistent color transfer). For information on cards suitable for direct-to-card dye-sublimation printing, contact your authorized Color ID Card Printer dealer or the printer manufacturer.

Page 23
Image 23
FARGO electronic II manual About Cards